- Accessibility is a Key Value and Strategic Goal at Carleton
- Configuring User Preferences for Accessibility
- System Check for Compatibility
- Accessibility in the HTML Editor
- Accessible Video Content
- Content Organization in Modules/Submodules
- Additional Resources
Accessibility is a Key Value and Strategic Goal at Carleton
Faculty and instructors have a critical role to play in creating equitable access to education for learners of all abilities. D2L Brightspace has tools to assist the design of courses to ensure WCAG/AODA standards are met on content pages created within Brightspace courses.
Accessibility also means thoughtful course design, such as effective organization of content materials, chunking information into meaningful topics, creating accessible documents, adding alt text to images, and using Universal Design for Learning (UDL) principles.
This help page outlines some of the features present in Brightspace which will help you create a more accessible and inclusive course experience for all learners.
Configuring User Preferences for Accessibility
Each user in Brightspace can customize their particular experience in Brightspace. The user experience can be customized to meet the needs of a range of users with the ability to set the interface language, to choose the default font size, and to customize the interface for use with assistive technologies.
To Access User Preferences
- Log into Brightspace with your MyCarletonOne credentials.
- Select your name in the right-top corner of the screen.
- Select Account Settings.
- Review the settings, and select the options that best fit your needs.
- When you are done, select Save and Close. User preferences will be enabled.
System Check for Compatibility
System Check scans and reports back on the browser’s compatibility with Brightspace. The system check reviews the browser’s version, settings, and configuration to confirm whether it will support all functionality of Brightspace.
NOTE: Third party tools are not part of the system check. Tools that plugin to Brightspace, such as Zoom, H5P, ARES, and Kaltura are not checked by the System Check.
To Access the System Check Report
- Log into Brightspace with your MyCarletonOne credentials.
- In the navbar, select Help to open the drop-down menu then select System Check. Your browser will be reviewed and a report will show your browser’s compatibility. If the System Check reports failures, try updating your browser or switching to a different browser to see if the problem resolves. If the problem persists, contact ITS by email: its.service.desk@carleton.ca or by phone 613-520-3700.

Accessibility in the HTML Editor
The HTML editor appears in multiple tools and content areas within a Brightspace course. The HTML editor, with its associated tools, allows for customized content pages, such as Brightspace pages with specific heading levels, customized font sizes, added images, attached files, and hyperlinks.
Content in Brightspace can be made more accessible by using the built in features within the HTML editor discussed below. The HTML text editor is present in the following areas of Brightspace courses: Announcements, Course Details, Add a description, Create a File, and tool windows (i.e. Quizzes, Assignments, Discussions, etc.).
Ensuring accessibility of your content pages in Brightspace includes:
- Adding heading levels — heading levels help the learners understand the document’s structure and how ideas fit within the logical flow of the content. Heading levels are also critical for readers who use assistive devices to help navigate and make sense of the content.
- Checking colour accessibility with Colour Selector– learners need to be able to read the course content to understand it. Checking colour accessibility means ensuring that the foreground font colours and the background page colour are of high enough contrast to be read easily by all learners.
- Checking accessibility and spelling — As you setup your page, check that the page contains no accessibility errors. The Check Accessibility functional allows content developers to scan their pages for accessibility issues that need to be resolved. Some examples of accessibility errors are missing alt text for images, low colour contrast, and missing heading levels. Spelling errors and typos can confuse your readers and interfere with their ability to understand your message. Use the Check Spelling feature in Brightspace to scan your text for errors.
- Adding alternative text to images/pictures– Images should have alternative text to identify their purpose and meaning to make visual content available to all learners in the course.
Adding Heading Levels in the HTML Editor
Heading levels help organize your document in a hierarchical structure so that students can understand the logical relationship of information. Heading levels allow for skim reading and important meaning making, as headings often indicate the most important ideas. Within a content page, the title of the document should be Heading Level 1 (H1), and the sub-sequent sub-titles should follow logically heading level 2, 3, 4, (H2, H3, H4, etc.). All parts of a document should have assigned heading tags so that it can be read properly by a screen reader.
The HTML text editor allows instructors to set heading tags to content pages in a course. The text editor is present in the following areas of Brightspace courses: Announcements, Course Details, Add a description, Create a File, and tool windows (i.e. Quizzes, Assignments, Discussions, etc.).
To Add a Heading Level to Content in the HTML Editor
- Go to the HTML editing widow for the text area you want to edit or add in your course.
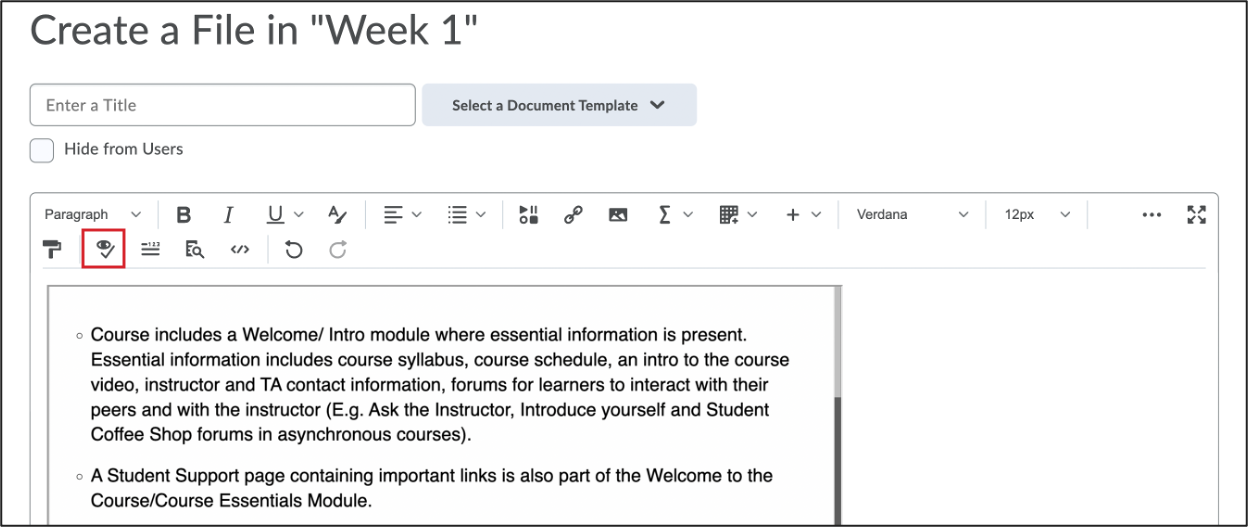
- From the HTML editor, select the downward arrow (Format) to open the drop-down menu (See the screen shot below for a visual of this area) and select appropriate heading level for your content.
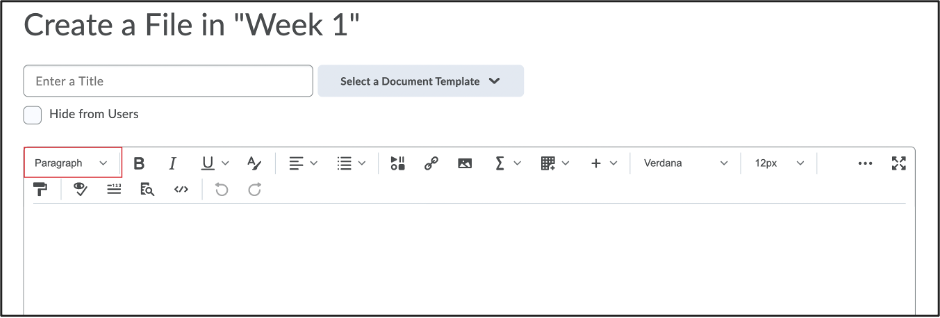
TIP: For a document title, choose H1; for a subheading use H2, H3, or H4 depending on the logical flow of the document; for body text use Paragraph. If you have any questions about document accessibility, please feel free to create a support request using the TLS Support Portal.
- Select Update or Save when you are done editing your text.
Checking Colour Accessibility
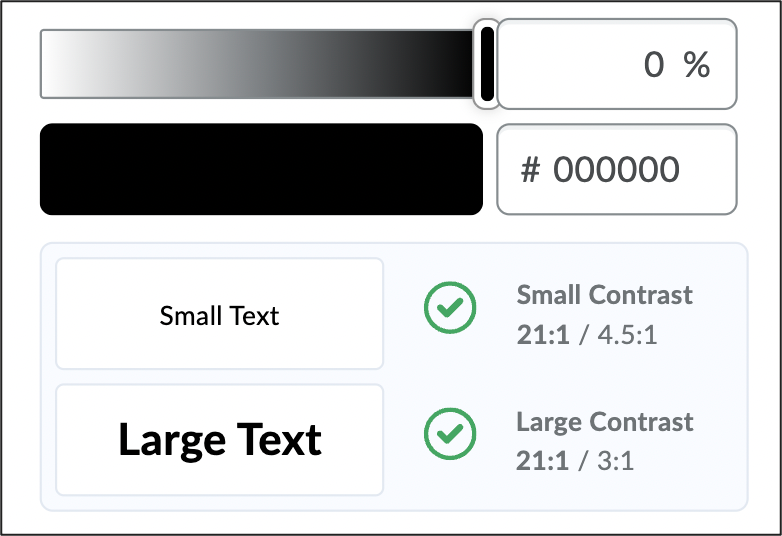
For text to be readable for anyone in a course, the font colours must have sufficient contrast ratio with the background colour. If the font colour and background colour have too low contrast ratio, the text will be difficult to read. Contrast ratios should not be assessed by the naked eye, as different readers have varying contrast capabilities. To check the contrast of your foreground and background text, use the colour selector in the Brightspace HTML editor.
The HTML editor is present in the following areas of Brightspace courses: Announcements, Course Details, Add a description, Create a File, and tool windows (i.e., Quizzes, Assignments, Discussions, etc.).
To Check Colour Contrast in Content in the HTML Editor
- Start within the HTML editing widow for the text area you want to edit or add in your course.
- From the HTML Editor, select the Select Colour icon

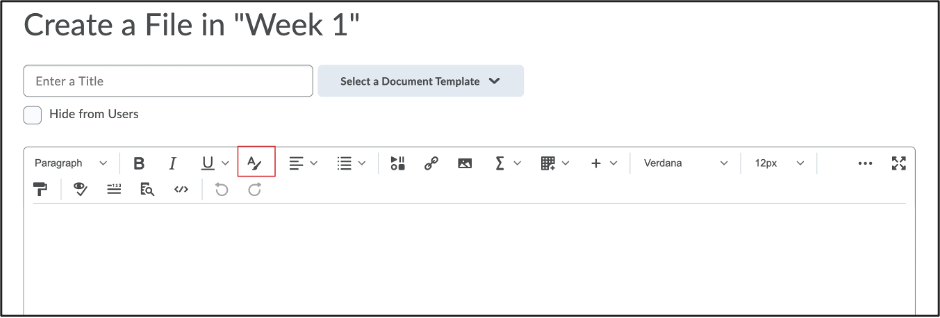
- In the Select a Color pop-up window, select the colour you would like to use for the font (foreground colour).
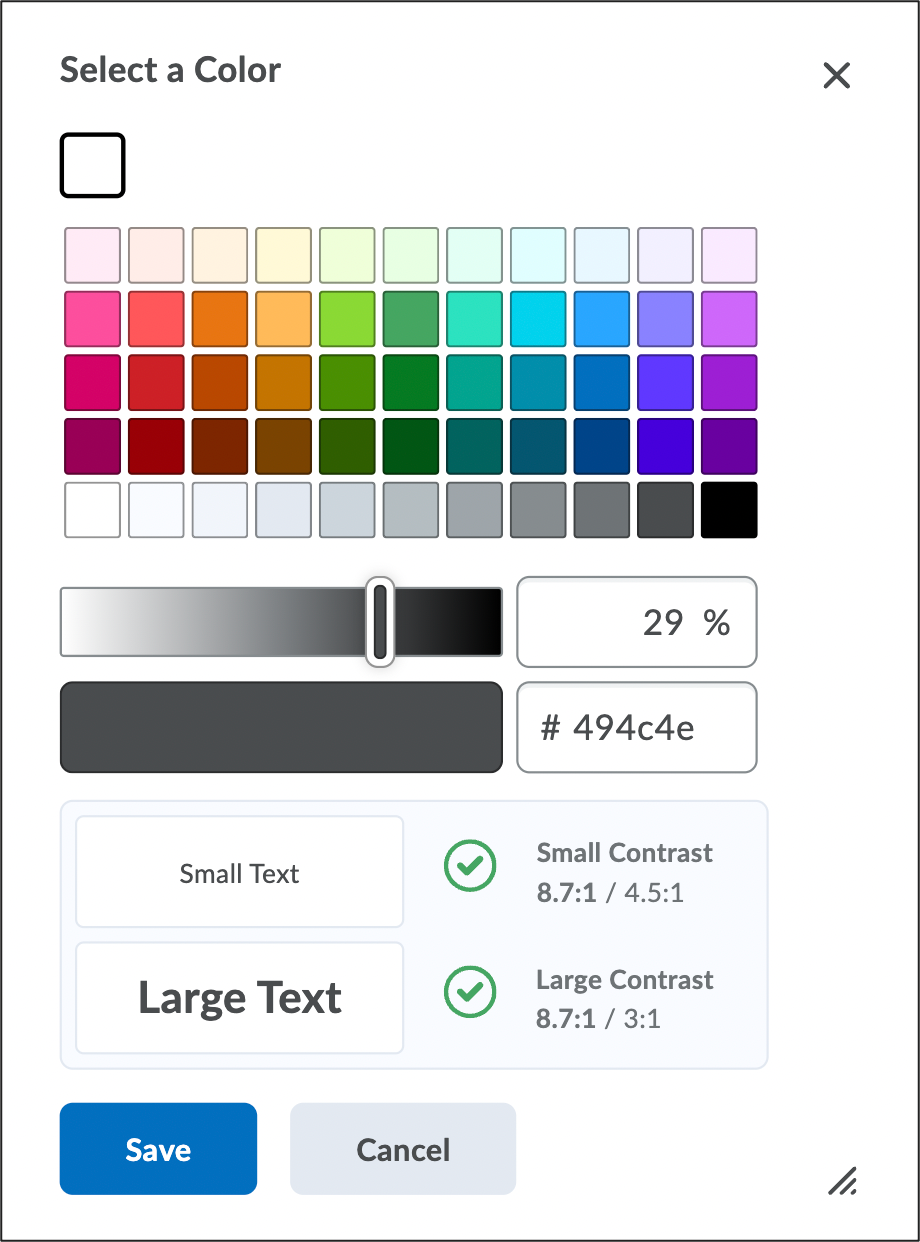
NOTE:The WCAG rating will change based on your colour selection.
-
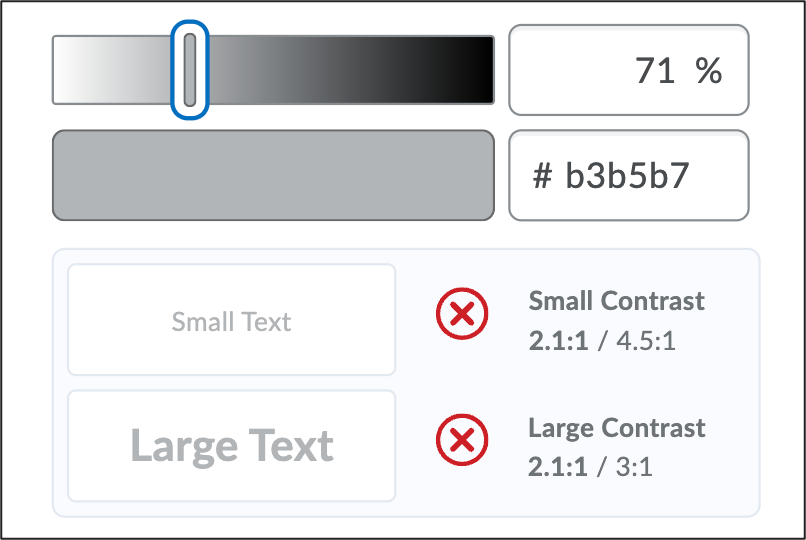
- If the WCAG rating has a red X next to it, the colour does not have sufficient contrast with the background colour and is not accessible. Choose another colour for the foreground colour.
- If the WCAG rating has a green check mark next to it, the colour meets accessibility requirements for sufficient contrast. You can use the colour you have selected because it is accessible.
- If the WCAG rating has a red X next to it, the colour does not have sufficient contrast with the background colour and is not accessible. Choose another colour for the foreground colour.
Checking Accessibility and Spelling
After adding course content, use the Check Accessibility and Check Spelling functions in Brightspace to scan the text in the HTML editor for accessibility errors. Check Accessibility in Brightspace can identify accessibility issues that you may have missed, so that they can be resolved quickly. Common accessibility errors that may be flagged, include low colour contrast, missing alternative text for images, and incorrect or missing heading levels. Check Spelling can identify typos or misspelled words in your text.
To Run the Accessibility Checker and Spell Checker
- After you have added content, such as text and images, to the HTML editor, select the Check Accessibility icon
 . See below for a visual of this button.
-
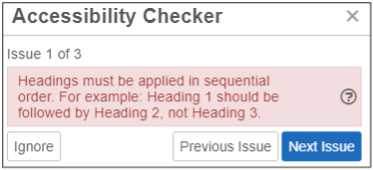
- If accessibility errors are present on the page, the accessibility checker will display a message in red to warn of the errors (see the visual below for an example of an error message). Select the question make next to the warning message, to see more information about the error and to assist with resolving the error.
- If accessibility errors are present on the page, the accessibility checker will display a message in red to warn of the errors (see the visual below for an example of an error message). Select the question make next to the warning message, to see more information about the error and to assist with resolving the error.
-
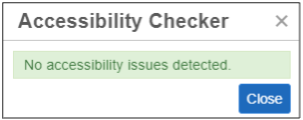
- Once there are no accessibility errors, the Accessibility Checker will display a green message to confirm. See below for a visual of the Accessibility Checker with no accessibility error messages.
- Once there are no accessibility errors, the Accessibility Checker will display a green message to confirm. See below for a visual of the Accessibility Checker with no accessibility error messages.
3. Select Update or Save to finalize your changes.
Adding Alternative Text to Images
The alternative text is a short description of what an image contains or represents. All images added to HTML text areas need to have alternative text descriptions. When images add meaning to the content, that meaning should be explained for all learners. When an image is purely for decoration, the image can be marked decorative so that an assistive device does not read the image. Whenever you insert an image in the course, you will be prompted to add alternative text descriptions.
To Insert an Image With an Alternative Text Description
- From the HTML editor, select the Insert Image icon

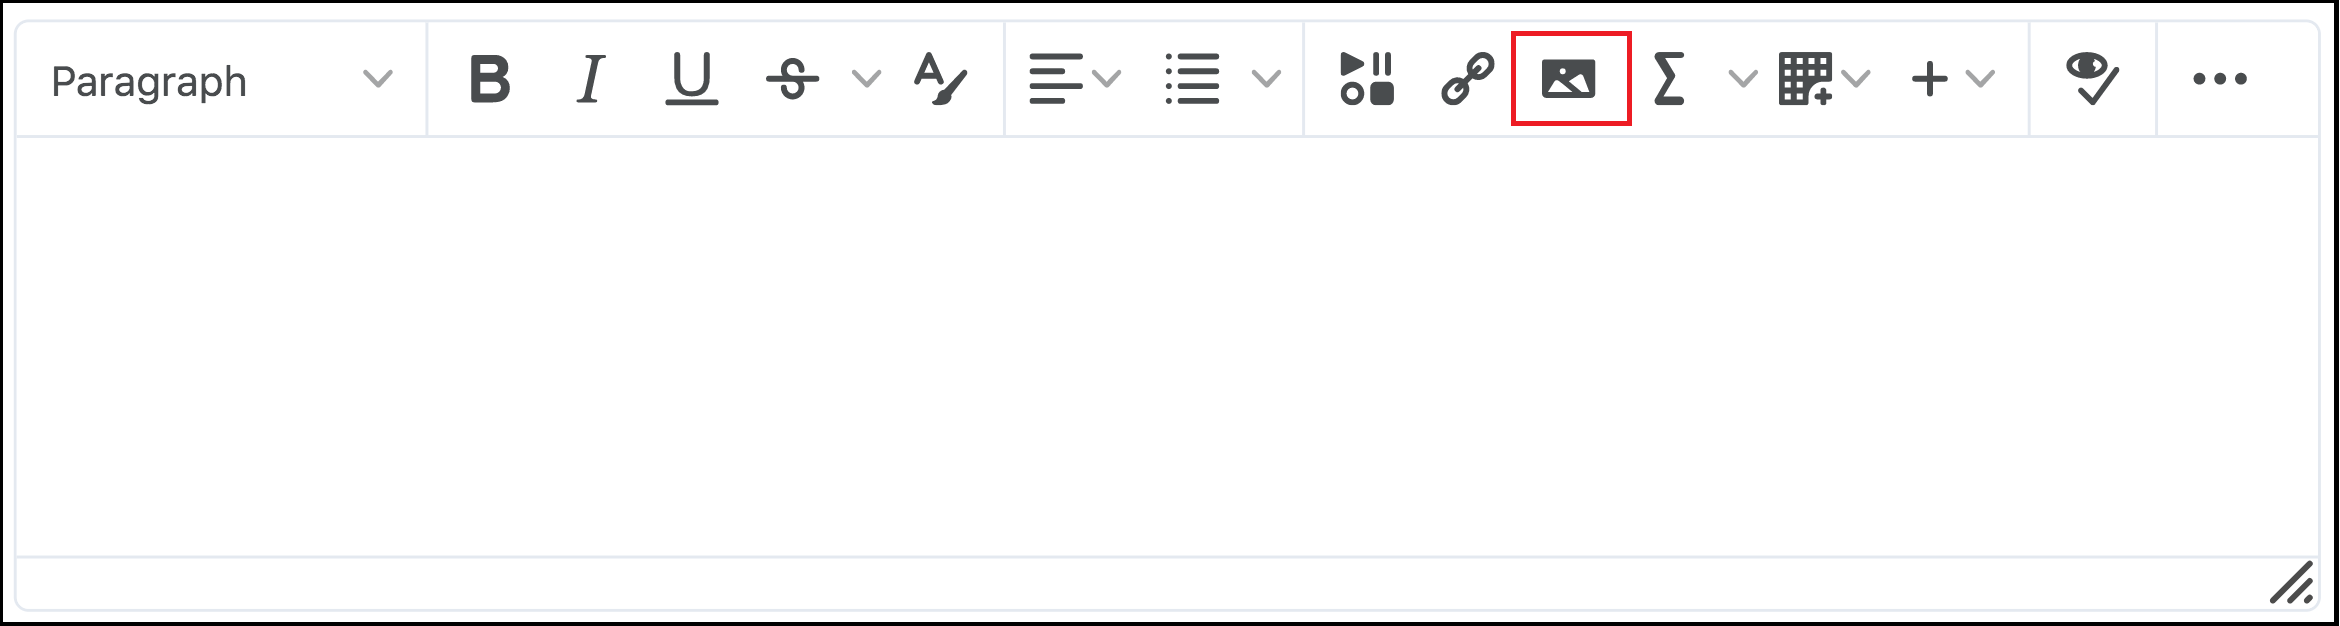
- Select Upload to select the image you wish to add.
- When the upload is complete, select Add.
- Within the Provide Alternative Text window, add the alternative text description to capture both the content and meaning of the image, or check the box to label it as decorative if the image content is purely aesthetic.
- Select OK to add the image to the page.
- Select Update or Save and Close to save your work.
Accessible Video Content
Upload videos to Kaltura Mediaspace for added accessibility features in Brightspace. Using Carleton’s mediaserver (Mediaspace) ensures that videos load more smoothly for students and voids bogging down the course load time. Kaltura also has an accessible video player which enables students to have some control over their viewing experience. The accessibility features include: playback control, automated captions (or English official when present), the ability to customize captions, and the ability to watch videos at full screen.
Mediaspace also allows the downloading of the video transcripts which can be embedded in Brightspace and made available for learners.
Note: Video titles may need to be changed after embedding them in Brightspace. The video title will be brought from Kaltura Mediaspace with the name given to it when it was recorded. To ensure the video title is accessible and meaningful to students, update the video title as needed. Refer to Adding Kaltura videos to Brightspace documentation for instructions.
Remember to keep videos short to make video content more easily accessible to students with low bandwidth and low internet speed.
Content Organization in Modules/Submodules
Use modules and sub-modules to organize content into meaningful chunks/topics of information. Logical organization enables easy navigation of your Brightspace course page for the learners. Content can be organized into weekly sections, units, or modules. Consider adding dates to each of the modules to flag to students when the materials contained in that section will be made available to them.
Create a helpful video overview of how to navigate the Brightspace course page and where to find key content. A short tutorial will make sure your students know exactly where to find what they need for success.
Additional Resources
- CAST: The UDL (Universal Design for Learning) Guidelines
- Carleton Accessibility Resources for Instructors
- Microsoft: Make Your Word Documents Accessible
- Video: What is Accessibility?
- Niagara College Accessibility Hub – The Accessibility Hub provides supports and resources that help reduce barriers and create more accessible teaching and learning experiences, including articles, checklists, and videos.
Was this page helpful?
8 people found this useful
Still need help? Contact us