- Logging in to cuLearn and Accessing Past Courses
- Making cuLearn Courses Visible or Hiding a Course from Students
- Exporting Grades in a cuLearn Course
- Downloading cuLearn Assignments
- Downloading Course Files
- Backing up cuLearn Course Content
- Enrolling Users and Assigning Roles in cuLearn
- Exporting H5P Content
Brightspace by D2L has replaced cuLearn as Carleton’s learning management system, effective May 2021. All courses at Carleton will now be hosted on Brightspace learning management system.
This support page has been created to help instructors find instructions and cuLearn support documents to assist with retrieving content or documents from past cuLearn courses. If you have questions or need any assistance with retrieving content from cuLearn courses, contact Teaching and Learning Services via the TLS Support Portal.
Access to cuLearn will be available to instructors until July 2024 via the direct cuLearn login portal using MyCarleton One credentials. Thereafter, cuLearn content will be archived and available by request only. All cuLearn course content from the past 5 years has been migrated to Brightspace and is available within the new LMS.
Student access to the cuLearn portal will be available for a one year period via the direct cuLearn login portal. As always, course access, whether in cuLearn or Brightspace, is at the discretion of the instructor.
Logging in to cuLearn and Accessing Past Courses
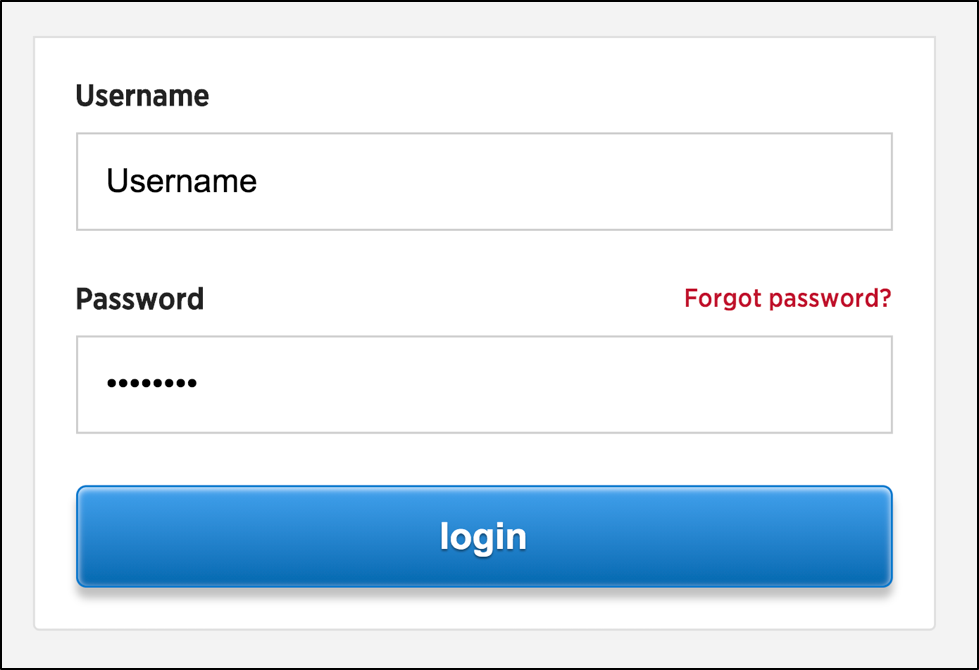
To log in to cuLearn:
- Go to carleton.ca/culearn.
- Enter your MyCarletonOne username and password.
- Click login.
NOTE: If you are no longer able to login to cuLearn, but had previous access, please contact Information Technology Services (ITS) at 613-520-3700 or by emailing its.service.desk@carleton.ca. Only users who had active roles in courses in cuLearn will have access to the archived courses.
After logging in to cuLearn, you will see links to all the previous courses you had access to in cuLearn. Your courses are categorized by semester/term. Each course category can be collapsed or expanded by clicking on the course category title. To enter a course, click on the course title.
Making cuLearn Courses Visible or Hiding a Course from Students
Courses must be made visible for students and TAs for them to see the course content. Only students and TAs who were previously enrolled in the course will have access to a visible course.
cuLearn courses can be hidden to prevent student/TA access to past content.
To Make Your Course Visible:
- Log in to cuLearn using your MyCarletonOne credentials.
- Click on your course link.
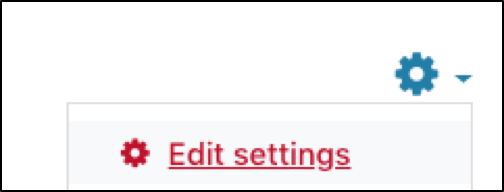
- Click on the Settings Gear on the right side of the course page.
- In the drop-down menu, select Edit Settings.
- Under General > Course visibility, select Show from the drop-down menu to make your course visible. (See the screen image below for a visual of this menu).

- Click Save and display. Your course will now be visible to students and will appear as a blue link on your cuLearn dashboard (see example below).
![]()
Hiding the Course from Students
If you wish to prevent students or TAs from unmonitored access to previous courses, you can hide the course. Hidden courses are not visible to students and users with a Teaching Assistant role.
Using the same method indicated to make a course visible, simply change the Visible setting from Show to Hide in Step 5. Remember to save your changes. Course materials will still be accessible to you, but students and TAs will no longer have access to the course.

Exporting Grades in a cuLearn Course
Gradebook feedback can be exported from cuLearn to create a backup or to submit to E-grades. Remember that all grades, feedback and assessment information is subject to Privacy and Confidentiality legislation. Any files that you download should be deleted after use to maintain data privacy requirements.
To export grades:
- Log in to cuLearn using your MyCarletonOne credentials.
- Click on your course link.
- In the left navigation menu, click Grades
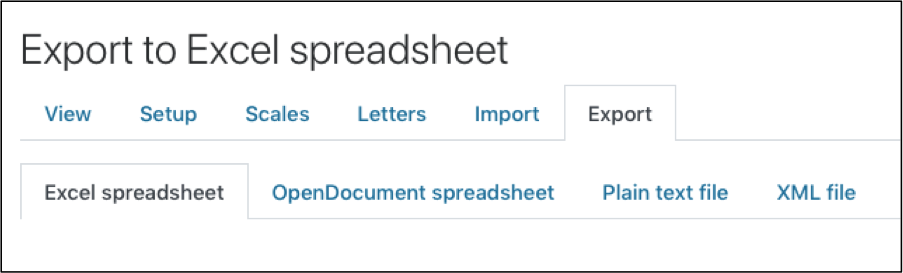
- Click the Export tab.
- Choose either Excel spreadsheet or Plain Text File from the four options below the Export tab. See the screen shot of the Export to Excel Spreadsheet window and the Export tab.
- Click on the desired file type for the export file under Export format options menu.
- Select the grade items you want to export from the Grade items to be included menu.
- If you are exporting the gradebook for E-grades submission, uncheck all grade items except for the Course total
- Click Export Format Options to expand the menu
- Beside Grade export display types, check the box beside Letter
- Click Download. Depending on the browser used, the new file will either be opened, downloaded to your Downloads folder, or the browser will ask what to do with the exported file.
Downloading cuLearn Assignments
Student submissions can be downloaded for review or storage. For example, student assignments may be to review when writing reference letters or when completing program assessments.
To download an assignment submission file:
- Log in to cuLearn using your MyCarletonOne credentials.
- Click on your course link.
- Click on the Assignment.
- At the bottom of the page click View all submissions.
- To download all student assignments, select Download all submissions from the “Grading Action” drop-down menu at the top left of the page.
- When you select “Download all submissions“, all student files will be placed in a .zip folder.
NOTE: If you’re working on a Mac, the .zip folder will automatically unzip.
If you’re working on a PC, you will need to manually unzip the downloaded folder: Once the folder downloads, open the folder by clicking on it. At the top, you will see Extract all files. - Click on “Extract all files” to unzip the folder. Student submissions are now available individually within folders named after each student in the class.
Downloading Course Files
Instructors can download all files they have uploaded to a cuLearn course using the Download Instructor Files feature. The download will contain files uploaded to cuLearn Activities (Assignments, Quizzes, Forums, etc.) and Resources (Files, Folders, Pages, etc.), as well as files that are embedded into activities, such as assignment descriptions or quiz questions. Students submissions are not included in the downloaded files. To save student submissions, you will need to Backup your course.
| NOTE: Only users enrolled as an Teacher or Designer in a cuLearn course will be able to download files. |
To download course files:
- Log in to cuLearn using your MyCarletonOne credentials.
- Click on your course link.
- Click on the blue settings gear on the right side of your course page.
- In the drop-down menu, select Download instructor files.
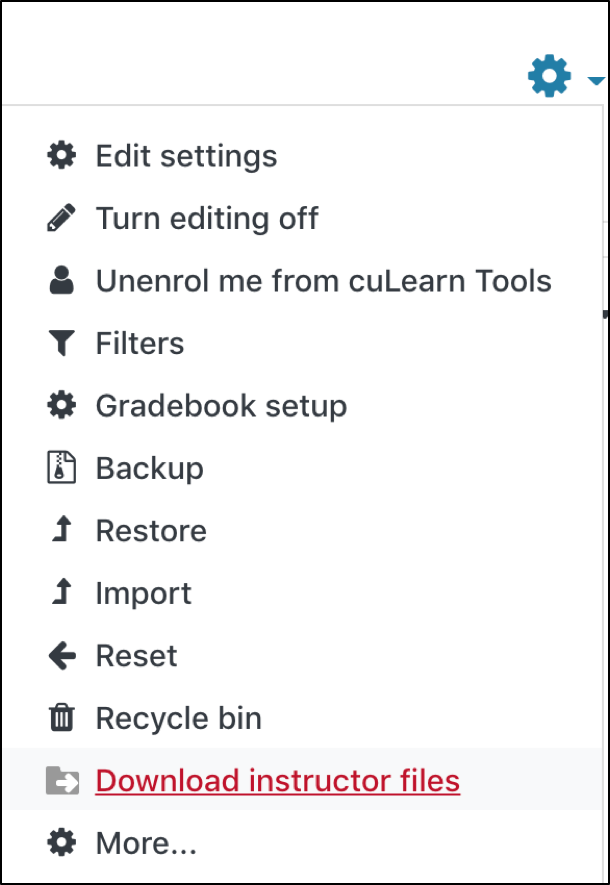
- cuLearn will automatically begin downloading a .zip file to your computer with your course name. Click on the downloaded .zip file to access a folder containing your files (documents, images, videos, etc.).
Backing up cuLearn Course Content
Instructors can backup cuLearn course content and download a copy of the backup file. Once you have downloaded the backup file, you can import cuLearn content into Brightspace.
| NOTE: More than 5 years of course content has been migrated from cuLearn into Brightspace. Generally, you will not have to backup your course and import it into Brightspace. Backing up a course in cuLearn may be used to extract H5P activities or unusual file types that did not import during the Brightspace migration. |
To back up course content:
- Log in to cuLearn using your MyCarletonOne credentials.
- Click on your course link.
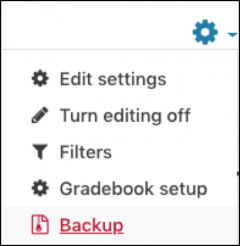
- Click on the Settings Gear on the right side of the course page.
- In the drop-down menu, select Backup.
- Under Backup settings, click the checkboxes to select or de-select the course content you want to backup.
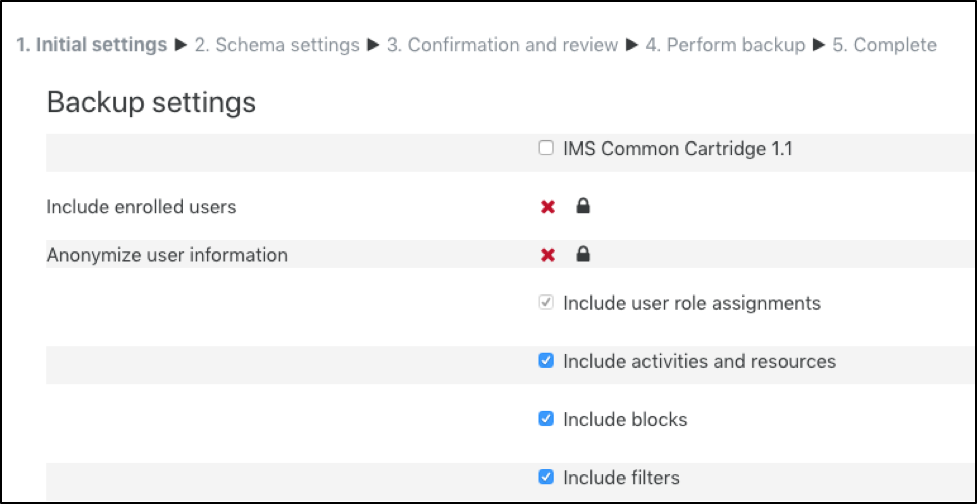
- Click Next.
- Select the Resources and Activities to include in the backup file from each topic section in the course.
NOTE: If you want to backup user data for your course, select the User data checkbox next to a topic section or resource/activity. Remember that user data is private and confidential. User data should not be stored on personal computers for extended periods of time. Files with confidential student data should be deleted after use. 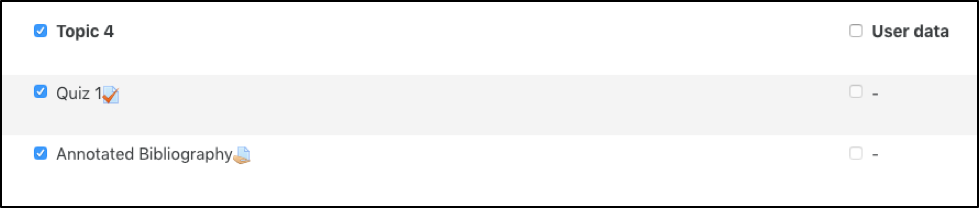
- Click Next.
- Under Filename, enter a file name for the backup, or keep the name automatically generated for your file.
- Under Backup Settings and Included items, review the settings for your backup and the list of course content to be included in your file.
- Once you have finished reviewing your Backup settings, click Perform Backup. When your file has finished loading, you will see the message “The backup file was successfully created”.
- To view or manage your backup files, click continue.
- The backup file will be stored on the system and can be downloaded for use. To download the backup file click the Download link next to the backup that was created.
To download a copy of the backup file:
- Go into your cuLearn course.
- Click on the Settings Gear on the right side of your main course page.
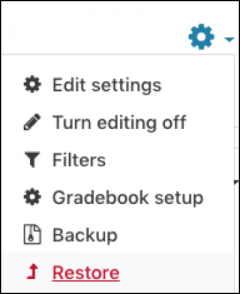
- In the drop-down menu, select Restore.
- Locate the backup file in the User private backup area section of the page.
- Click the Download link to the right of the backup file you want to download.
Enrolling Users and Assigning Roles in cuLearn
Instructors may wish to grant access to their previous course content for program review purposes or content sharing. Users can be added to cuLearn courses via the Participant list.
To add a user:
- Log in to cuLearn using your MyCarletonOne credentials.
- Click on your course link.
- In the navigation menu on the left side of your course page, click Participants.

NOTE: If you cannot see the navigation menu, you may need to expand it first. To open the navigation menu, click on the hamburger button on the top-left side of your course page. 
TIP: Ensure your TA is not in the Participants list. If the TA already appears in the course, you will not be able to add them again as that person already has access to the course page. - Click Enrol Users to open the Enrol Users pop-up window (See the image below).
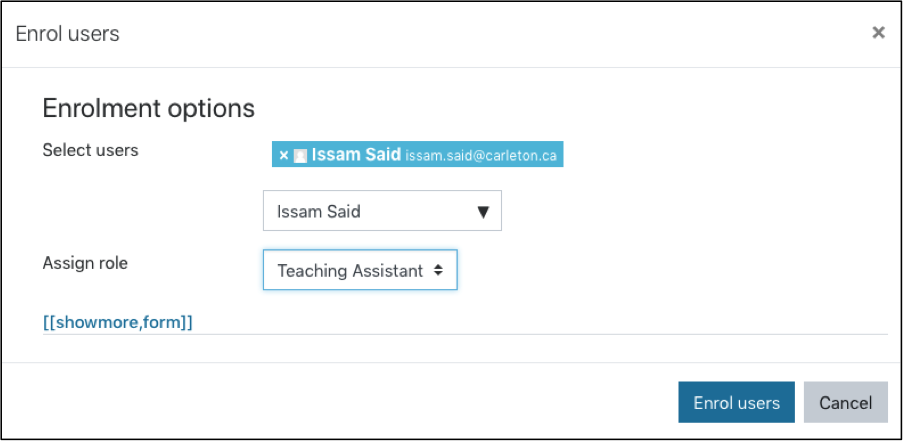
NOTE: While you will still be able to access cuLearn content and information, no new users or courses will be added to cuLearn past May 2021. All courses at Carleton for Summer 2021 and beyond will be hosted in Brightspace by D2L. - In the Enrol Users pop-up window: type the name of the user in the search field under Select Users.
NOTE: A user search may take 10-15 seconds to complete and the message “No suggestions” or “Too many users to show” may appear in the meantime. Continue waiting to see if the user will appear before abandoning your search. - Click on the user’s email address to select them.
NOTE: It is important to verify your TA by their email address as there may be multiple users with the same name. You will know when a user has been selected when the name and email appear next to Select Users (See Image above). - In the drop-down menu under Assign Role, select the role type you would like to assign to the user.
- Click Enrol Users to finalize the enrolment. The user should now appear with a role assignment and should have access to the cuLearn course page.
Assigning Multiple Roles to a User
You have the option to assign a user multiple roles in your cuLearn course. For example, a Teaching Assistant can also be assigned the role of a Designer. Users with multiple roles will have the privileges of all assigned role types.
To assign an additional role:
- Login to your course page.
- In the navigation menu, click Participants.
- Find the name of the user that you want to assign a role to in the participants list.
- Under the Roles column, click the pencil icon beside the user’s role.
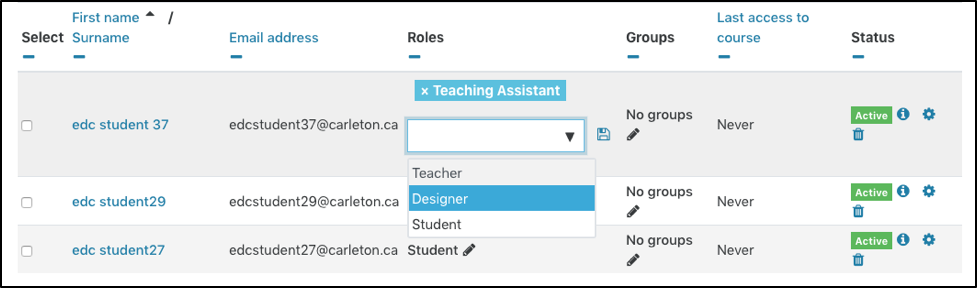
- Select a role from the drop-down menu. Once selected, the role should appear in blue under the role column.
- Click the Save changes icon (floppy disk) to save the new role you have assigned.
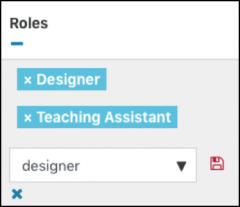
- The assigned role should now appear next to the user’s name under Roles.

Exporting H5P Content
- Log in to cuLearn using your MyCarletonOne credentials.
- Locate the H5P content you want to export and click Edit.

- In the drop-down menu, select Edit Settings.
- Scroll to Display Options
- Click both Display action bar and frame and Allow download.

- Click Save and display.
- Click Reuse below the H5P content. You will see a pop-up window labeled Reuse Content.
- Click Download as an .h5p file.
- Save the file to your computer.
|
|
Teaching and Learning Services Contact*** Office Hours: Monday to Friday, 8:30-4:30 ***
|

Was this page helpful?
1 Person found this useful
Still need help? Contact us