- Account Provisioning
- EON-XR System Requirements
- Understanding EON-XR Engagements and Activities
- Guidance for Using EON-XR Activities
- Before Using EON-XR
- Activating your EON-XR Account
- Downloading the EON-XR App
- To Log into EON-XR
- Resetting Your EON-XR Password
- Importing Assets to EON-XR
- To Create an Xperience in EON-XR
- Tagging Xperiences in EON-XR
- To Edit an Existing Xperience
- To Add an Xperience to Your Course
- Sharing an EON Xperience
- Additional Help
An EON Xperience is an immersive and interactive project created through EON-XR that produces virtual or augmented reality environments. Users can engage with these immersive learning activities across a variety of platforms. After creating an EON-XR Xperience, instructors can add their Xperience to a Brightspace course.
For information on how to log into EON-XR, refer to the following instruction set: To Log into EON-XR.
Account Provisioning
All instructors and students at Carleton can be provisioned EON-XR account. Once a user has an account, there are three license types available for use:
- EON Basic for viewing and interacting with EON Xperiences
- EON Merged for creating and interacting with Xperiences and
- EON Spatial Meetings for shared learning environments
In order to embed EON-XR activities into your Brightspace course, you will need to submit a request for the tool to be added. For a consultation regarding use of EON-XR in your course, submit a course consultation request form.
Instructors
Instructors can submit a request for an EON-XR account or submit any EON licensing inquiries to the Teaching and Learning Services Jira Support Portal.
Students
To assign a basic EON-XR license to a student, add an EON-XR lesson to your course and instruct students to select the EON-XR lesson in Brightspace. When a student selects the lesson, that student gets logged into EON-XR and auto-assigned a license. This basic license allows students to both view and interact with the assigned Xperience or any other public Xperiences.
To provide access to EON Spatial Meetings or an EON Merged license for students, submit a request through the Teaching and Learning Services Jira Support Portal.
EON-XR System Requirements
EON-XR can be run on both desktop and mobile devices. In this section, you can find the minimum system requirements for both ways of running EON-XR. For more details about the recommended system requirements instead, you can consult EON-XR’s Supported Platforms and Devices support page.
Desktop
For detailed information about the minimum system requirements for running the EON-XR desktop app, refer to the following table:
| Operating System | Windows | macOS |
| Version | Windows 10 or higher. | 10.15 (catalina) or higher. |
| CPU | x86, x64 architecture with SSE2 instruction set support. | x64 architecture with SSE2. |
| Graphics API | DX10, DX11, DX12 capable. | Metal capable Intel and AMD GPUs. |
| Additional Requirements | Officially supported drivers from your hardware’s vendor. | Official, Apple supported drivers. |
This table was taken from EON Reality’s Supported Platforms and Devices page.
Mobile
iOS devices require an iOS 10 operating system with 2GB of memory or higher to run EON-XR. Apple devices that meet these system requirements include iPhone 7 or iPad Air 2 or higher.
Android devices require an Android 5 operating system, 5 GB of RAM, and 32 GB of storage or higher.
For more detailed information about minimum system requirements for running the EON-XR mobile app, refer to the following table:
| Operating System | Android | iOS |
| Version | Android 7.0 or higher. | iOS 12 or higher. |
| CPU | ARMv7 with Neon Support (32-bit) or ARM64. | A7 SoC+ (64 bit processor). |
| Graphics API | OpenGL ES 2.0+, OpenGL ES 3.0+, Vulkan. | Metal. |
| Additional Requirements | 4GB+ RAM.
Support AR Core. |
Support AR Kit.
iOS Device with 2GB of memory or higher (iPhone 6S and iPad Air 2 or higher). |
This table was taken from EON Reality’s Supported Platforms and Devices page.
Understanding EON-XR Engagements and Activities
EON-XR can be used for a few different types of engagements within a course:
- XR activities: instructors can create XR engagements in EON-XR and then embed those activities into Brightspace via the “Existing Activities” button in a course module. Students can select the lesson in their course to explore and participate in the lesson.
- XR assignments in Brightspace: when students are provisioned the appropriate account, students can create experiences in EON-XR, generate a URL link and share that link in a Brightspace text-based assignment for grading.
- EON-XR assignment tab: within the EON-XR platform, users will see an Assignments tab. While assignments can be created and shared within the tab, it is not recommended to do so. XR assignments should be submitted into Brightspace for easy review and assessment.
Guidance for Using EON-XR Activities
As you plan your Extended Reality activities, consider the following guidance:
EON-XR is best used for content engagement and formative assessment: Because extended reality (XR) can be inaccessible to some users, EON-XR assignments should only be used as ungraded, formative assessments. Consider adding an alternative assignment or making XR activities one of several options for students.
EON activities are accessed through Brightspace and completed in EON-XR: Instructors can add EON-XR into Brightspace course modules using the “Add Existing Activities”. Students can access EON-XR activities through the course module link. This course LTI link will take students directly to the lesson on the EON platform.
| NOTE: Students will need to download the EON-XR app and login to their account. Once in EON-XR, students can complete the activities created by the instructor. |
Graded activities require 100% completion to see any grade in the Brightspace gradebook: Students are required to complete every task in an EON-XR lesson and receive a checkmark for each task, for the grades to flow to the Brightspace gradebook. If any task in the lesson is not completed to the point of receiving a checkmark, the assignment will be marked as incomplete by EON-XR and the student will have a zero in the Brightspace gradebook.
Before Using EON-XR
Before using the EON-XR platform, you need to do two things:
Activating your EON-XR Account
You should have received an invitation from Carleton’s EON-XR platform. The invitation was sent either to your cmail.carleton.ca or cunet.carleton.ca inbox from the EON-XR email address do.not.reply@eon-xr.com (refer to image below).

If you do not find this email in your inbox, check your spam or junk folder. If you still do not see this invitation from EON-XR, then reach out to Teaching and Learning Services via the TLS Jira Support Portal.
Once you have activated your account, log into the EON-XR platform.
Downloading the EON-XR App
The EON-XR app is available for both desktop and mobile devices. This section covers the steps you need to follow in order to download the EON-XR app on your device.
If you have trouble downloading the EON-XR app and need assistance, you can submit a support request via the Teaching and Learning Services support portal.
To Download the EON-XR App on Desktop
- Go to the EON-XR landing page.
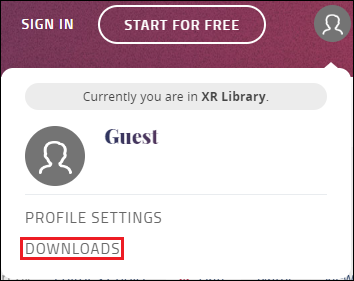
- Select the profile icon in the top right of the page.

- Select the Downloads option from the pulldown menu. This will cause a downloads pop-up window to appear.
- Select the type of device you are using from the list of options in the pop-up window. This will take you to the download web portal.
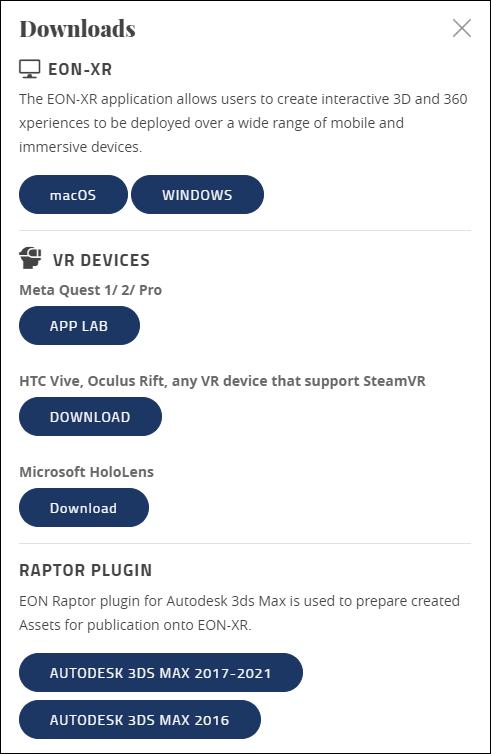
- Select the Download EON-XR button. This will cause a Save As window to pop up.
- Select Save.
From here, you can follow the instructions on the macOS web portal or the Windows web portal, depending on your device.
To Download the EON-XR App on Mobile
The EON-XR mobile app can be downloaded either through the Apple App Store or through the Google Play Store.
To Log into EON-XR
- Go to the EON-XR login page.
- Enter your Carleton (cunet) email address into the Email field.
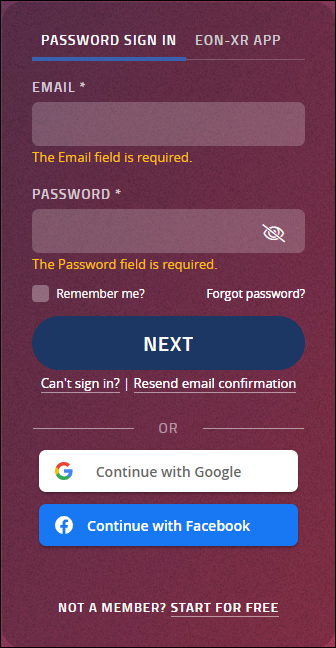
WARNING: Users should only make accounts with @cmail.carleton.ca or @cunet.carleton.ca email addresses. Other email addresses (even @carleton.ca) will not work with Brightspace. Please only use cmail or cunet email addresses when creating an EON account. - Enter your EON Reality password into the Password field.
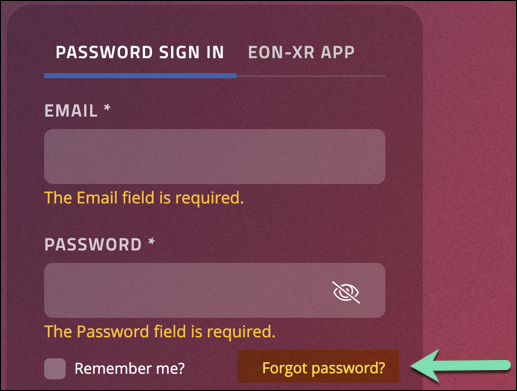
TIP: If you don’t remember your password, you can always select the Forgot password? button, located below the password field. For more information, refer to our instructions on Resetting Your EON-XR Password. - Select the Next button.
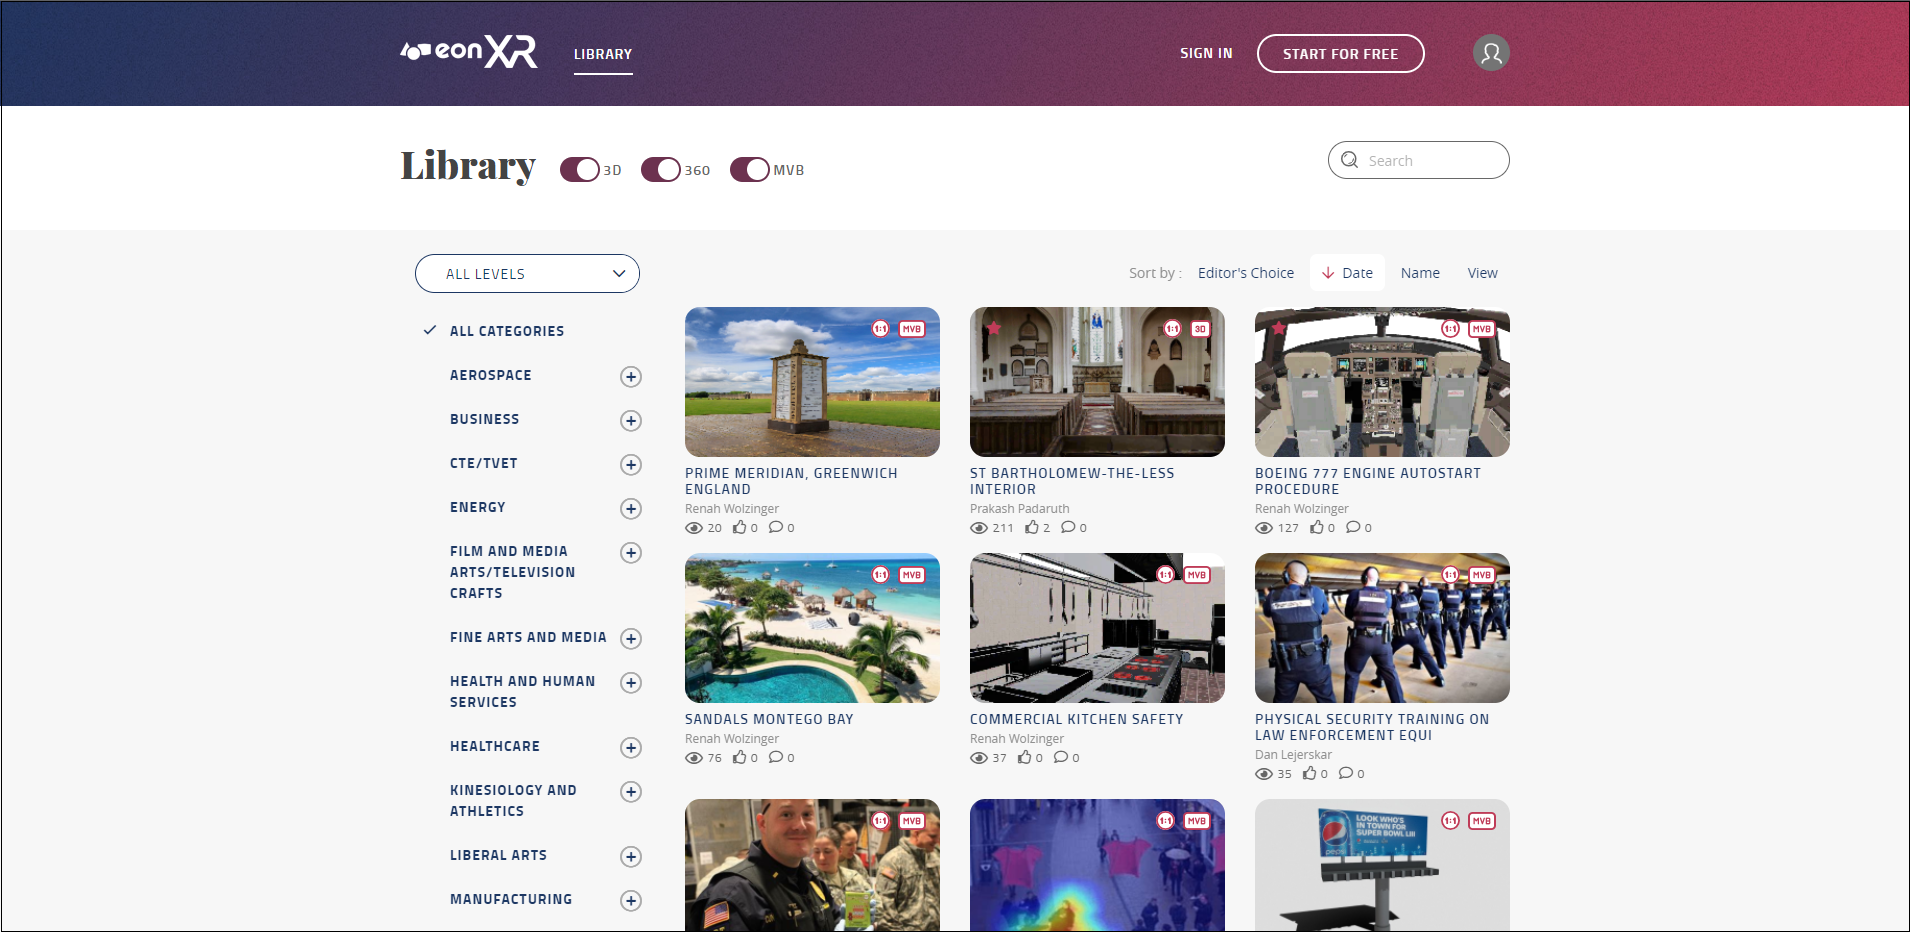
You will now return to the EON-XR landing page as a Carleton user.
TIP: You can confirm you are logged in by the “Carleton University Education” title located below your user icon in the page header (refer to image below).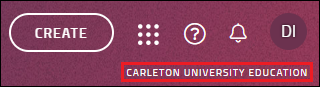 |
Resetting Your EON-XR Password
If you don’t remember your EON-XR password, you can always reset it by selecting the Forgot password button.
- Select the Forgot password button. This button will open a new page in your browser, prompting you to reset the password for your Carleton EON-XR account.
- Enter your @cunet.carelton.ca or @cmail.carleton.ca email address and the EON-XR server will send an email to you to reset your password. This email will be from the email address do.not.reply@eon-xr.com.
- Once you receive the email from do.not.reply@eon-xr.com, select the Reset Password button in the email to reset your password.
NOTE: If you do not receive a password reset email after a short amount of time, check your junk or spam folder.
Importing Assets to EON-XR
Before building an Xperience in EON-XR, you may want to import a particular asset for your lesson. This could be an asset you’ve created or one you’ve bought through a website like Sketchfab. There are currently two types of assets that can get imported to EON-XR:
- 3D assets
- 360 assets
3D assets are digital models of objects or characters that can be imported into an EON Xperience to create immersive augmented reality (AR) or virtual reality (VR) projects in EON-XR. 3D Assets are the basis of most EON Xperiences, allowing users to engage with models of objects that would otherwise be difficult to interact with.
360 assets are either photos or videos that capture a panoramic view of a real or virtual environment. Through EON-XR, these 360 assets can include a variety of destinations that instructors may use either as learning environments catered for specific lessons or as a general destinations to hold virtual meetings in.
To Import 3D Assets to EON-XR
- Go to the EON-XR landing page.
- Log into your EON Reality account.
NOTE: Your EON Reality login will be distinct from your MyCarletonOne login credentials. If you cannot remember your EON Reality login and password, please use the password reset link.
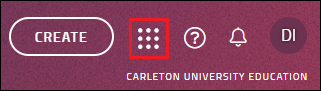
- Select the waffle icon in the right side of the top navbar.
- From the drop-down menu, select Import 3D Asset. This will take you to the Import 3D Assets page.
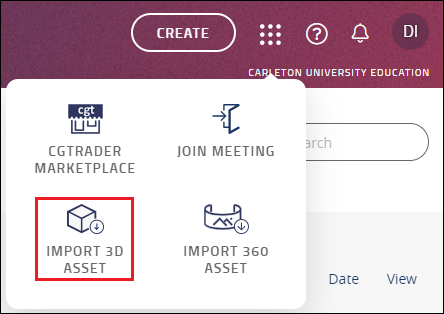
- Drag and drop your asset file into the import box to upload your 3D asset.
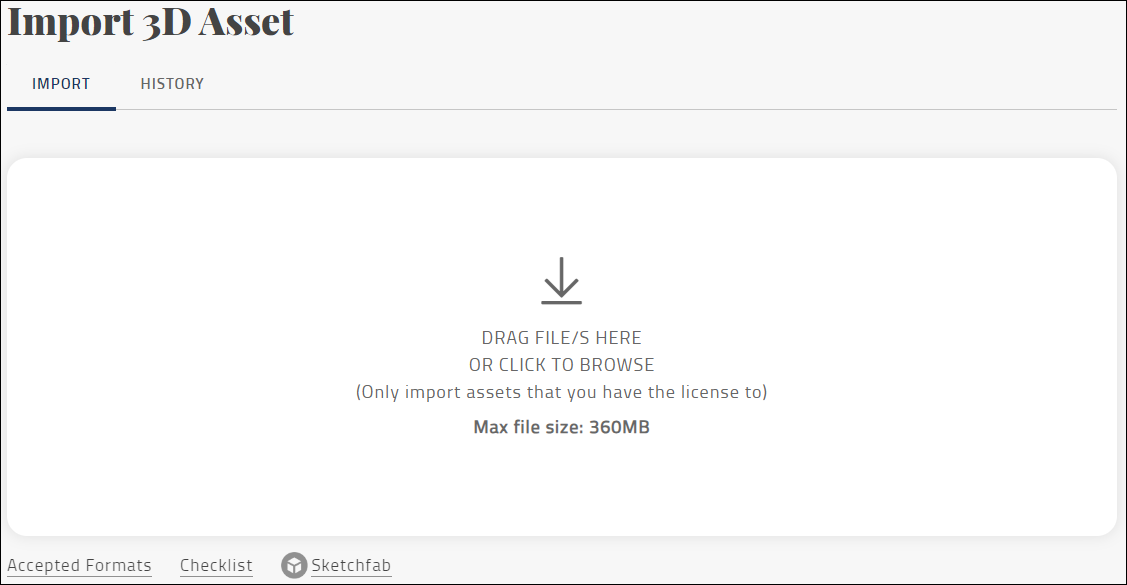
TIP: You can also upload your asset file by selecting the import box and locating your asset file in the file browser pop-up window.
NOTE: Select the Accepted Formats button to pull up a list of current compatible asset file types. EON-XR will not accept files exceeding 360 megabytes.
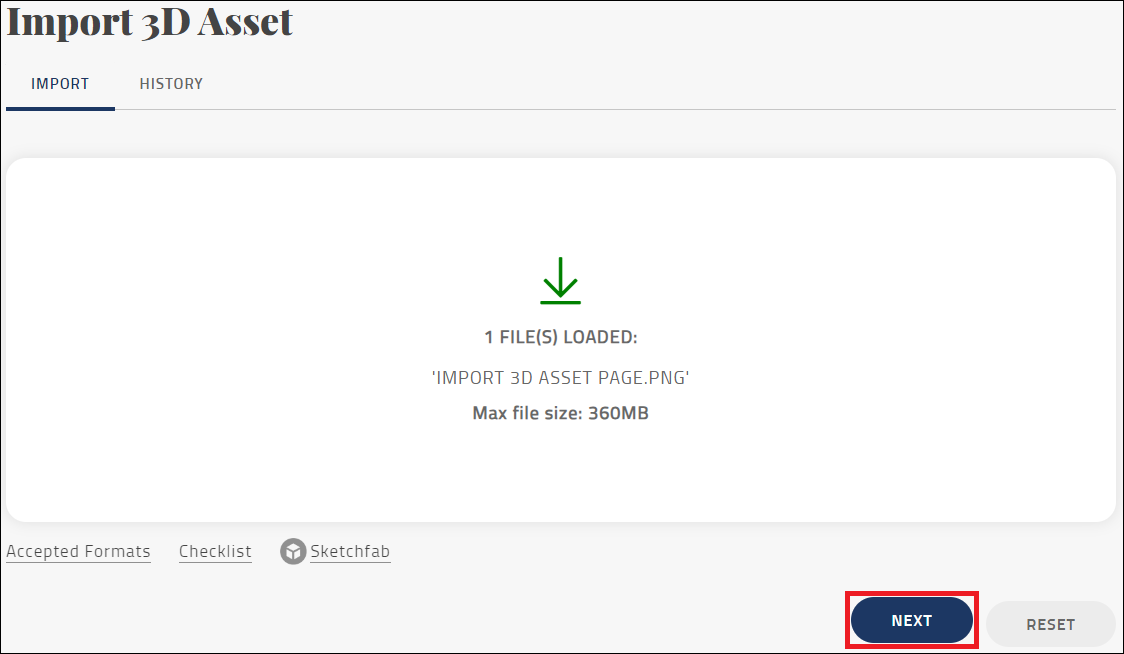
- Select the Next button.
- Enter the author’s name in the Credit Author field.
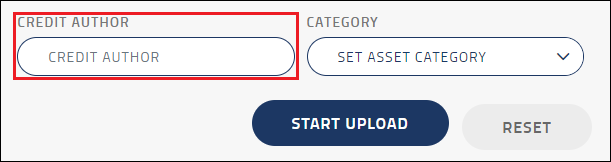
NOTE: For information on copyright best practices at Carleton, visit MacOdrum Library’s Copyright page.
- Select Set Asset Category to set the category for your asset.
NOTE: Best practice for setting your asset category is to select the faculty that aligns best with the subject matter of your asset.
- Select Start Upload to import your 3D asset.
Your 3D asset has now been uploaded to EON-XR. To continue building your Xperience, follow our support documentation on Building an EON-XR Xperience.
To Import 360 Assets to EON-XR
- Go to the EON-XR landing page.
- Log into your EON Reality account.
NOTE: Your EON Reality login will be distinct from your MyCarletonOne login credentials. If you cannot remember your EON Reality login and password, please use the password reset link.
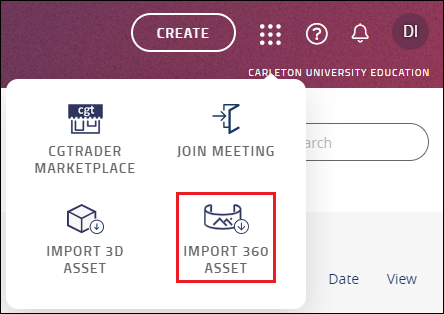
- Select the waffle icon in the right side of the top navbar.
- From the drop-down menu, select Import 360 Asset. This will take you to the Import 360 Assets page.
- Drag and drop your asset file into the import box to upload your 360 asset.
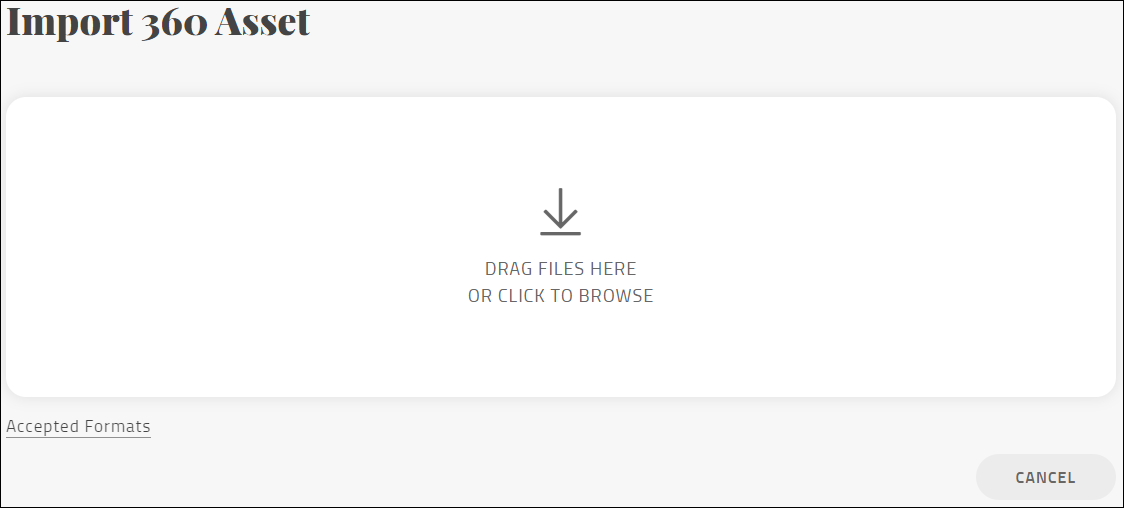
TIP: You can also upload your asset file by selecting the import box and locating your asset file in the file browser pop-up window.
NOTE: Select the Accepted Formats button to pull up a list of current compatible asset file types. EON-XR will not accept files exceeding 200 megabytes.
- Enter your Image Name, Category, and Copyright Information in their respective fields.
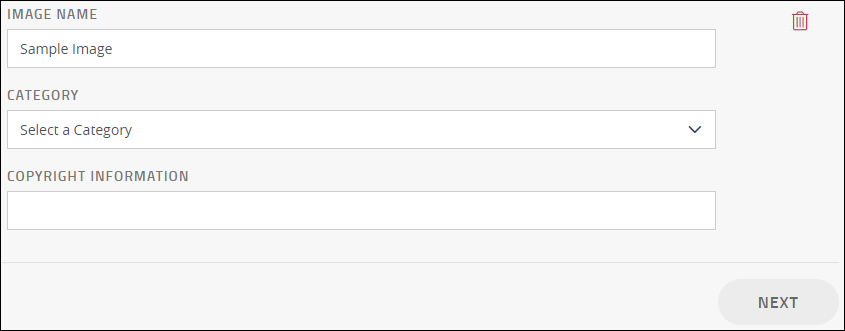
- Select a category for your asset from the Category drop-down menu.
NOTE: Best practice for setting your asset category is to select the faculty that aligns best with the subject matter of your asset.
- Enter the asset’s copyright information in the Copyright Information field.
NOTE: For information on Carleton’s copyright best practices, visit MacOdrum Library’s Copyright page.
- Select Next.
Your 360 asset has now been uploaded to EON-XR.
To Create an Xperience in EON-XR
In your course, your instructor might ask you to create your own EON Xperience. You can follow the instructions below for instructions detailing how to create an Xperience in EON-XR.
| NOTE:Creating an Xperience in EON-XR requires a “merged” license. If you experience difficulty creating an EON Xperience, you may only have a “basic” license and will need to submit a request for a merged license to the TLS support portal. |
- Go to the EON-XR landing page.
- Log into your EON Reality account.
- Select the Create button in the top navbar.
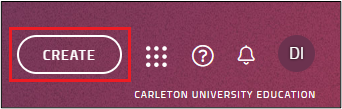
- Select Xperience.
- Select the asset type you would like to incorporate into your Xperience.

- Select the asset you would like to use from the asset library.
- Enter the necessary information in the fields labelled Lesson Title, Level, Tags, and Lesson Objective as you see fit.
- Select the Build Xperience button.
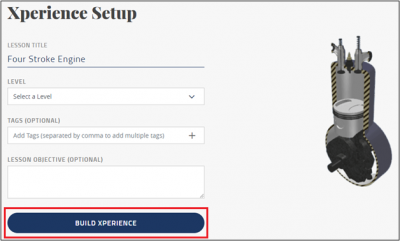
NOTE: This will open your Xperience in an EON-XR Desktop app window.
- Select the Toggle the display of annotation button on the left side of the window to show the default annotations for the Xperience.

- Select the annotation you would like to add content to.
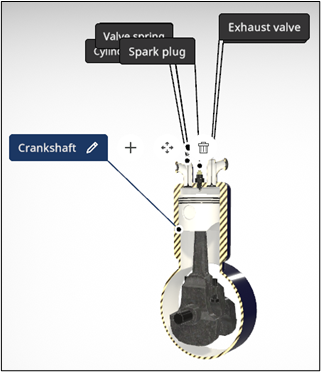
- Select the Plus button next to the annotation’s name.
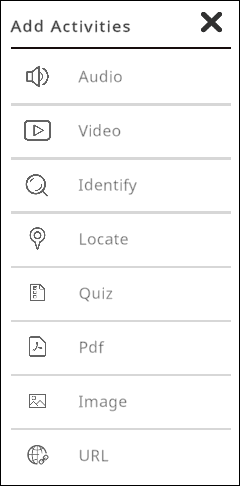
NOTE: Selecting the Plus button will reveal the Add Activities menu on the right side of the window.
- Select the type of content you would like to add to your Xperience from the Add Activities menu.
- Make changes to the content to suit your needs.
- When you are finished, select the Close button located in the top left of the Xperience. This will cause a confirmation module to pop-up.
- Select Exit.

NOTE: All Xperiences you create get automatically saved to the My Workspace tab, located in the header of the EON Reality page.
You have successfully created an EON Xperience.
Tagging Xperiences in EON-XR
A tag is a label that you attach to your Xperience. EON allows you to use tags to classify and describe content. Tagging your Xperience with relevant metadata will make your Xperience easier to find for both creators and viewers. Some tags you can add to your Xperience include your course’s
- Instructor,
- Code,
- Year, and
- Semester (fall, winter, or summer)
While these are a good starting point for tagging your Xperiences, using your tags consistently is more important than how you tag your content. Stick to a tagging system that is useful and intuitive for both you and your students.
To Edit an Existing Xperience
- Go to the EON-XR landing page.
- Log into your EON Reality account.
- Select the My Workspace tab in the center of the webpage’s header.

- Under the Xperiences tab, select the Xperience you would like to edit.
- Select the Edit Xperience button.

- Make your desired changes to your Xperience.
- Select the Save.
You have successfully edited your experience.
To Add an Xperience to Your Course
- Sign into Brightspace with your MyCarletonOne credentials.
- Locate the new/empty course where you want to bring content into in one of the following ways:
- Select the course tile under the My Courses widget.
- the Course Selector Grid and select the course from the drop-down menu. If you are enrolled in more than 20 courses, you can search for the course name using the search bar.
- Go to the course module you would like to add your Xperience to.
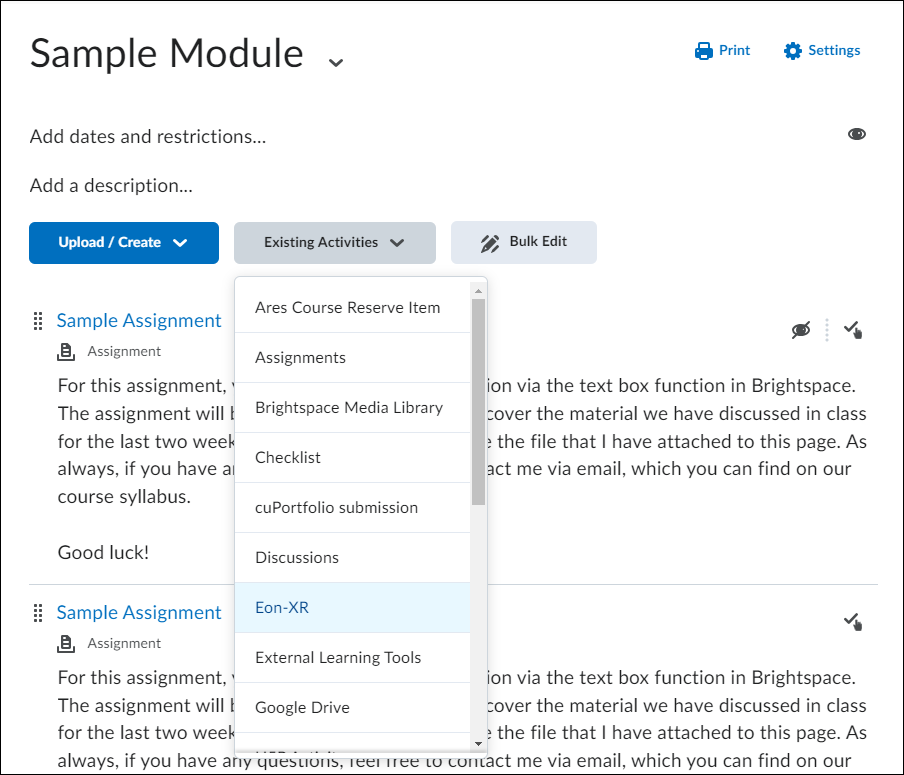
- Select the Existing Activities button.
- From the pulldown menu, select Eon-XR.
- From the Add Activity menu, select the My Xperiences tab.

WARNING: Do not select the My Assignments tab. This tab does not interact with Brightspace and will not produce expected results. - Select the Xperience you would like to add.
The Xperience will now appear in your course module.
Sharing an EON Xperience
When sharing an Xperience in EON-XR, you can share your Xperience using either desktop or a mobile device.
To Share an EON Xperience on Desktop
- Go to the EON-XR landing page.
- Log into your EON Reality account.
- Select the My Workspace tab in the center of the webpage’s header.
- Select the Xperience you would like to share.
- Select the Share icon on the top right of the Xperience page.

- Turn on the Share Xperience toggle at the top right of the screen.

- Select the Anyone option.
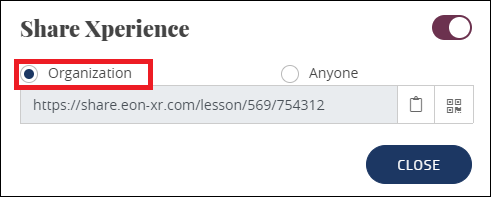
NOTE: Selecting the Organization option will create a hyperlink to this Xperience. Anyone logged into EON-XR through Carleton University can access this Xperience through the created hyperlink.
- Copy the hyperlink.
- Submit your Xperience hyperlink in a Brightspace assignment. For more information on how to submit this hyperlink, see our support page on How to Submit an Xperience Hyperlink to Brightspace.
To Share an EON Xperience on Mobile
- Go to the EON-XR landing page.
- Log into your EON Reality account.
- Select the My Workspace tab in the center of the webpage’s header.
- Select the Xperience you would like to share.
- Select the Share function on the top right of the Xperience page.
- Turn on the Share Xperience toggle at the top right of the screen.
- Select the Organization option.
NOTE: Selecting the Organization option will create a hyperlink to this Xperience. Anyone logged into EON-XR through Carleton University can access this Xperience through the created hyperlink.
- Copy the hyperlink.
- Close the sharing window.
- Submit your Xperience hyperlink in a Brightspace assignment. For more information on how to submit this hyperlink, see our support page on How to Submit an Xperience Hyperlink to Brightspace.
Additional Help
If you experience difficulties while using EON-XR and have questions, visit the EON-XR Frequently Asked Questions page for help.
If you have any questions about your EON Reality account or accessing EON-XR, you can contact Teaching and Learning Services vis the Teaching and Learning Services Jira Support Portal.
 Teaching and Learning Services Contact Information
- Office Hours: Monday to Friday, 8:30-4:30
- Educational technology support – Visit the TLS Support Portal to enter a tech support request, or fill out the course consultation request form
- Course design or pedagogical support – Contact tls@carleton.ca
 D2L Brightspace Technical Support Contact Information
- Available: 24 hours a day, 7 days a week, 365 days a year
- EMAIL: Fill out the Email Support Request Form
- PHONE: 1-877-325-7778
Was this page helpful?
2 people found this useful
Still need help? Contact us