- Configuring an Assignment for Grading
- Viewing Student Submissions
- Grading Assignments
- Providing Assignment Feedback
There are multiple way to grade and provide feedback in the D2L Brightspace assignment tool.
- Configuring an Assignment for Grading
- Viewing Student Submissions
- Grading Assignments
- Providing Assignment Feedback
→For instructions on how to create an assignment in Brightspace, see the Creating Assignments page.
Configuring an Assignment for Grading
NOTE: When you create a new assignment in Brightspace, a grade item will automatically be added to your gradebook as long as you enter a score value in your assignment settings. You can adjust your assignment settings at any time to link/unlink a grade item or categorize your assignment grade item in your gradebook.
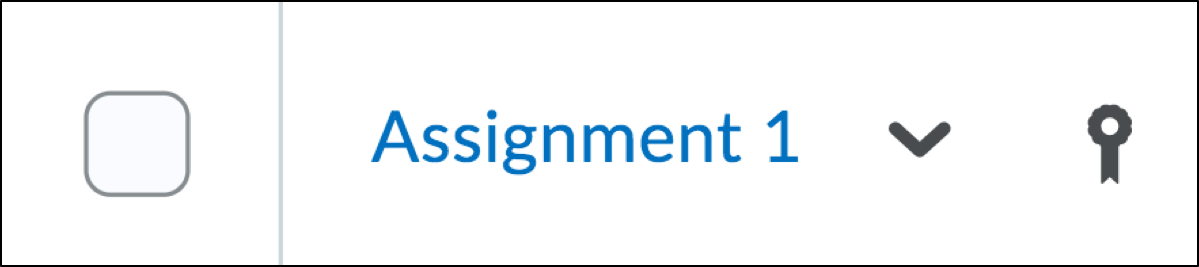
An assignment that is linked to a grade item will be indicated with a Ribbon Icon ![]() on your Manage Assignments page (see example below). Hover your cursor over the Ribbon Icon to view the name of the associated grade item.
on your Manage Assignments page (see example below). Hover your cursor over the Ribbon Icon to view the name of the associated grade item.
→You can also verify that your assignment is associated to a grade item in your gradebook. For instructions, see the Setting up Grades page.
Link an Assignment to a Grade Item
- Log into Brightspace using your MyCarletonOne credentials.
- On the Brightspace homepage, locate your course in one of the following ways:
- Select the course tile under the My Courses widget.
- Select the Course Selector Grid
 and select the course from the drop-down menu. If you are enrolled in more than 20 courses, you can search for the course name using the search bar.
- In the navbar, select Tools.

- In the drop-down menu, select Assignments.
- Locate the assignment in the Assignments table and select the arrow
 to expand the assignment actions menu.
 - Locate an existing assignment or create a new assignment.
- To edit an existing assignment: Select the arrow
 next to an existing assignment, then select Edit Assignment.
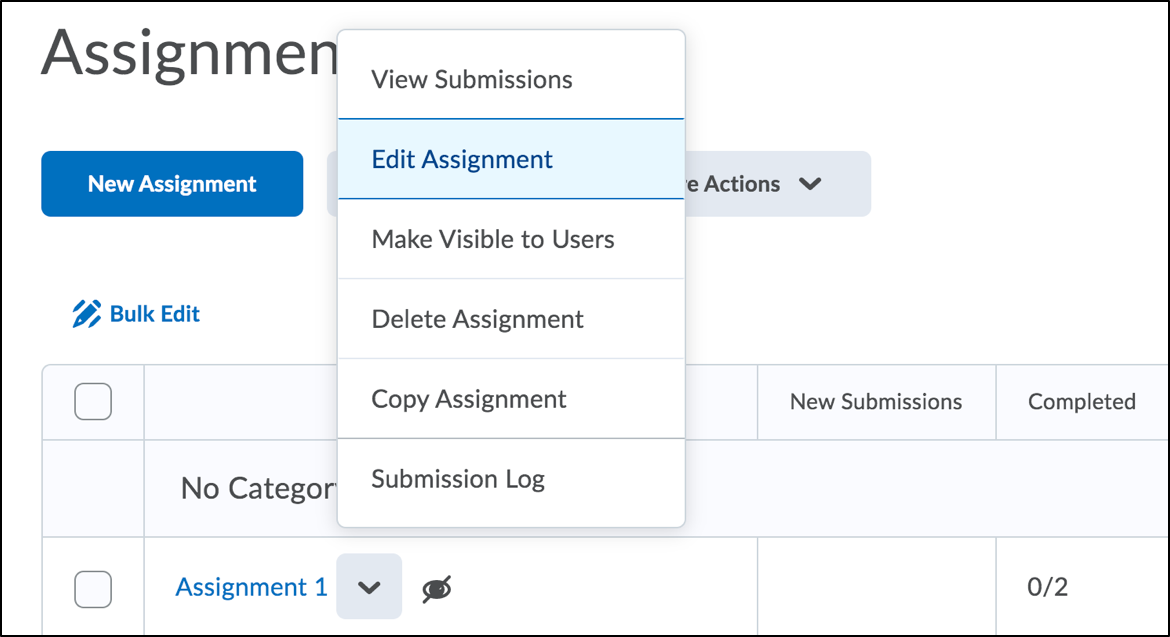
- To create a new assignment: Select the New Assignment button.
- To edit an existing assignment: Select the arrow
- Enter a score value in the Score out of field.
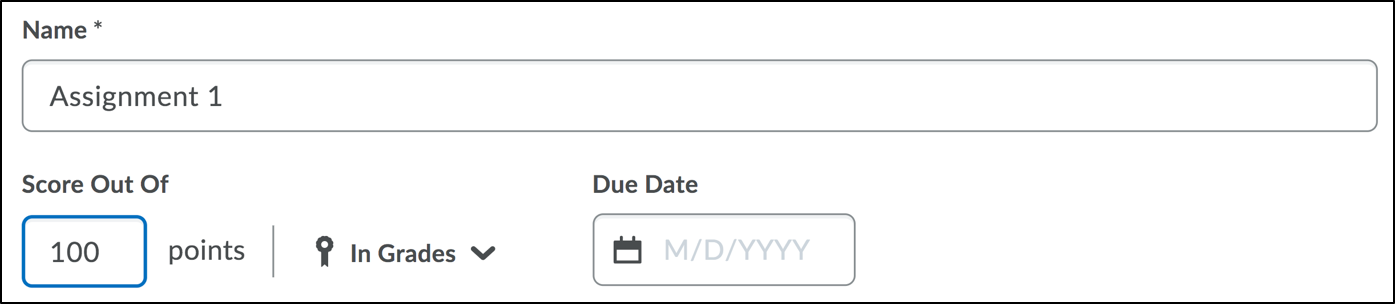
- You will see an In Grade drop-down menu to the right of the score field. By default, a new grade item will be created in your gradebook once you have entered a score value. You have the option to link your assignment grade item to an existing category in your gradebook.
- To categorize an assignment grade item:
- Select the In Grades drop-down menu and select Choose from Grades. A Choose from Grades pop-up window will open.
- Select a category from the Grade Category drop-down menu.
- Select OK.
- To categorize an assignment grade item:
- Add or attach a rubric if you will be using a rubric to grade the assignment.
- To add or attach a rubric:
- Select Evaluation and Feedback on the right side of the page to expand a list of settings options.
- Select Add Rubric and select one of the following options:
- Create New – If you select this option, you will need to configure the settings for your new rubric, then select Attach Rubric. For more instructions on how to set up a rubric, see the Creating Rubrics page.
- Add Existing – If you select this option, you will need to select an existing rubric in the Add Existing pop-up window, then select Add Selected.
- To add or attach a rubric:
- Select Save and Close when you are finished editing your assignment settings.
You will now see a grade item (column) for your assignment in your gradebook.
Viewing Student Submissions
View Student Submissions
- Log into Brightspace using your MyCarletonOne credentials.
- On the Brightspace homepage, locate your course in one of the following ways:
- Select the course tile under the My Courses widget.
- Select the Course Selector Grid and select the course from the drop-down menu. If you are enrolled in more than 20 courses, you can search for the course name using the search bar.
- In the navbar, select Tools.
- In the drop-down menu, select Assignments.
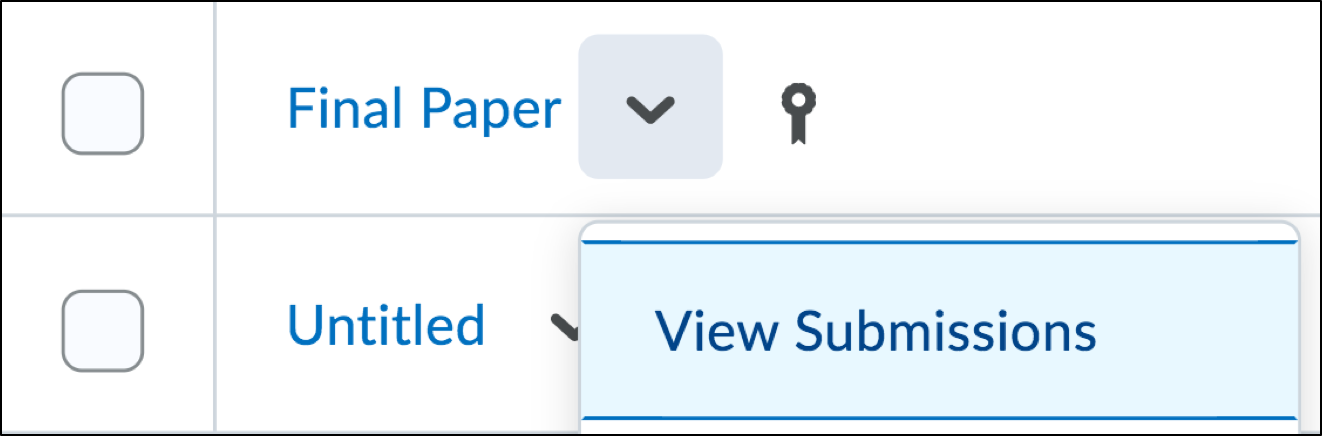
- Locate the assignment in the Assignments table and select the arrow to expand the assignment actions menu.
- In the drop-down menu, select View Submissions.
- Under the Users Tab or Submissions Tab, you can search for a students name or view a table listing all assignment submissions.
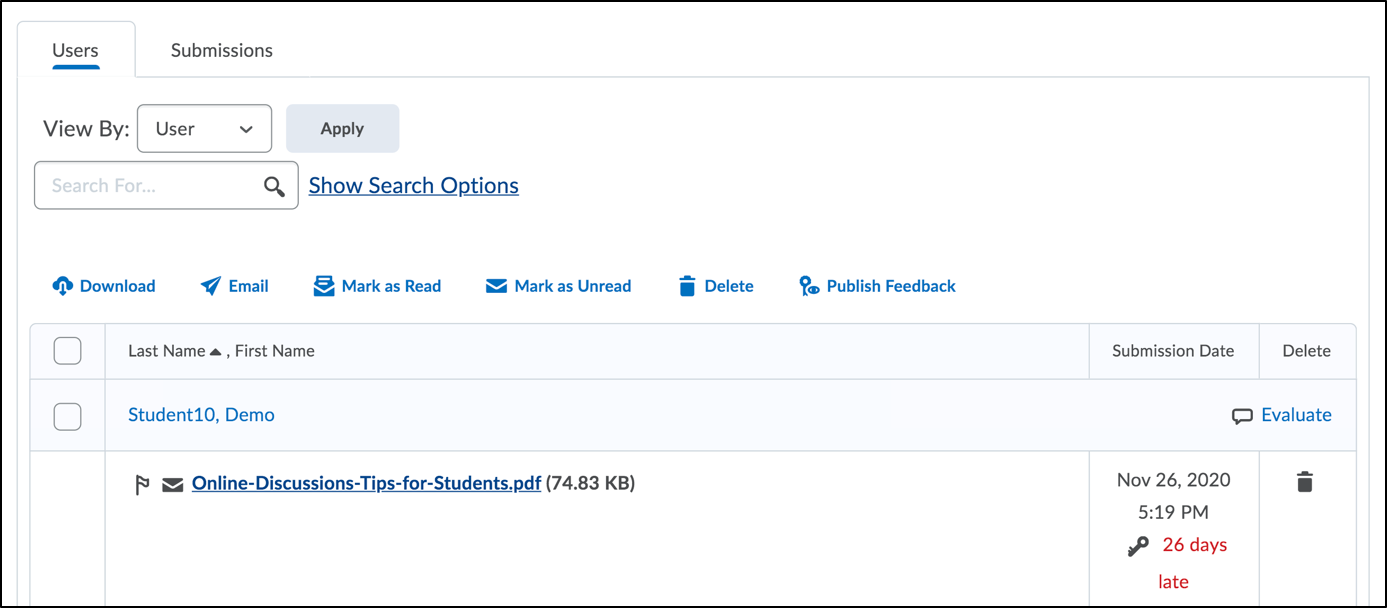
- Select the name of a student to view their submission. Alternatively, you can select the submission file or the Evaluate link. You will be taken to the document viewer where you can view and grade the submission.
TIP: You can filter your search options (i.e. View late submissions, students who have not submitted an assignment) by selecting Show Search Options to the right of the search field.
View Submission Log
- Log into Brightspace using your MyCarletonOne credentials.
- On the Brightspace homepage, locate your course in one of the following ways:
- Select the course tile under the My Courses widget.
- Select the Course Selector Grid and select the course from the drop-down menu. If you are enrolled in more than 20 courses, you can search for the course name using the search bar.
- In the navbar, select Tools.
- In the drop-down menu, select Assignments.
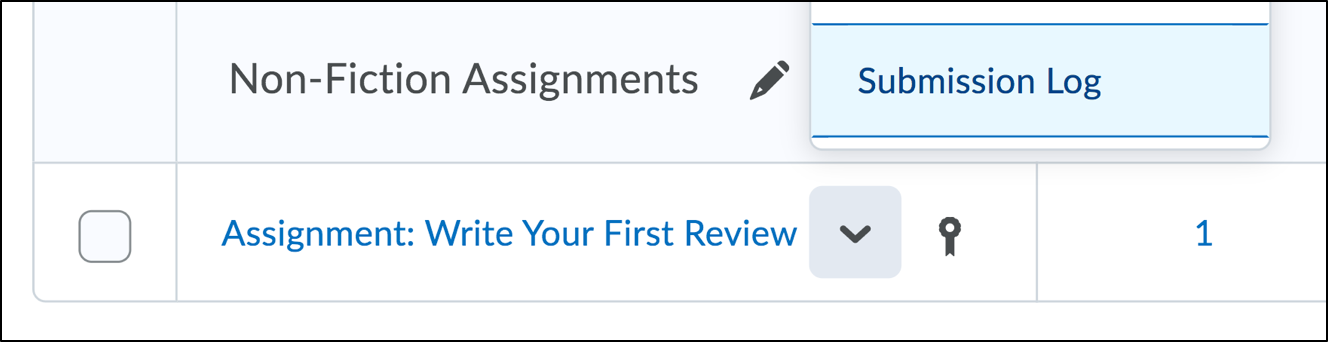
- Locate the assignment in the Assignments table and select the arrow to expand the assignment actions menu.
- In the drop-down menu, select Submission Log.
You will see a table displaying submission details for all submitted assignments (see example below).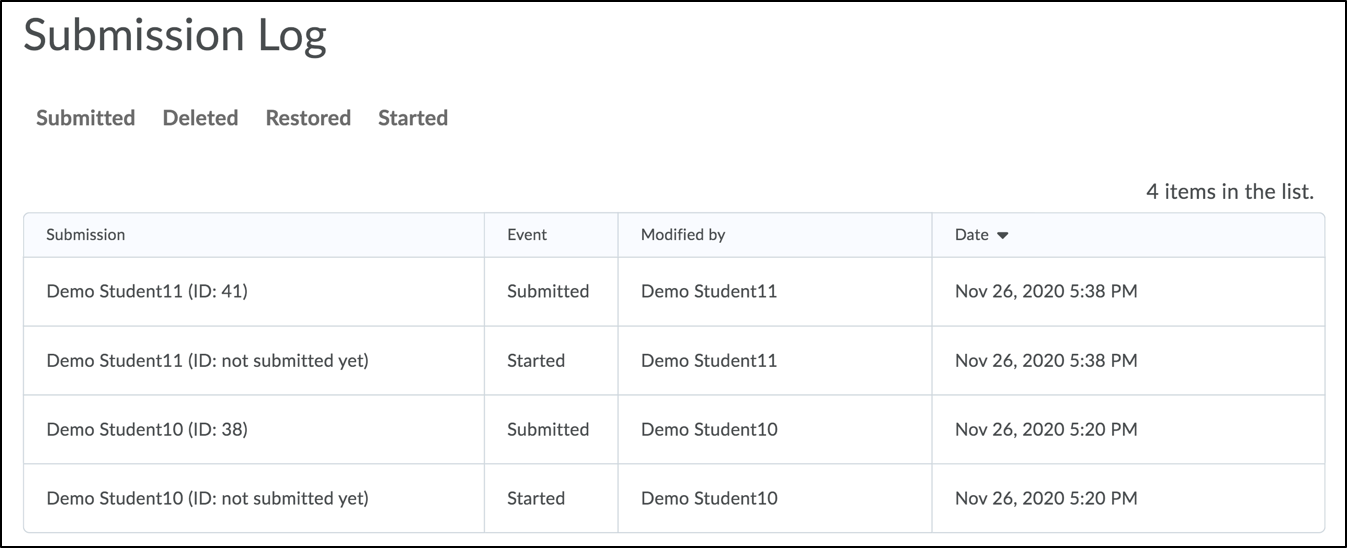
Download Assignment Submissions
- Log into Brightspace using your MyCarletonOne credentials.
- On the Brightspace homepage, locate your course in one of the following ways:
- Select the course tile under the My Courses widget.
- Select the Course Selector Grid and select the course from the drop-down menu. If you are enrolled in more than 20 courses, you can search for the course name using the search bar.
- In the navbar, select Tools.
- In the drop-down menu, select Assignments.
- Locate the assignment in the Assignments table and select the arrow to expand the assignment actions menu.
- In the drop-down menu, select View Submissions.
- Select the checkboxes to select the submissions you want to download. To select all submission, select the top-most checkbox.
- Select Download.

- You will see a Downloading Files pop-up window. When your zip file is finished loading you will see the message Your file is ready to download. Select Download.
You will now be able to access the downloaded zip file on your computer.
Grading Assignments
How you grade an assignment will differ depending on the submission type you selected when you created your assignment. All submission types can be graded in Brightspace, including:
- File Submissions – This submission type requires students to submit a file in Brightspace (e.g. Word document, PDF, or video file)
- Text Submissions – This submission type requires students to submit a response in a text box in Brightspace (e.g. blog post).
- On Paper Submission – This submission type does not allow students to submit through Brightspace. Students must submit a paper copy of the assignment (e.g. essay).
- Observed in Person – This submission type does not allow students to submit through Brightspace. Students must complete an in-person assessment (e.g. presentation).
Grade Assignment File Submissions
NOTE: The instructions below are for grading assignments that have been configured with “File Submission” as the submission type.
- Log into Brightspace using your MyCarletonOne credentials.
- On the Brightspace homepage, locate your course in one of the following ways:
- Select the course tile under the My Courses widget.
- Select the Course Selector Grid and select the course from the drop-down menu. If you are enrolled in more than 20 courses, you can search for the course name using the search bar.
- In the navbar, select Tools.
- In the drop-down menu, select Assignments.
- Locate the assignment in the Assignments table and select the arrow to expand the assignment actions menu.
- In the drop-down menu, select View Submissions.
- Select the name of the student you want to grade. Alternatively, you can select the file attachment. You will be taken to the document viewer where you can view and grade the submission.
NOTE: The following file types are compatible with the document viewer:
-
- MS Word (DOC, DOCX)
- MS PowerPoint (PPT, PPTX, PPS)
- Adobe Acrobat (PDF, PDFS)
- Web (HTM, HTML)
- Plain text (TXT)
- Images (BMP, GIF, JPG, JPEG, PNG)
-
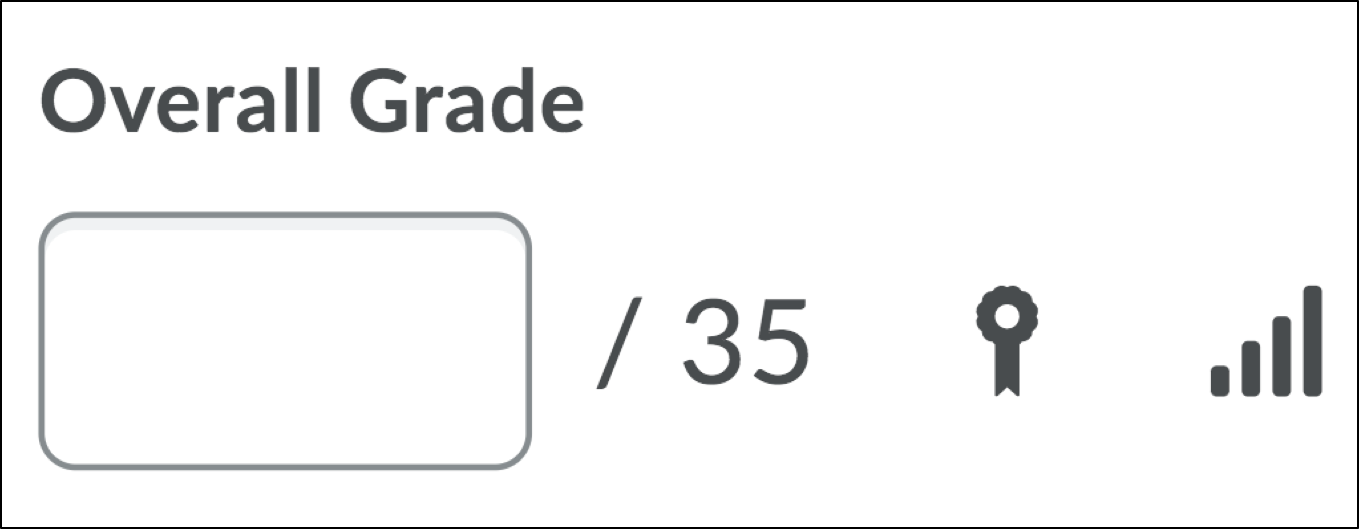
- Enter a score for the submission in the Overall Grade field.
- Enter feedback (optional).
- If you want to annotate the submission file, select the annotation (pen) icon
 in the document viewer toolbar. You can use the annotation toolbar to add comments, highlight text, or mark up the submission. For more information on annotating an assignment submission, see Annotate an Assignment Submission.
 - When you are finished grading, select Publish to release the grade/feedback to students. You can select Save Draft if you want to release the grade at a later date.
TIP: You can use the arrows ![]() in the top-right or lower-right corners of the page to navigate between student submissions.
in the top-right or lower-right corners of the page to navigate between student submissions.
Grade Text Assignment Submissions
NOTE: The instructions below are for grading assignments that have been configured with “Text Submission” as the submission type.
- Log into Brightspace using your MyCarletonOne credentials.
- On the Brightspace homepage, locate your course in one of the following ways:
- Select the course tile under the My Courses widget.
- Select the Course Selector Grid and select the course from the drop-down menu. If you are enrolled in more than 20 courses, you can search for the course name using the search bar.
- In the navbar, select Tools.
- In the drop-down menu, select Assignments.
- Locate the assignment in the Assignments table and select the arrow to expand the assignment actions menu.
- In the drop-down menu, select View Submissions.
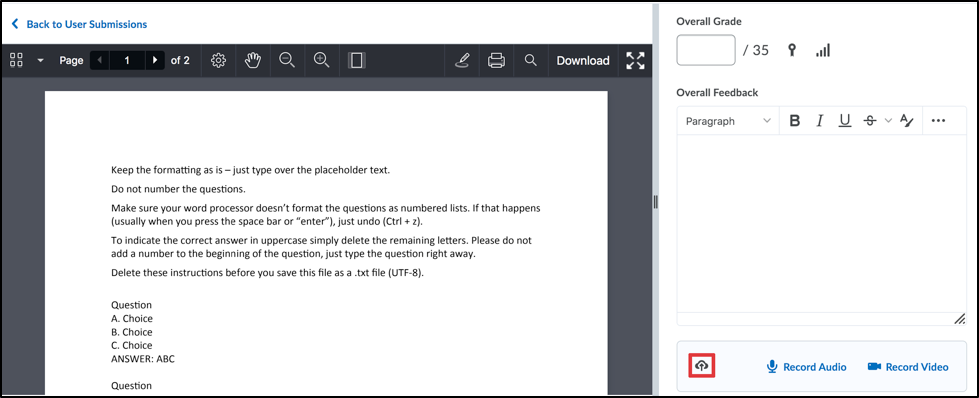
- Select the name of the student you want to grade. Alternatively, you can select View Submission or Evaluate. You will be taken to an evaluation page with the text submission displayed on the left side of the screen.
- Enter a score in the Overall Grade field.
- Enter feedback in the Overall Feedback HTML Editor.
TIP: Select the ellipsis icon
 to expand the full HTML Editor toolbar. In the HTML Editor, you can format or attach/embed files or media to your feedback using the insert stuff
  , insert quicklink
  , and insert image
  buttons.
 - When you are finished grading, select Publish to release the grade/feedback to students. You can select Save Draft if you want to release the grade at a later date.
TIP: You can use the arrows ![]() in the top-right or lower-right corners of the page to navigate between student submissions.
in the top-right or lower-right corners of the page to navigate between student submissions.
Grade On Paper Submissions or Observed in Person Assignments
NOTE: The instructions below are for grading assignments that have been configured with “On Paper” or “Observed in Person” as the submission type.
- Log into Brightspace using your MyCarletonOne credentials.
- On the Brightspace homepage, locate your course in one of the following ways:
- Select the course tile under the My Courses widget.
- Select the Course Selector Grid and select the course from the drop-down menu. If you are enrolled in more than 20 courses, you can search for the course name using the search bar.
- In the navbar, select Tools.
- In the drop-down menu, select Assignments.
- Select the assignment you want to grade.
- Locate the name of the student you want to grade and select Evaluate under the Evaluation and Feedback column.

- Enter a score in the Overall Grade field.
- Enter feedback in the Overall Feedback HTML Editor
TIP: Select the ellipsis icon
to expand the full HTML Editor toolbar. In the HTML Editor, you can format or attach/embed files or media to your feedback using the insert stuff , insert quicklink , and insert image buttons. - When you are finished grading, select Publish to release the grade/feedback to students. You can select Save Draft if you want to release the grade at a later date.
TIP: You can use the arrows ![]() in the top-right or lower-right corners of the page to navigate between student submissions.
in the top-right or lower-right corners of the page to navigate between student submissions.
Grading with Quick Eval
Quick Eval is a grading tool that allows you to view a list of ungraded submissions that need to be evaluated. Quick Eval syncs with all graded tools in Brightspace (Assignment, Discussions, Quizzes, etc.). All activities that need to be evaluated will appear in Quick Eval until they are graded and feedback is published.
- Log into Brightspace using your MyCarletonOne credentials.
- On the Brightspace homepage, locate your course in one of the following ways:
- Select the course tile under the My Courses widget.
- Select the Course Selector Grid and select the course from the drop-down menu. If you are enrolled in more than 20 courses, you can search for the course name using the search bar.
- In the navbar, select Progress.

- In the drop-down menu, select Quick Eval.
- You will now see the Quick Eval Dashboard. From your dashboard, you can view Assignment
 , Discussion
  , and Quiz
  submissions
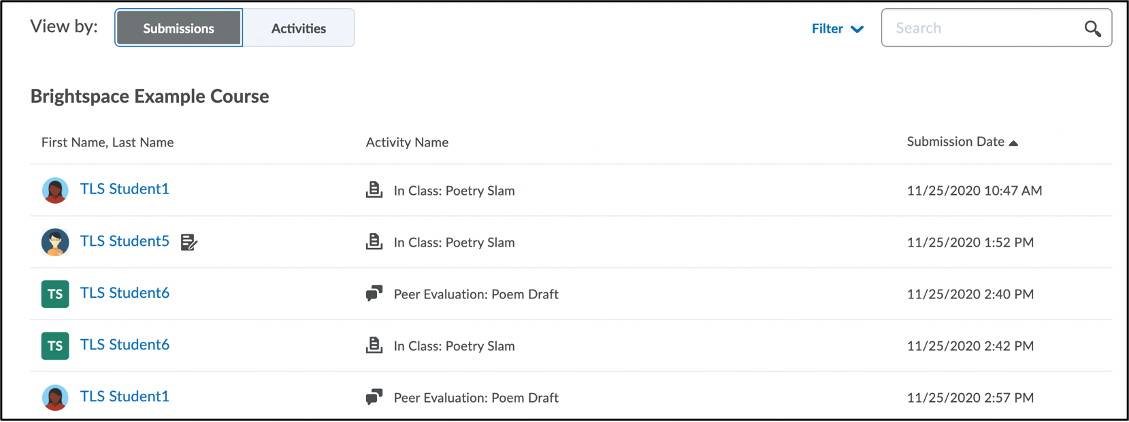
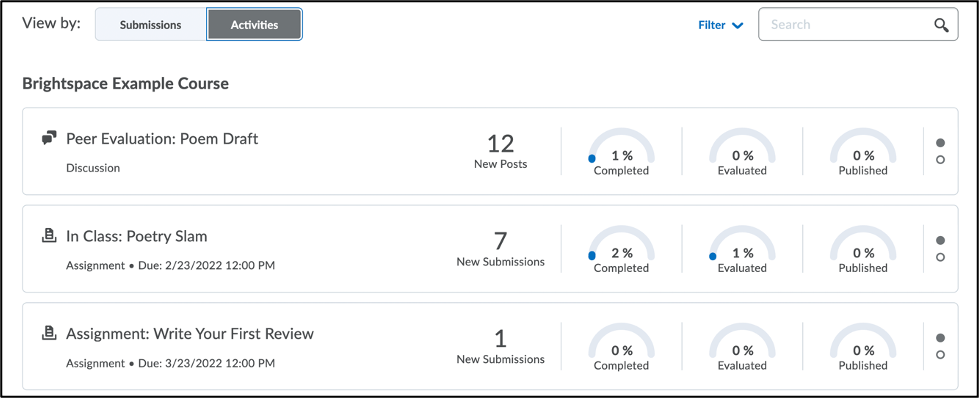
 - You can view the Quick Eval list by Submissions or Activities. Use the buttons next to View by: to toggle between views.

TIP: You can filter your submissions by Activity name or date by selecting Filter on the top-right side of the page. You can also use the search field to search for a specific student or activity. For example, you can search for the assignment name (i.e. “In Class: Poetry Slam”) to view all ungraded submissions for that assignment.
- Submissions – View a list of ungraded student submissions. The list can be sorted by selecting on the First Name, Last Name, Activity Name, and Submission Date links at the top of the list.
- Activities – View a list of activities with ungraded submissions. The list displays the number of New Submissions, and the percentage of Completed, Evaluated, and Published submissions.
- Submissions – View a list of ungraded student submissions. The list can be sorted by selecting on the First Name, Last Name, Activity Name, and Submission Date links at the top of the list.
- Navigate to the submission(s) you want to grade in the Quick Eval list.
- If you are viewing the Submissions list, select the name of the student you want to assess.
- If you are viewing the Activities list, you can view ungraded posts in the following ways, select the New Submissions # to grade all new submissions. To view all posts (graded and ungraded), select Evaluate All or select Submission List to view a list of all Submissions.

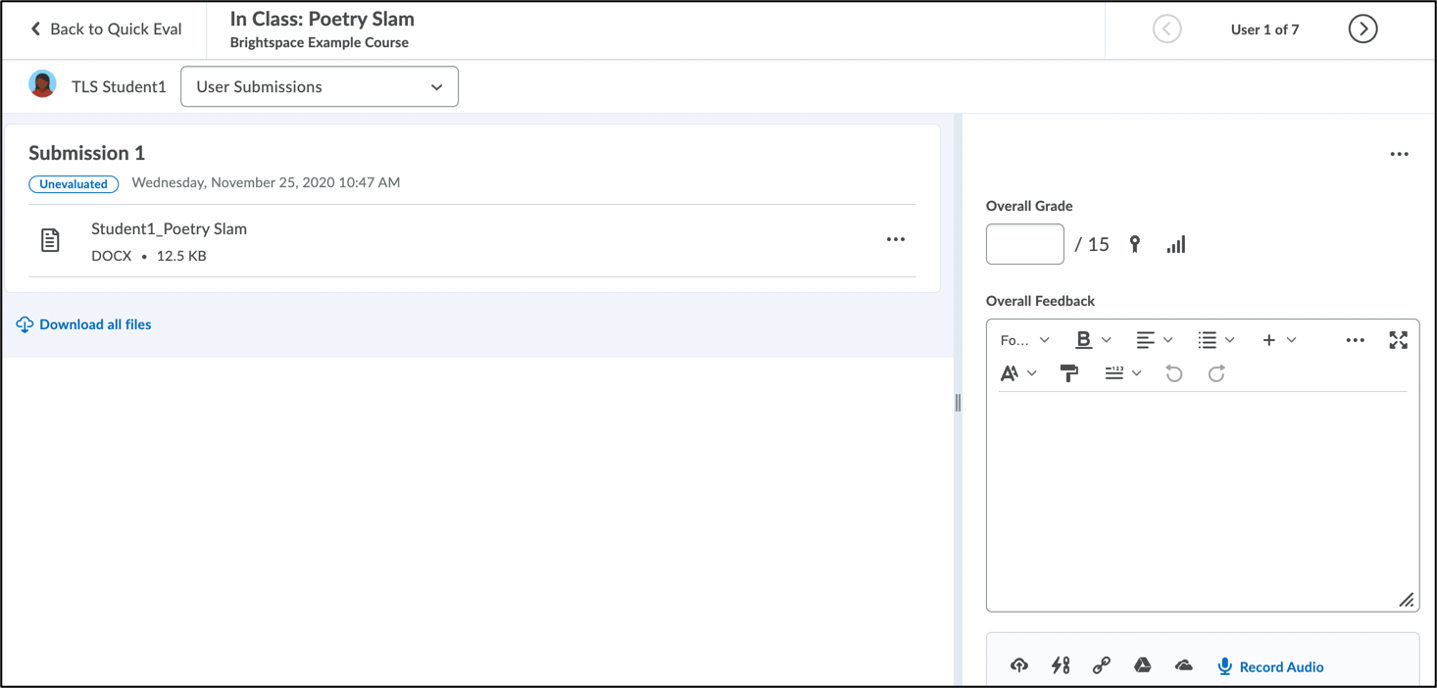
- A new page will open showing the assignment submission. If you are using a rubric, the interactive rubric will appear in the panel above the Overall Grade and Overall Feedback fields.
- Enter an Overall Grade in the top-right corner of the window.
- Enter feedback in the HTML Editor under Overall Feedback.
TIP: Use the arrows on the top-right side of the screen to navigate between submissions.
- When you are finished assessing the post, select Publish. You can select Save Draft to save your feedback if you want to publish at a later date. When a submission has been graded, it will no longer appear in the the Quick Eval list.
Grading with a Rubric
- Log into Brightspace using your MyCarletonOne credentials.
- On the Brightspace homepage, locate your course in one of the following ways:
- Select the course tile under the My Courses widget.
- Select the Course Selector Grid and select the course from the drop-down menu. If you are enrolled in more than 20 courses, you can search for the course name using the search bar.
- In the navbar, select Tools.
- Select Assignments from the drop-down menu.
- Select the name of the assignment you wish to grade.
- Select the name of the student you wish to grade. You can also select the file name or the Evaluate link to the right of the student’s name.

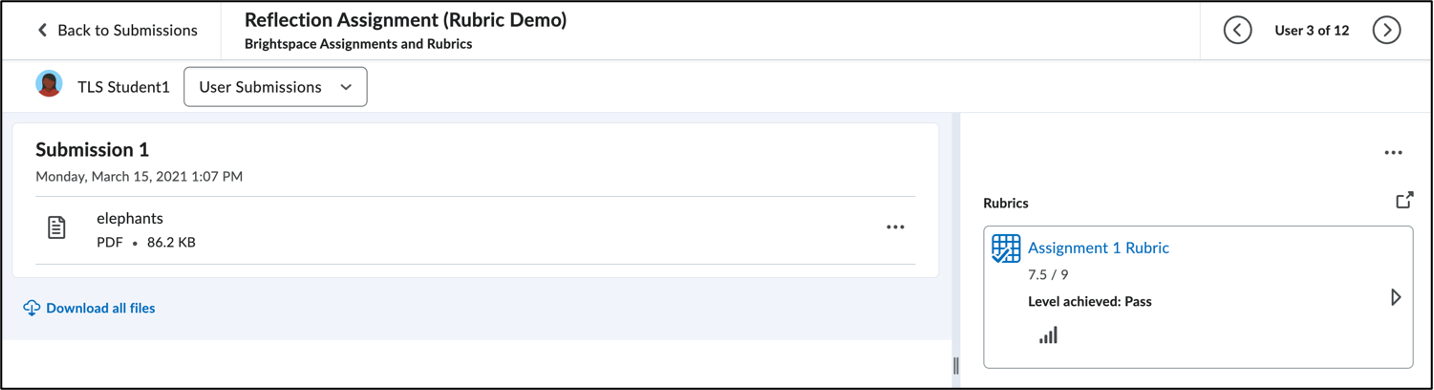
- You will now be able to view the submitted file. Select the file name to view the submission in the document viewer.
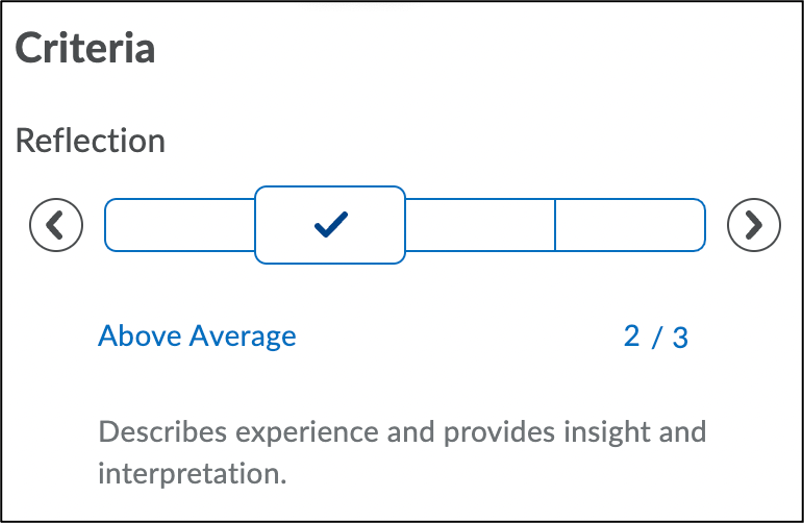
- To the right of the submission you will see a panels with Rubrics, Overall Grade, and Overall Feedback. Select the name of the rubric you will be using to grade to expand the criteria.
- Select the appropriate level for each criterion. The criterion score column will automatically populate with the correct points value.
WARNING: Do not select the criterion score column to type in the point value manually. You must select a level for each criterion. If every criterion does not have a level selected, the rubric will not display to students.
- Select Add Feedback in the criteria column to enter feedback.
- When the rubric grading is complete, verify that a level has been selected for each criterion. The rubric score will automatically populate in the Overall Grade section and the rubric will automatically save as grading information is entered.
- Select Publish to make the grade/feedback visible to the student, or Save Draft to publish at a later time.
Providing Assignment Feedback
Annotate Assignment Submissions
Use the annotation toolbar to add text and markups when providing assignment feedback. Watch the video tutorial below for an overview of how to use annotation tools to provide feedback. See File Types Supported by Annotations for more information about file types that are supported in the Annotation tool.
- Log into Brightspace using your MyCarletonOne credentials.
- On the Brightspace homepage, locate your course in one of the following ways:
- Select the course tile under the My Courses widget.
- Select the Course Selector Grid and select the course from the drop-down menu. If you are enrolled in more than 20 courses, you can search for the course name using the search bar.
- In the navbar, select Tools.
- In the drop-down menu, select Assignments.
- Locate the assignment in the Assignments table and select the arrow to expand the assignment actions menu.
- In the drop-down menu, select View Submissions.
- Select the name of the student you want to grade. Alternatively, you can select the file attachment. You will be taken to the document viewer where you can view and grade the submission.
NOTE: The following file types are compatible with the document viewer:
-
- MS Word (DOC, DOCX)
- MS PowerPoint (PPT, PPTX, PPS)
- Adobe Acrobat (PDF, PDFS)
- Web (HTM, HTML)
- Plain text (TXT)
- Images (BMP, GIF, JPG, JPEG, PNG)
-
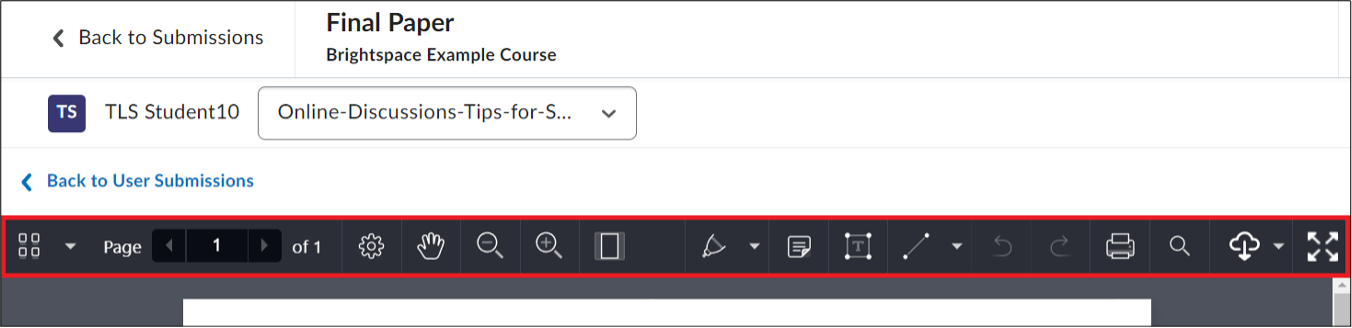
- The submission file will now appear in the document view in the left side of the page with a toolbar above the document.
TIP: Select the expand button
 to open the document viewer in fullscreen. In fullscreen view, the annotation toolbar will display options in a more detailed and accessible way.
TIP: If you are grading a multi-page document, you can use the navigation tools in the left side of the document viewer toolbar to adjust the page view/layout.
- The thumbnail icon
 will toggle a panel that provides an outline and preview of all pages in the document.
 - The page layout (gear) icon
 allows you to customize the page layout view and adjust the page rotation.
 - The page selection arrows
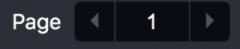 allow you to jump between pages in the document.
 - The pan mode (hand) icon
 allows you to select the document and drag it up or down to pan the page.
 - The magnifying glass icons
 allow you to zoom in or out on the document.
 - The Fit page icon
 allows you to toggle the document view to either fit the whole page in the frame, or fit it to the width of the frame.
- The thumbnail icon
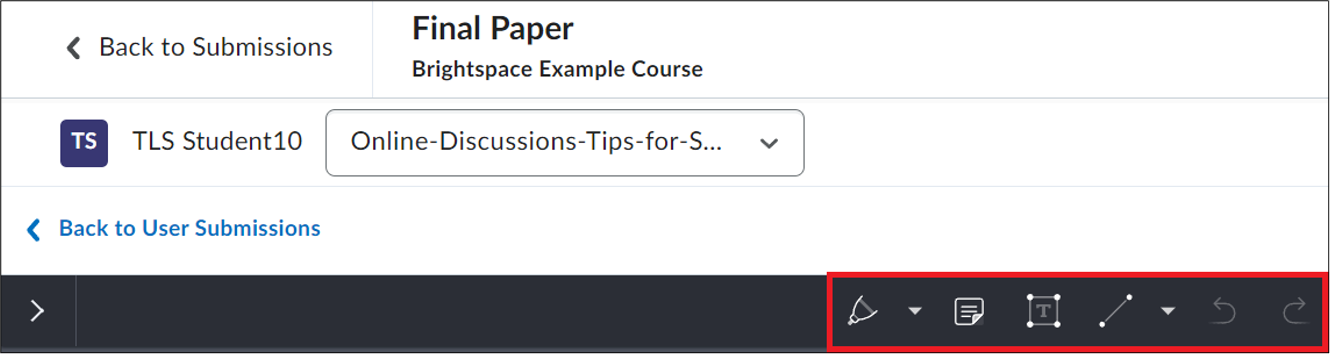
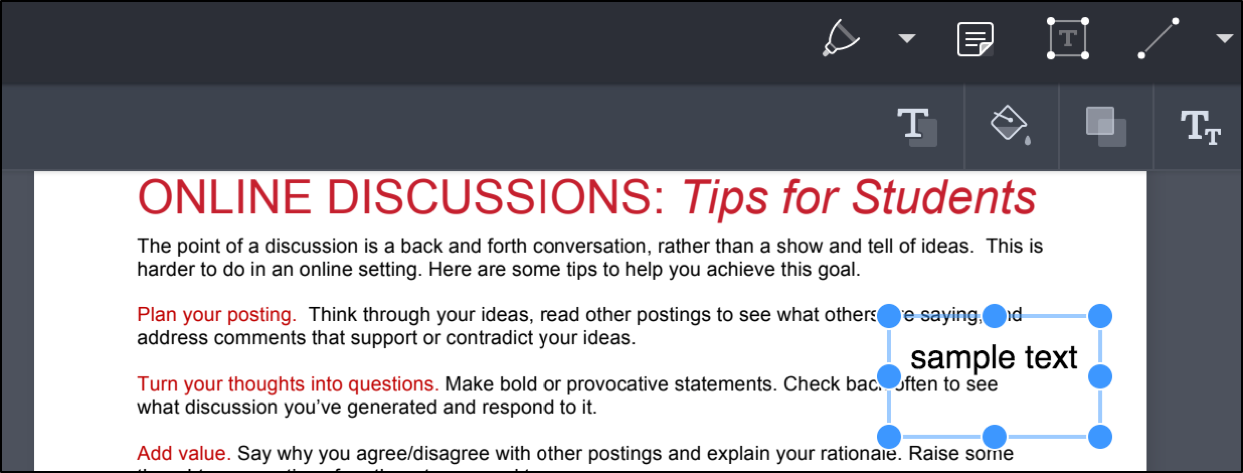
- On the right side of the document viewer toolbar, select the Annotation (pen) icon to expand the annotation toolbar options.
- You will now see the annotation toolbar icons in the right-hand side of the toolbar.
Annotation ToolFunctionDrawing The drawing (pen) button allows you to draw free-hand on the page using your cursor. Once the Pen button is selected, a toolbar with a toolbar of line type settings options (colour, fill colour, opacity, thickness, blend mode) will appear below the button.
To draw freehand:- Select the drawing pen button.
- Select and drag to draw on the document. .
Note
 The note button allows you to add notes to the document. Once the note icon is selected, a toolbar will appear where you can adjust the note settings (colour, icon). The note will appear on the document as a note icon
  that students can view when they hover their cursor over note.
To add a note:
- Select the note button.
- Select the page where you would like the note to be located.
- Type your note text.

Text
 The text button allows you to add text to the document. Once the text button is selected, a toolbar of text formatting options (colour, fill colour, opacity, font) will appear below the button.
To add text:- Select the Text button and select the page where you would like the text to be located.
- Type you text as you want it to appear on the document. Use the formatting options to customize the font style and colour.
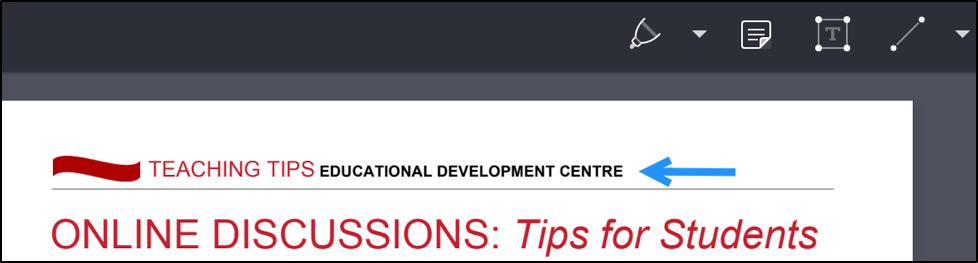
Line
 The Line button allows you to add a line or arrow to the document. Once the Line button is selected, a toolbar of line type settings options (colour, fill colour, opacity, thickness, style) will appear below the button.
To add a line:- Select the line button
- Customize the line appearance using the options in the expanded toolbar.
- Select and drag your cursor to place a line on the page.
- When you are finished annotating the document, select Save as Draft. If you are ready to publish your annotations and feedback, select Publish.
Upload Feedback Files
- Log into Brightspace using your MyCarletonOne credentials.
- On the Brightspace homepage, locate your course in one of the following ways:
- Select the course tile under the My Courses widget.
- Select the Course Selector Grid and select the course from the drop-down menu. If you are enrolled in more than 20 courses, you can search for the course name using the search bar.
- In the navbar, select Tools.
- In the drop-down menu, select Assignments.
- Locate the assignment in the Assignments table and select the arrow to expand the assignment actions menu.
- In the drop-down menu, select View Submissions.
- Select the name of the student you want to grade. Alternatively, you can select the file attachment. You will be taken to the document viewer where you can view and grade the submission.
TIP: Select the expand button
to open the document viewer in fullscreen. In fullscreen view, the annotation toolbar will display options in a more detailed and accessible way. - Enter a Score in the Overall Grade field.
- Enter Feedback in the Feedback field.
- To attach a file, select the Upload File button

- In the Add a File pop-up window, upload your file in one of the following ways:
- Drag and drop your file into the upload area.
- Select Upload and select a file from your computer.
- Select Add. You will now see your file listed below the Attachments heading.
- When you are finished providing feedback, select Publish to release the grade/feedback to students. You can select Save Draft if you want to release the grade/feedback at a later date.
Grade Offline and Bulk Upload Feedback Files
NOTE: This feature is not compatible with the Anonymous Grading option at this time.
To download the students’ assignments for grading offline
- Log into Brightspace using your MyCarletonOne credentials.
- On the Brightspace homepage, locate your course in one of the following ways:
- Select the course tile under the My Courses widget.
- Select the Course Selector Grid and select the course from the drop-down menu. If you are enrolled in more than 20 courses, you can search for the course name using the search bar.
- In the navbar, select Tools.
- In the drop-down menu, select Assignments.
- Select the assignment name.
- Adjust the per page value at the bottom of the Assignment Submission page so that all students appear on one page. (Note: The maximum value is 200. For a course with enrolment higher than 200, the steps below will need to be followed for each page of student submissions.)

- Select the checkbox at the top of the list to select all students/submissions.

- Select the Download button just above the list of students.
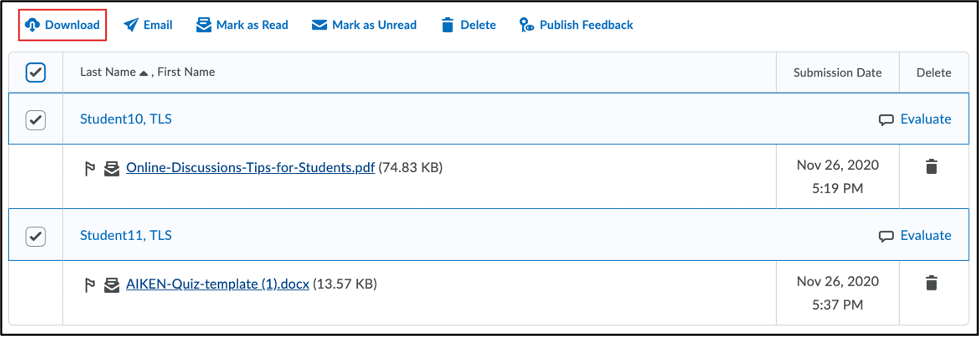
- A pop-up window will appear on the screen while Brightspace prepares a zip file containing all the students/submissions that have been selected. When the package is ready, select the Download button in the pop-up window to save the zip file to your computer.
NOTE: The original ZIP file contains a subfolder for each user submission with a numeric ID prefixed to the folder name, which can make it difficult to import back into Brightspace. If you’d like to remove the numeric IDs, use the Bulk Assignment Renamer in the Converter dropdown menu (found in the navbar).
- Extract the zip file. This will create a submission folder for every student who has made a submission.
WARNING: Do not change the title of the submission folder. Doing so can affect importing feedback files to Brightspace.
- Open a student submission folder.
- Evaluate the assignment and add feedback.
- Save your changes on each file.
- Repeat steps 11 to 13 for each student submission folder.
- Once you have evaluated and added feedback to all submission files and saved them, select all the updated folders and create a .zip folder.
NOTE: If you have any learner names with characters that cannot be used in a compressed folder, such as Ø, rename that folder and reattempt to create a .zip folder. Do not change the ID prefixed to the name of the folder.
To upload the feedback package to Brightspace:
NOTE: Before uploading feedback files, you must re-zip the parent folder that contains all of the student folders. Brightspace will not accept an un-zipped folder if you try to upload it. If you have previously used the Assignment Converter to alphabetically rename the sub-folders, then you will need to re-run the new ZIP file back through the “Un-Convert” feature of the Assignment Converter to undo those changes.
- Log into Brightspace using your MyCarletonOne credentials.
- On the Brightspace homepage, locate your course in one of the following ways:
- Select the course tile under the My Courses widget.
- Select the Course Selector Grid and select the course from the drop-down menu. If you are enrolled in more than 20 courses, you can search for the course name using the search bar.
- In the navbar, select Tools.
- In the drop-down menu, select Assignments.
- Select the assignment name.
- Select the Add Feedback Files button at the top of the Assignment Submission page. A pop-up window will appear on the screen.
- Drag and drop the zip file into the upload field of the pop-up window. (Or select the “Upload” button to browse your computer for the zip file.)
- Select the Add button at the bottom of the pop-up window.
- Once you select the “Add” button, Brightspace will start extracting the contents of the zip file and distributing them across the students’ submissions. This may take some time, depending on the number of files / size of the import. When the process is complete, the pop-up window will close, and a message will appear briefly at the bottom of the screen stating that X number of files were successfully uploaded.
Bulk Upload Feedback Files Only
If you are not annotating the assignments but creating separate feedback files: follow the steps in the Grade Offline/Bulk Upload section above but remove the students’ original submissions from the folders before uploading the feedback package. Otherwise, Brightspace will also attach the students’ original submissions as feedback files.
Providing Video or Audio Feedback
Video Notes can be used to provide video feedback for assignments. You can record a video note while providing feedback in the document viewer. For more information on creating video notes, see the Creating Video Notes page.
- Log into Brightspace using your MyCarletonOne credentials.
- On the Brightspace homepage, locate your course in one of the following ways:
- Select the course tile under the My Courses widget.
- Select the Course Selector Grid and select the course from the drop-down menu. If you are enrolled in more than 20 courses, you can search for the course name using the search bar.
- In the navbar, select Tools.
- In the drop-down menu, select Assignments.
- Locate the assignment in the Assignments table and select the arrow to expand the assignment actions menu.
- In the drop-down menu, select View Submissions.
- Select the name of the student you want to grade. Alternatively, you can select the file attachment. You will be taken to the document viewer where you can view and grade the submission.
- In the panel on the right side of the document viewer, select Record Video or Record Audio.
- You will be prompted to allow brightspace.carleton.ca to use your camera and/or microphone. Select Allow.
- Select the New Recording button to begin recording.
- Select Stop Recording when you are done recording your message.
- If you are satisfied with your recording, select Next.
- Customize the following details:
- a title and description for your video
- Select an audio language for your video from the drop–down menu.
- Select Next.
- A preview window will appear. If you are satisfied with your video, select Insert.
Was this page helpful?
18 people found this useful
Still need help? Contact us