- Delete Categories and Grade Items
- Edit Categories and Grade Items
- Hide/Show Categories and Grade Items
- Reorder Your Gradebook
- Bulk Edit Categories and Grade Items
- View Event Logs
Once you have set up your gradebook, you can manage student grades and modify your grade items or categories in the Manage Grades tab.
![]()
Related Support Topics:
- Setting up your Gradebook using the Setup Wizard
- Creating Grade Items
- Creating Grade Categories
- Entering Grades and Feedback
Delete Categories and Grade Items
- Log into Brightspace using your MyCarletonOne credentials.
- On the Brightspace homepage, locate your course in one of the following ways:
- Select the course tile under the My Courses widget.
- Select the Course Selector Grid
 and select the course from the drop-down menu. If you are enrolled in more than 20 courses, you can search for the course name using the search bar.
- In the navbar, select Progress.

- In the drop-down menu, select Grades.
- Select the Manage Grades tab.

- Select the More Actions button, then select Delete in the drop-down menu.

- Select the checkboxes to select the grade items or categories you want to delete.
- You will be prompted to confirm that you want to delete the selected grade items or categories. Select Yes.
Edit Categories and Grade Items
Edit grade item or category settings.
- Log into Brightspace using your MyCarletonOne credentials.
- On the Brightspace homepage, locate your course in one of the following ways:
- Select the course tile under the My Courses widget.
- Select the Course Selector Grid and select the course from the drop-down menu. If you are enrolled in more than 20 courses, you can search for the course name using the search bar.
- In the navbar, select Progress.
- In the drop-down menu, select Grades.
- Select the Manage Grades tab.
- Select the name of the category or grade item you wish to edit.
- You will be taken back to the page where you initially configured your category or grade item settings. Make your desired changes.
- Select Save.
Hide/Show Categories and Grade Items
Hide your grade items/categories or make your grade items/categories visible to students
- Log into Brightspace using your MyCarletonOne credentials.
- On the Brightspace homepage, locate your course in one of the following ways:
- Select the course tile under the My Courses widget.
- Select the Course Selector Grid and select the course from the drop-down menu. If you are enrolled in more than 20 courses, you can search for the course name using the search bar.
- In the navbar, select Progress.
- In the drop-down menu, select Grades.
- Select the Manage Grades tab.
- Select the arrow
 beside the Grade Item you want to show or hide.

- Select Make Visible to Users if you want to show the grade to students. Select Hide from Users if you want to make the grade invisible.
Reorder Your Gradebook
Adjust the order of grade items and categories in your gradebook.
- Log into Brightspace using your MyCarletonOne credentials.
- On the Brightspace homepage, locate your course in one of the following ways:
- Select the course tile under the My Courses widget.
- Select the Course Selector Grid and select the course from the drop-down menu. If you are enrolled in more than 20 courses, you can search for the course name using the search bar.
- In the navbar, select Progress.
- In the drop-down menu, select Grades.
- Select the Manage Grades tab.
- Select the More Actions button, then select Reorder in the drop-down menu.
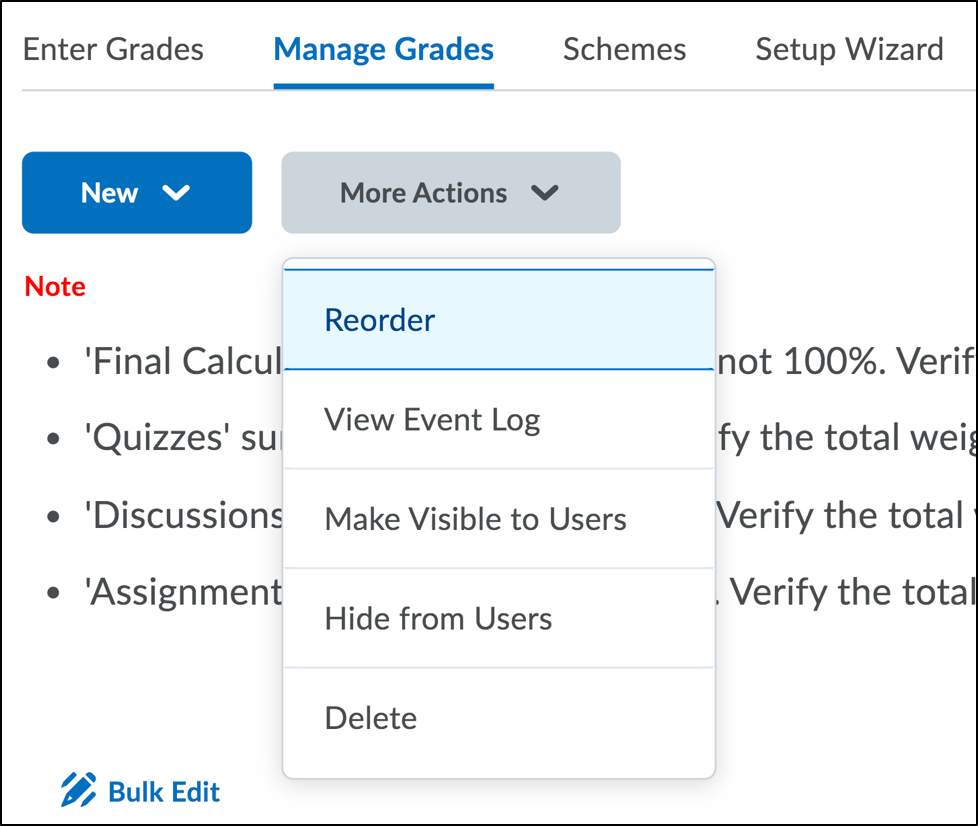
- Use the number drop-down menus in the Sort Order column to adjust the order of your categories and grade items.
NOTE: Once you adjust the sort order for a grade item or category, the order of other grade items and categories will adjust accordingly. - Select Save.
Bulk Edit Categories and Grade Items
- Log into Brightspace using your MyCarletonOne credentials.
- On the Brightspace homepage, locate your course in one of the following ways:
- Select the course tile under the My Courses widget.
- Select the Course Selector Grid and select the course from the drop-down menu. If you are enrolled in more than 20 courses, you can search for the course name using the search bar.
- In the navbar, select Progress.
- In the drop-down menu, select Grades.
- Select the Manage Grades tab.
- Select the checkboxes to select the grade items or categories you want to edit.
- Select Bulk Edit.
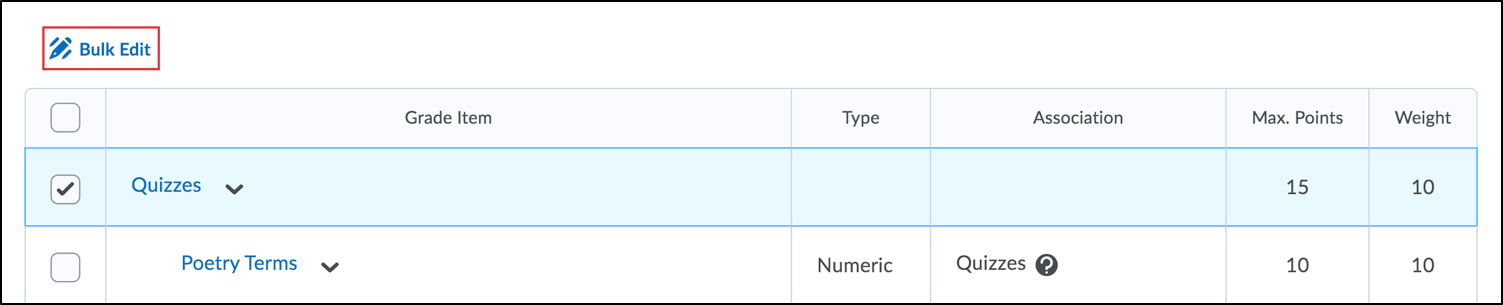
- You will be taken to the Bulk Edit Items and Categories page where you can edit the following:
- Edit grade item or category names under the Name column
- Edit grade item or category short names under the Short Name column.
- Edit grade item or category weight under the Weight column.
- Select if you want to allow the grade to exceed 100% in the Can Exceed column
- Select Save.
View Event Logs
- Log into Brightspace using your MyCarletonOne credentials.
- On the Brightspace homepage, locate your course in one of the following ways:
- Select the course tile under the My Courses widget.
- Select the Course Selector Grid and select the course from the drop-down menu. If you are enrolled in more than 20 courses, you can search for the course name using the search bar.
- In the navbar, select Progress.
- In the drop-down menu, select Grades.
- Select the Manage Grades tab.
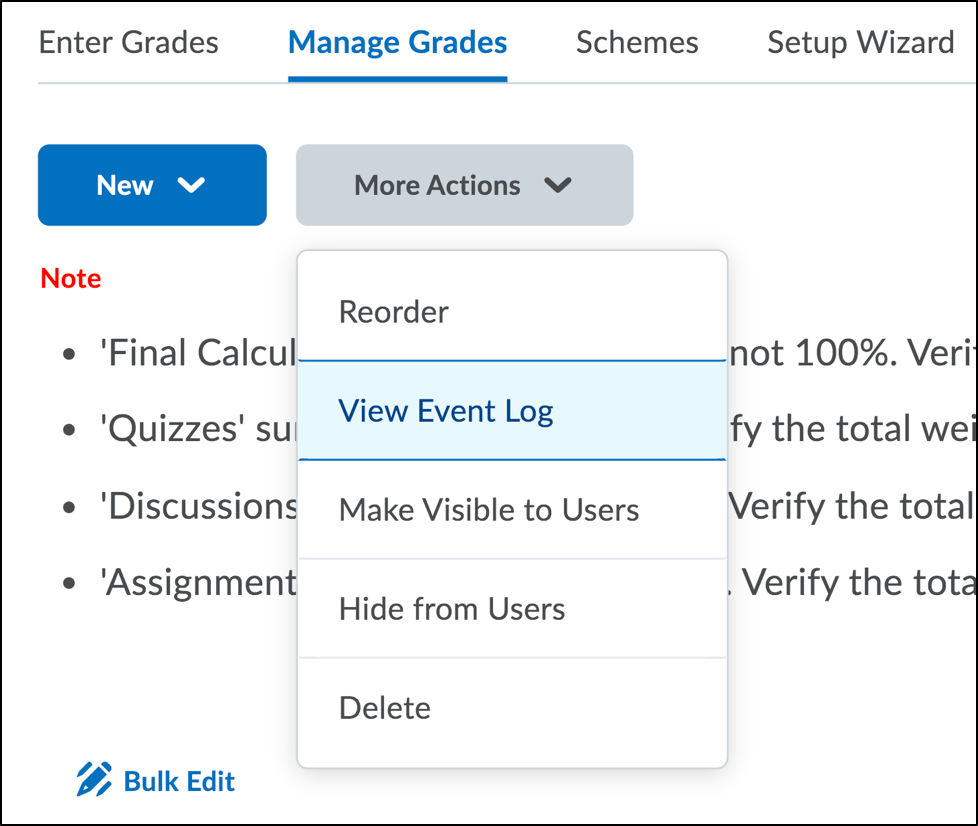
- Select the More Actions button, then select View Event Log in the drop-down menu.
Was this page helpful?
3140
11bdab693f
1 Person found this useful
Still need help? Contact us