- Adding Discussions
- How Students can Send Emails from Discussions
- Creating Groups
- How Students can Email a Group
As of October 2021, the Classlist tool is disabled for students in D2L Brightspace, meaning that students will not be able to access a list of class names or email addresses in Brightspace courses. The decision to remove the Classlist for students was made at the advice of the Carleton Privacy Office. Instructors can facilitate the exchange of contact information between students in Brightspace by creating discussion forums or groups, or by setting up a virtual meeting room (BigBlueButton or Zoom).
Instructors have the following options for alternative communication within Brightspace:
- Add Discussions – students can post messages to the entire class, and/or can click another classmate’s icon in a discussion post to see an option to email their classmate individually
- Create Groups – inside the Groups tool, students can email their group members; a group can be set up for the entire class to allow emailing capability, if desired
- Enable Zoom or BBB webconferencing “lounges” – students can meet online and chat in real time; students can share information in those sessions and share their personal contact information if they decide to do so or an collaborate in the online space
- Request the Classlist be turned back on in your course –if an instructor feels strongly that the Classlist should be available within the course, you can request that the Classlist be added back to the student Tools menu. If you choose this option, please talk to your students about acceptable use in you course and Carleton IT policies. Be aware that students may object and ask to opt out of having their names visible in the Classlist. If you would like the Classlist to be visible to students in your course, you can submit a request via the TLS Support Portal.
Adding Discussions
Instructors can set up a discussion forum as a space where students can collaborate and exchange contact information. Student’s can post their contact information in a thread or reply, or they can email an individual discussion member by clicking on their user profile. Students can also use @mentions to tag other discussion members in posts or replies. Access to discussions can be restricted by course group. If you add group restrictions to a discussion, students will only see the group they are enrolled in when viewing the discussion forum.
- How to Create a Discussion
To create a Discussion, you will need to set up a forum with one or more discussion topics, or add a topic to an existing forum in your course. For more instructions, see the Discussions page.
| Create a Forum |
- Log in to Brightspace with your MyCarletonOne credentials.
- On the Brightspace homepage, locate your course in one of the following ways:
-
- Click on the course tile under the My Courses widget.
- Click the Course Selector Grid
 and select the course from the drop-down menu. If you are enrolled in more than 20 courses, you can search for the course name using the search bar. and select the course from the drop-down menu. If you are enrolled in more than 20 courses, you can search for the course name using the search bar.
- In the navbar, click Tools.

- In the drop-down menu, select Discussions.
- Under the Discussions List tab, click the New button.
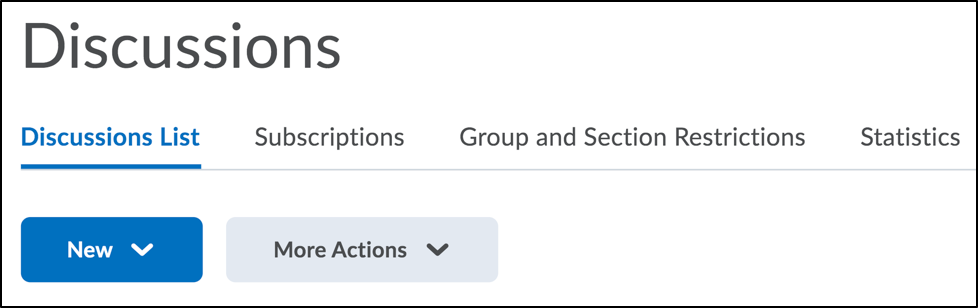
- In the drop-down menu, select New Forum.
- Enter a title for your new forum.
- Enter a description for your new forum (optional).
- In the Options section, customize your forum using one or more of the following check boxes: NOTE: If you apply settings at the forum level, all topics in that forum will share these settings. If you prefer to have different settings for each topic, apply the desired settings within the topic itself.
- Allow anonymous posts– Enables users to post anonymously; Names will not be displayed.
NOTE: Anonymous posts cannot be evaluated.
- A moderator must approve individual posts before they display in the forum– To ensure that posts are approved by a moderator before they display in the forum.
- Users must start a thread before they can read and reply to other threads in each topic– To ensure user participation.
- Display forum descriptions in topics– To provide instructors the option to display a discussion forum description within a discussion topic description.
| NOTE: For additional information on managing discussion forums, see INSERT LINK TO MANAGING DISCUSSION FORUMS HELP PAGE |
- Under the Restrictions tab, you have to option to customize the following settings:
- Under Availability, select your preferred permissions for the discussion forum including hiding, start and end dates.
- Under Locking Options, customize the lock settings for your forum. Locking a forum prevents users from posting to any of its associated topics until it is unlocked; they can still read post made to a topic prior to it being locked.
| NOTE: Forums are unlocked by default. |
- Click Save and Close.
You have now created a Discussion forum and need to add at least one topic in order for students to be able to post. |
| Create a Discussion Topic |
- Log in to Brightspace with your MyCarletonOne credentials.
- On the Brightspace homepage, locate your course in one of the following ways:
-
- Click on the course tile under the My Courses widget.
- Click the Course Selector Grid and select the course from the drop-down menu. If you are enrolled in more than 20 courses, you can search for the course name using the search bar.
- In the navbar, click Tools.
- In the drop-down menu, select Discussions.
- Under the Discussions List tab, click the New button.
- In the drop-down menu, select New Topic.
- Under the Properties tab, enter the following New Topic Details:
- From the Forum drop-down list, select the forum you want to place your topic in or click New Forum to create a new forum for your topic.
- Enter a topic title.
- Enter a topic description (optional).
- Under Options, you can select one or more of the following settings:
- Allow anonymous posts – Selecting this option allows users to post anonymously to the topic. Anonymous posts display with the author “Anonymous” in the thread.
- A moderator must approve individual posts before they display in the topic – Selecting this option will require a moderator to approve posts in this topic before they display to users.
- Users must start a thread before they can read and reply to other threads – Selecting this option will require a user to start a new thread in the topic before viewing or replying to other threads in the topic. If this topic requires post approval, users will not be able to view or reply to other threads until their thread is approved.
- Under Rate posts, you have the option to enable post ratings for the discussion topic. You can choose from the following rating schemes:
- No Ratings (Default) hides all rating controls from users.
- Five-Star Rating Scheme allows users to assign each post a score out of five.
- Up Vote/Down Vote Rating Scheme allows users to increase or decrease a post’s rating.
- Up Vote Only Rating Scheme allows users to increase a post’s rating.
- To grant everyone access to the topic and restrict learners to only see threads from their own group or section, under Topic Type, select Group or section topic.
| WARNING: You cannot edit the topic type once you save the topic. |
- Enter your New Topic Details including title, description, options, ratings.
| TIP:Options have three additional settings that may be beneficial for a discussion forum including anonymous posting, posts to be approved by a moderator, and posting before viewing other threads on the discussion forum. Use your discretion which option(s) you would like to apply to your discussion topic. |
- Under the Restrictions tab, customize the following settings:
- Under Availability, select your preferred permissions for the discussion forum including hiding, start and end dates.
- Under Locking Options, customize the lock settings for your forum. Locking a forum prevents users from posting to any of its associated topics until it is unlocked; they can still read post made to a topic prior to it being locked.
| WARNING: Locking a forum prevents users from posting to it while locked. Posting to the forum will not be available until the topic is unlocked again. Students can still read posts made prior to the forum being locked. |
- Click Save and Close. You have now created a topic under a discussion forum. You may wish to add more topics to the discussion forum by following the steps listed.
|
How Students can Send Emails from Discussions
Emailing an Individual Student in a Discussion
By clicking on a user’s profile icon in a discussion, students can use the Send Email button to email an individual course member. 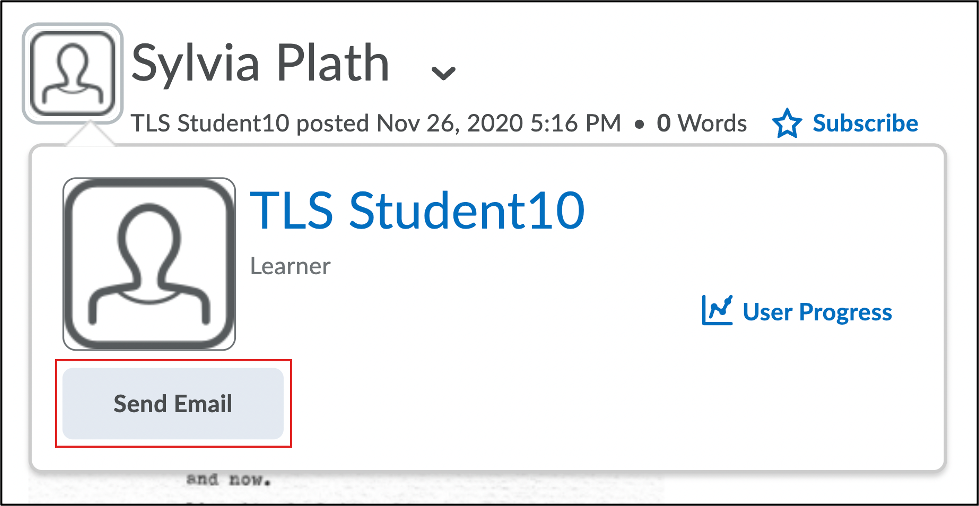
Using @Mentions in Discussions
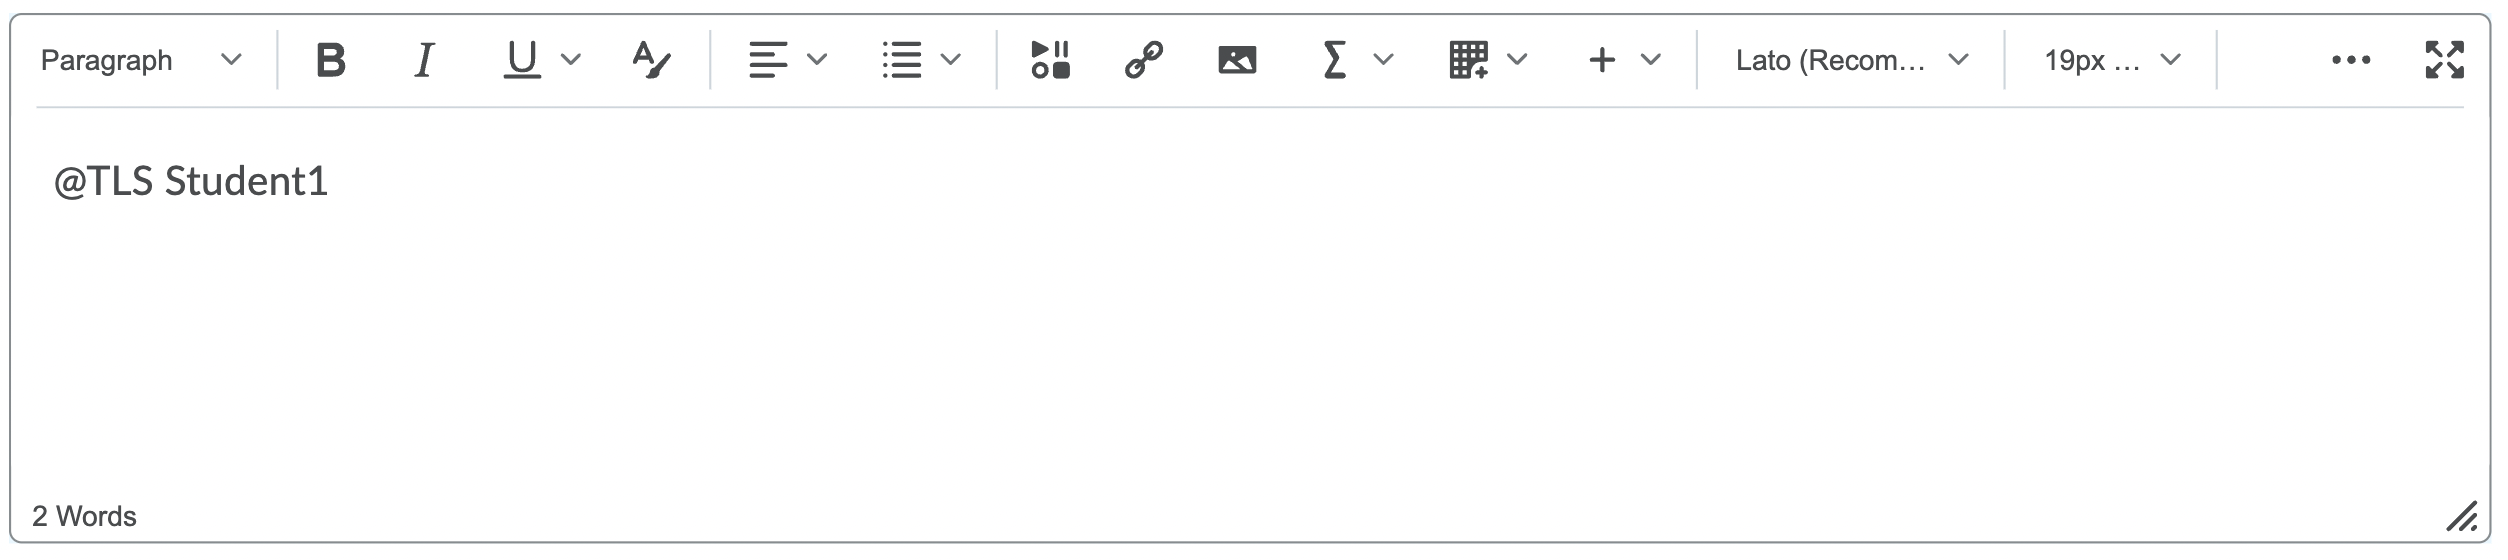
Students can use @mentions to tag course participants when posting in a discussion thread. When a user is tagged with an @mention, they will receive a subscription alert in their minibar. If students have enabled email notifications for @mentions in their notification settings, they will also receive an email from noreply@brightspace.carleton.ca directing them to the thread they were tagged in. For instructions, see Using @Mentions in Discussions.
| PLEASE NOTE: |
- Students can only tag other enrolled course members in discussions.
- In order to receive an email notification for an @mention, students will need to enable the Discussions – mentioned in a discussion post or thread instant notification setting. Students can refer to the Customizing Notification Settings page for instructions.

|
Creating Groups
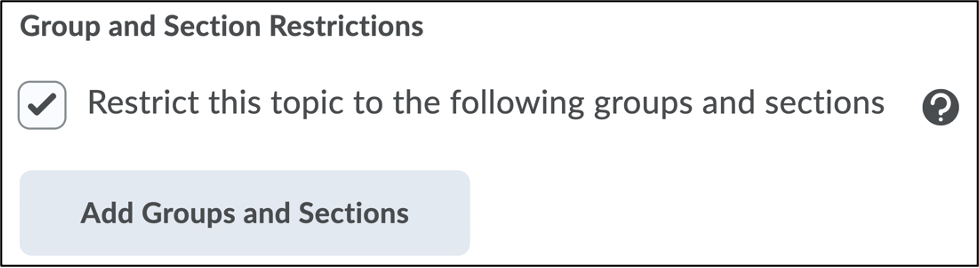
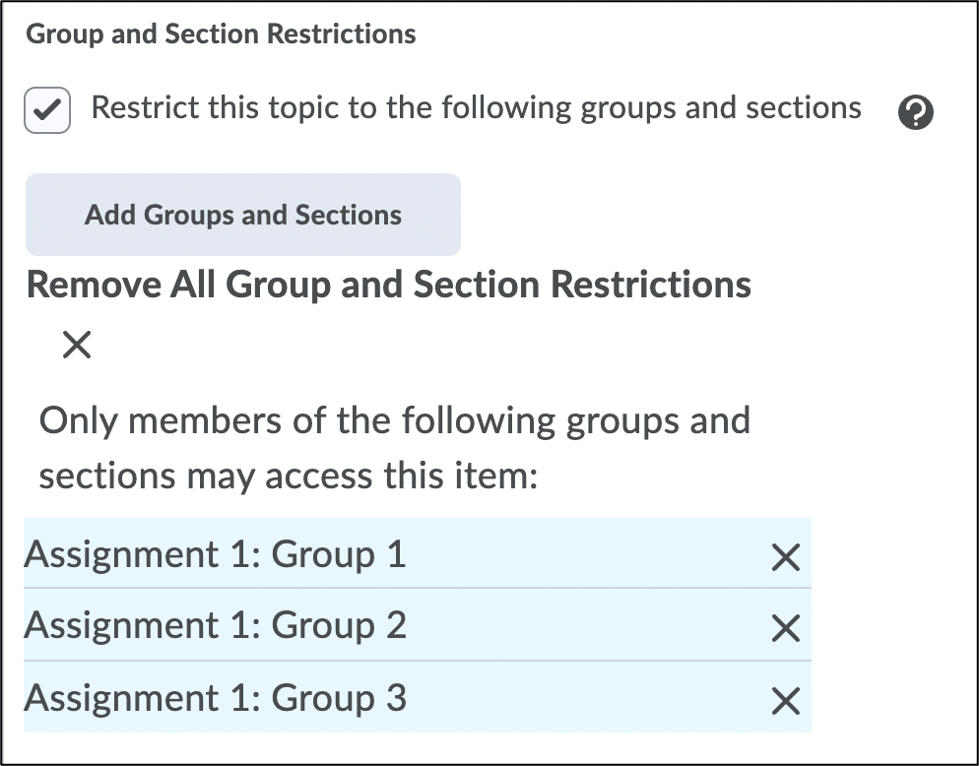
When you create groups in your course, students will be able to view how many members are enrolled and send emails to their group(s). If you want to allow students to email the entire class, you can create a group with all course participants enrolled. You also have the option to create groups with restricted discussion areas, or you can Set Group Restrictions for an Existing Discussion Topic.
- How to Create Group Categories
| Create a Group Category |
- Log in to Brightspace with your MyCarletonOne credentials.
- On the Brightspace homepage, locate your course in one of the following ways:
-
- Click on the course tile under the My Courses widget.
- Click the Course Selector Grid and select the course from the drop-down menu. If you are enrolled in more than 20 courses, you can search for the course name using the search bar.
- In the navbar, click Tools.

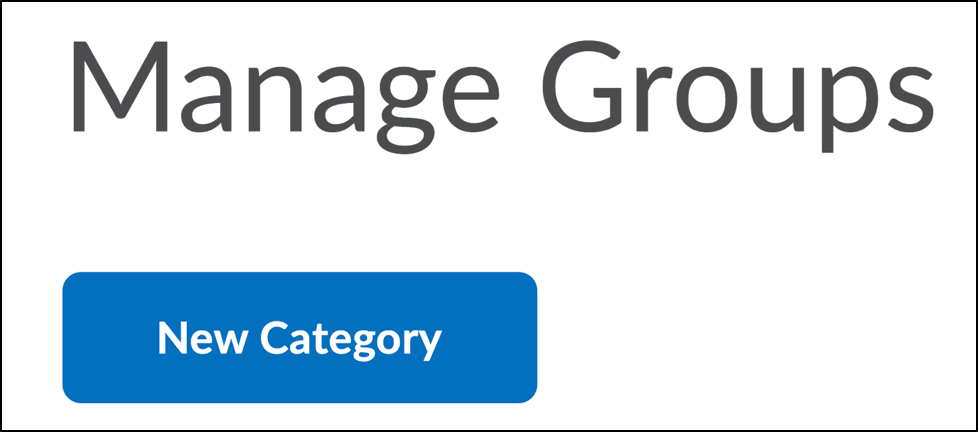
- In the drop-down menu, select Groups. You will be taken to the Manage Groups page.
- Click the New Category button.
- Enter a name for the category.
- Select an Enrollment type from the drop-down menu. See a description of the enrolment type options in the table below.
- Enter the number of groups to create and/or the number of students per group.
- To apply a distinctive prefix to each group name and code in the category, enter it in the Group Prefix field. If you do not fill in this field, the prefix defaults to “Group”.
- Under Advanced Properties, you have the option to make category and group descriptions visible to group members.
- Under Additional Options, you have the option to setup a discussion area workspace, group lockers, or a dropbox folder for each group to submit their assignments in.
- Click Save to save your settings and return to the Manage Groups page.
|
- How to Enroll Course Participants to a Group
-
| Assign Students or TAs to Groups |
- Log in to Brightspace with your MyCarletonOne credentials.
- On the Brightspace homepage, locate your course in one of the following ways:
-
- Click on the course tile under the My Courses widget.
- Click the Course Selector Grid and select the course from the drop-down menu. If you are enrolled in more than 20 courses, you can search for the course name using the search bar.
- In the navbar, click Tools.
- In the drop-down menu, select Groups. You will be taken to the Manage Groups page.
- Select a group category from the View Categories drop-down list to view all groups within that category.
- Click the drop-down arrow
 next to the category name in your groups table, then select Enroll Users. next to the category name in your groups table, then select Enroll Users.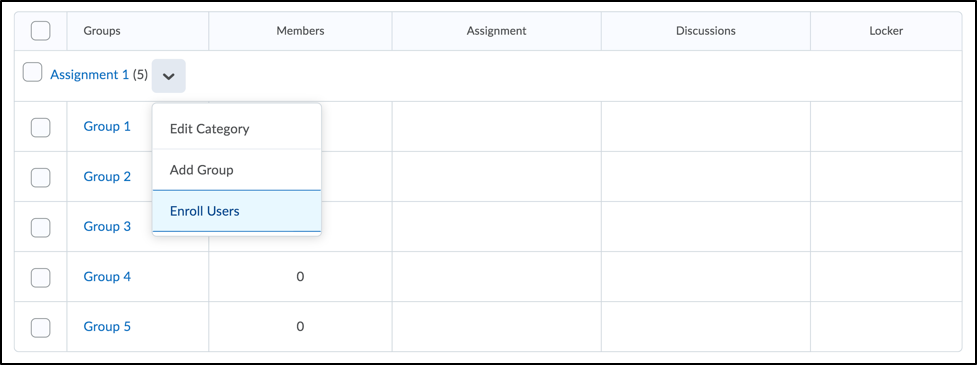
- On the Enroll Users page, scroll down to the table listing all users enrolled in your course.
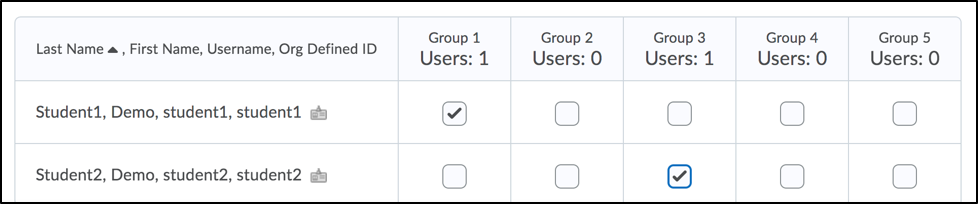
- To add a user to a group, check the box for that user in the appropriate group column.
- To remove a user from a group, uncheck the box for that student in the appropriate group column.
| TIP: Search for a student’s name in the search field to jump to a specific student, or click Show Search Options to access more search filters, including the options to view all users who are currently not enrolled in a group. |
- Click Save to save your enrollments and return to your Manage Groups page.
|
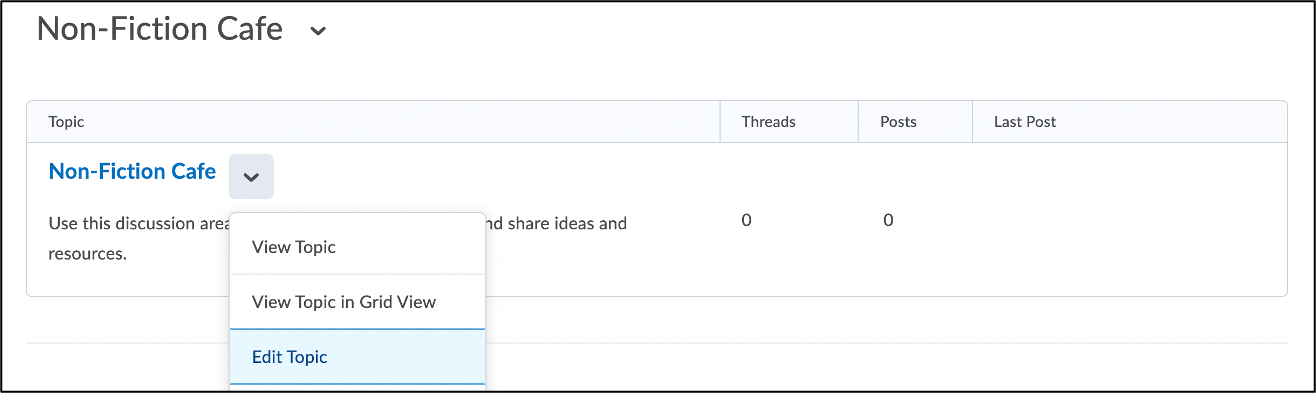
- How to Create Groups with Restricted Discussion Areas
-
To create a group with a discussion area:
- Log in to Brightspace with your MyCarletonOne credentials.
- On the Brightspace homepage, locate your course in one of the following ways:
-
- Click on the course tile under the My Courses widget.
- Click the Course Selector Grid and select the course from the drop-down menu. If you are enrolled in more than 20 courses, you can search for the course name using the search bar.
- In the navbar, click Tools.
- In the drop-down menu, select Groups. You will be taken to the Manage Groups page.
- Click the New Category button.
- Enter a name for the category.
- Select an Enrollment type from the drop-down menu.
- Enter the number of groups you wish to create and/or the number of students per group.
- To apply a distinctive prefix to each group name and code in the category, enter it in the Group Prefix field. If you do not fill in this field, the prefix defaults to “Group”.
- Under Advanced Properties, you have the option to make category and group descriptions visible to group members.
- Under Additional Options, select Set up discussion areas. Configure the following Forum settings:
- Select an existing forum from the Forum drop-down menu or click New Forum to create a new forum.
- Choose one of the following options:
- Create New Topic: Create a new discussion topic to restrict with this group category
- Attach to Existing Topic: Create a group-restricted thread in an existing discussion topic. *This option is only available for empty topics without previous group restrictions or posts.
- Click Save. If you selected, Create New Topic, you will be taken to the Create Restricted Topics page.
- Under Group Discussion, select one of the following options:
- Create one topic per group (1 topic total): Each group has a separate, restricted topic.
- Create on topic with threads separated by group: Groups share one group-restricted thread in a single topic.
- Edit the title and add a description (optional)
- You will now see a Workspace Summary displaying how many forums and topics were created. Click Done to return to the Edit Category page.
- Click Save at the bottom of the Edit Category page.
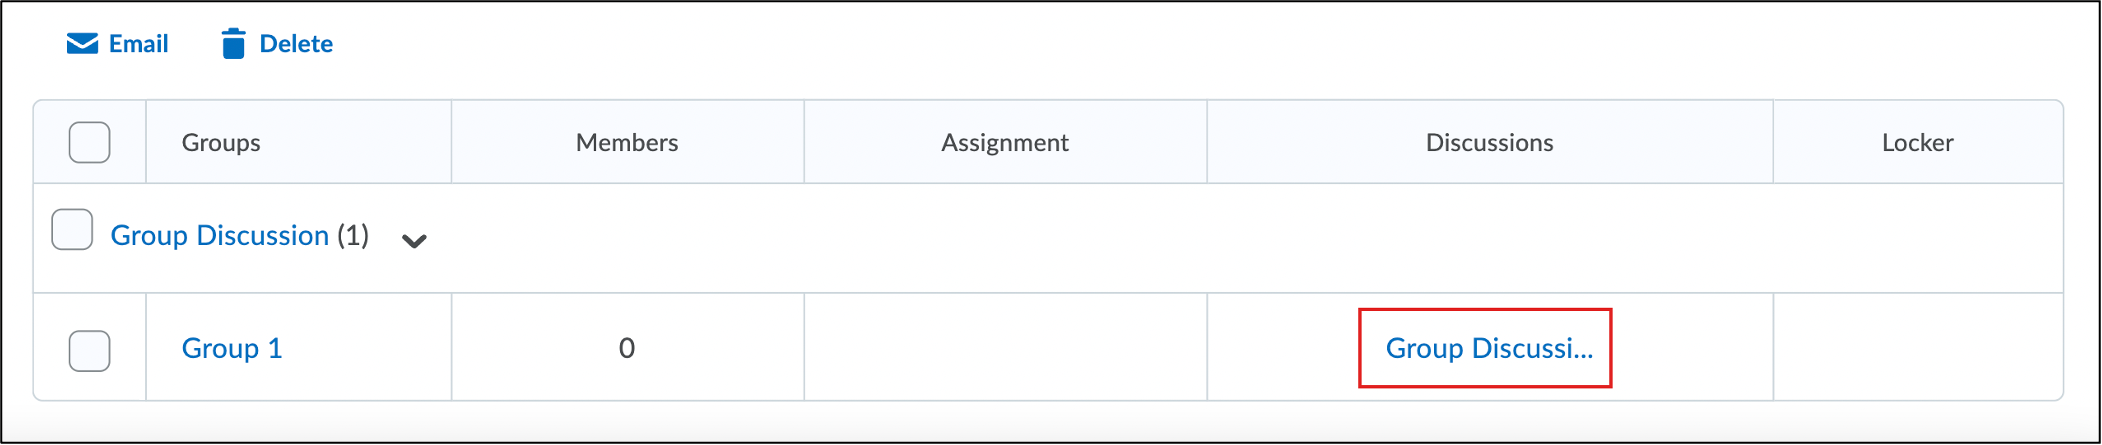
You will now see a link to the group discussion area(s) on your Manage Groups page.
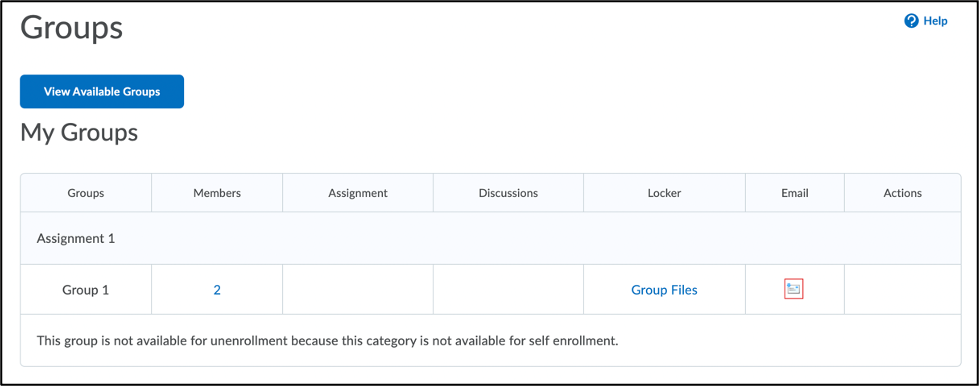
How Students can Email a Group
Students can email groups by clicking the email icon  in the groups tool. When a group member sends an email, their email address will visible as the email sender. Students can refer to the Emailing Groups page for instructions.
Was this page helpful?
4677
5c92b285cb
Thank you for your feedback.
1 Person found this useful
Still need help? Contact us
Share: Twitter, Facebook
Short URL:
https://carleton.ca/brightspace/instructors/?p=4677