- Assigning a Letter Grade Scheme to your Final Grade Column
- Organizing the Columns in Excel for E-grades
E-grades is Carleton’s final grade entry and approval system accessed through Carleton Central. Within E-grades, instructors can enter grades manually for each student or import/copy and paste grades into E-grades.
While D2L Brightspace can be used for grading and assessment, there is no direct connection between Brightspace and the E-Grades system. However, grades can be exported from Brightspace as a letter grade and then copied into E-grades for final grade submission.
| NOTE: The Registrar’s Office provides support for E-grades and have provided some instructions and screenshots below. For full instructions and help with E-grades, please visit the help file in the E-grades page or contact Systems and Training Support: Faculty_Systems_Support@carleton.ca. If you need assistance with exporting your grades from Brightspace, please submit a support request using the TLS support portal. |
There are four processes involved in submitting your final grades to E-grades:
- Assigning a Letter Grade Scheme to your Final Grade Column
- Exporting grades from Brightspace
- Organizing the Excel columns for E-Grades
- Copying and Pasting the grading information from Excel to E-Grades
Each of these four processes is explained below.
Assigning a Letter Grade Scheme to your Final Grade Column
There are two types of final grades in Brightspace: Final Calculated Grade and Final Adjusted Grade. If you want to leave your grades without any changes, you can export the Final Calculated Grades. If you need to modify any final grades, you should export the Final Adjusted Grades. Whether you are using Final Calculated Grades or Final Adjusted Grades, you will need to select a letter grade scheme before you export your grades.
→ For instructions on how to release final grades to students, refer to our support page: Releasing Final Grades to Students.
| NOTE: Brightspace does not round grades. That means that if a student has 79.99 their final grade will be a B+. If you would like to round it up to 80, and therefore an A-, you need to do that using Final Adjusted Grades. |
To Assign a Letter Grade Scheme to Final Calculated Grades
- Log into Brightspace using your MyCarletonOne credentials.
- On the Brightspace homepage, locate your course in one of the following ways:
- Select the course tile under the My Courses widget.
- Select the Course Selector Grid
 and select the course from the drop-down menu. If you are enrolled in more than 20 courses, you can search for the course name using the search bar.
- In the navbar, select Progress.

- In the drop-down menu, select Grades.
- Select the Enter grades tab.

- Select the arrow
 next to the Final Calculated Grade column and select Edit from the drop-down menu.
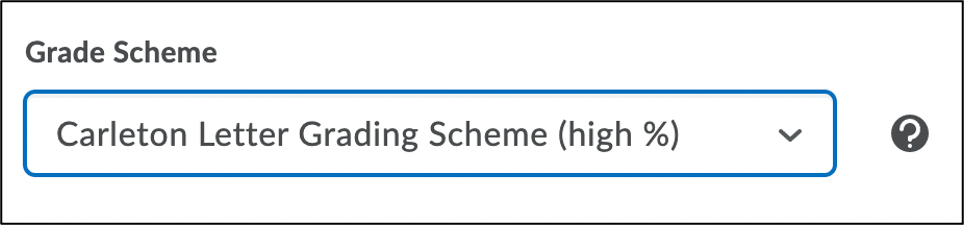
 - Go down to the Grade Scheme drop-down menu and change the scheme from Percentage Grade to Carleton Letter Grading Scheme (high, medium, or low will all work for this purpose).
- Select Save and Close.
You are now ready to export your final grades.
To Assign a Letter Grade Scheme to Final Adjusted Grades
To release final adjusted grades, you need to assign a letter grade scheme, then transfer student grades from the Final Calculated Grade column to the Final Adjusted Grade column.
To assign a letter grade scheme:
- Log into Brightspace using your MyCarletonOne credentials.
- On the Brightspace homepage, locate your course in one of the following ways:
- Select the course tile under the My Courses widget.
- Select the Course Selector Grid and select the course from the drop-down menu. If you are enrolled in more than 20 courses, you can search for the course name using the search bar.
- In the navbar, select Progress.
- In the drop-down menu, select Grades.
- Select the Enter grades tab.
- Go to the Final Grades column and select the arrow next to Final Adjusted Grade.
- Select Edit from the drop-down menu.
- Go down to the Grade Scheme drop-down menu and change the scheme from Percentage Grade to Carleton Letter Grading Scheme (high, medium, or low will all work for this purpose).
- Select Save and Close.
To Transfer Student Grades from the Final Calculated Grade Column to the Final Adjusted Grade Column
- Select the Enter Grades tab.
- Select the arrow next to the Final Calculated Grade column and select Enter Grades from the drop-down menu.
- Select the arrow next to the Final Grades title.

- Select Transfer All. This will move the Calculated grades into the Adjusted column.
- You will be prompted to confirm that you want to transfer the Final Calculated Grade to the Final Adjusted Grade. Select Yes.
- Select Save and Close.
- Adjust any final grades that need to be changed.
You are now ready to export your final grades.
To Export Grades from Brightspace
- Log into Brightspace using your MyCarletonOne credentials.
- On the Brightspace homepage, locate your course in one of the following ways:
- Select the course tile under the My Courses widget.
- Select the Course Selector Grid and select the course from the drop-down menu. If you are enrolled in more than 20 courses, you can search for the course name using the search bar.
- In the navbar, select Progress.
- In the drop-down menu, select Grades.
- Select the Enter grades tab.
- Select Export.
- Configure the following export options:
- Export Grade Items for:
- Select All Users if the course only has one section/course code.
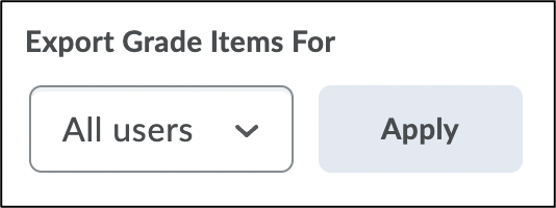
NOTE: For cross-listed and merged courses, select Section and select Apply to view the additional menu for isolating individual course codes. 
- Select All Users if the course only has one section/course code.
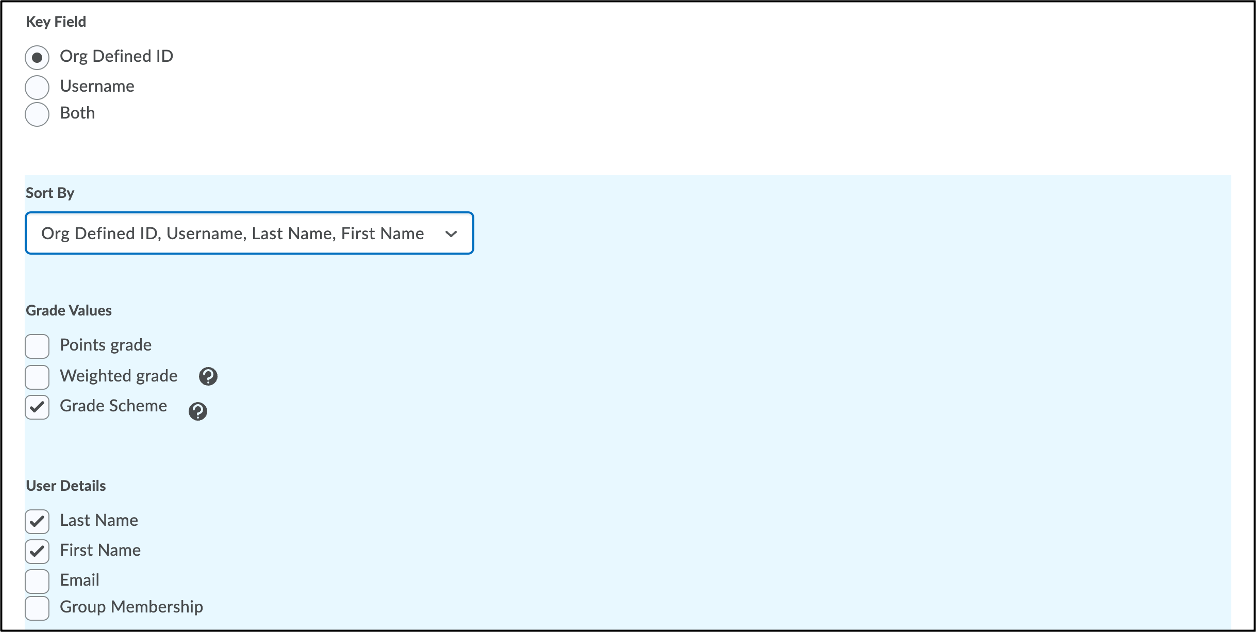
- Key Field: Org Defined ID (i.e., Student ID) is selected by default, meaning that the export will sort the exported list according to Student ID number.
- Sort by: This controls the order of the columns in the exported file. Select Org Defined ID, Username, Last Name, First Name from the drop-down menu.
- Grade Values: Select Grade Scheme.
- User Details: Select Last Name and First Name.
- Export Grade Items for:
- Go down to Choose Grades to Export, then select or deselect the grade items you want to export.
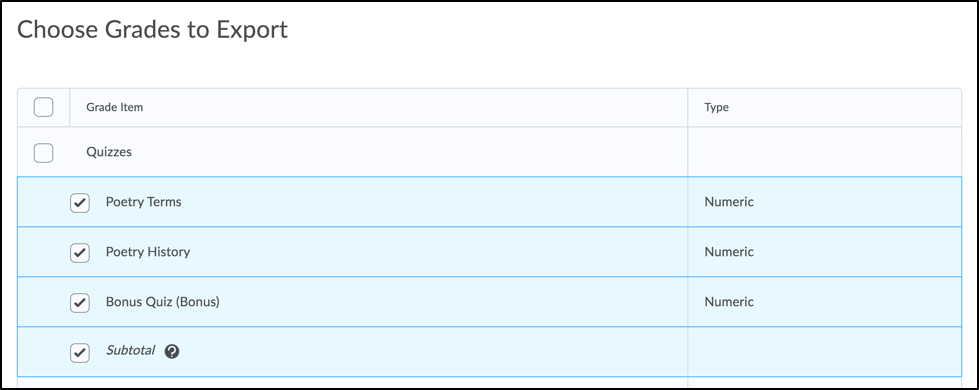
- Select Export to Excel.
- When the export is complete, select Download. The file will download to your computer.
Organizing the Columns in Excel for E-grades
| NOTE: You must remove any rows for Demo Learners in your course to be able to use the E-Grades system. If you do not remove Demo Learners you will receive an error. |
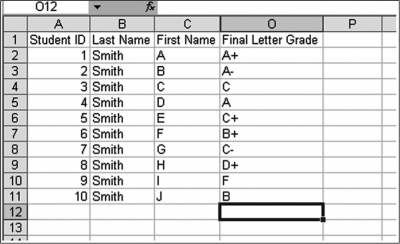
E-grades is very particular about the column headings and column order it will accept. E-grades will only accept the following columns in this order: Student ID, Last Name, First Name and Final letter Grade. (See the screen image below for a visual of an excel spreadsheet with appropriately titled columns.) Any other columns (including Demo Learners) in the Excel file must be deleted or moved.
| NOTE: Ensure that all final letter grades are single letter matching the 12 point grade scale. If the failure grade of F is written as F(fail), you will need to remove (fail). |
To Copy and Paste Grades from Excel to E-grades
- Log into E-Grades via Carleton Central and select the class you would like to submit grades for (See https://i.carleton.ca/registrar/grades/ for instructions and additional information.)
- Copy the data from Excel. E-Grades is very particular about which columns must be copied over and in what order.
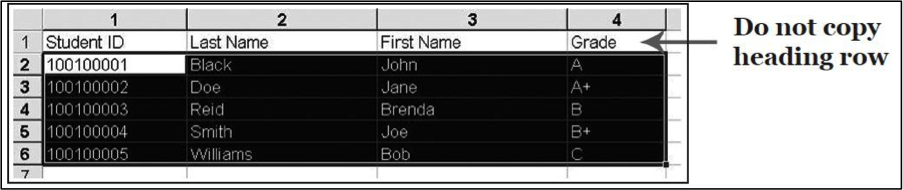
Any other columns in the Excel file must be deleted or moved. Only copy the following columns in this order: Org Defined ID, Last Name, First Name, and the letter grade column. (Do not copy the headings.) Any other columns in the Excel file must be deleted or moved.
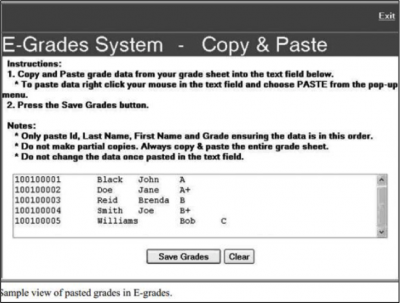
- In E-Grades, place your cursor in the large white text field. Right click and select “Paste”. The data from the columns in Excel will appear.
- Remember to save the grades by selecting the “Save Grades” button. You will be able to review the grades that have been saved in E-Grades by selecting Exit in the top right part of the window. You will be returned to the Roster and Grade Submission Menu.
- Select “Refresh Page” to review your grades. Only select “Submit Grades for Approval” when you are satisfied with your grades in E-Grades.
Students will see their final grades in Carleton Central after approval and a processing period.
Was this page helpful?
26 people found this useful
Still need help? Contact us