HTML templates can be used to create engaging and interactive content layouts within a D2L Brightspace course. Templates include both text layout pages, such as introduction and conclusion layouts, and dynamic pages with interactive elements, such as accordions and tabs. You can view examples of HTML templates in the Brightspace Tools Course (self-enroll through this link) under the HTML Content Pages module. HTML Templates are powerful, but can be tricky to setup and configure. You must create your HTML Templates carefully to ensure that the page elements do not break. Heed the warnings on the page below, and reach out to TLS Support if you have questions or need assistance.
What are the benefits of using HTML templates?
Templates improve the look and feel of courses, and can help you organize your content more meaningfully by adding page elements. HTML templates are designed to meet Universal Design for Learning and Accessibility standards (WCAG). Templates include formatting styles, such as heading levels and paragraphs, that help create content that is accessible for assistive technologies.
WARNINGS:
- Applying a template to an existing page will overwrite the content and you will lose your work. We recommend selecting and applying the HTML template before adding content (images, videos, etc.) to the Brightspace editor.
- Most HTML Templates will not require you to make any changes to the HTML code. We do not recommend editing the original templates as this can break the HTML code.
Important Processes for Using HTML Templates
When building HTML pages, you will need to follow a specific workflow to ensure the elements in the template won’t break. Follow this process as you build your templates:
- Bring your images and documents to the Manage Files tool in Brightspace first. See the support page on Uploading a File to Manage Files.
- Re-name your files meaningfully to ensure you know what that image or document is about. This will make the process easier for you when embedding these elements on your web pages.
- Create folders in the Manage File section that correspond to the elements you are bringing in. For example: Create a main folder called Module 1 and inside that folder create sub-folders called Module 1 Images, Module 1 Documents, and then insert all the images and documents in their specific folders. This will help you get organized and locate the items you need faster once you are creating your pages.
- Once all your documents and images are named and placed in the proper folders, then you can proceed to the creation of the webpages.
- You might also want to add a sub-folder in each module in the Manage File section called Html Pages. Once you create your webpages, you can change the new path to those pages in that folder. This way all your webpages will be located in a specific folder allotted to them.
WARNING: Be careful with content in the Manage Files area of Brightspace. Do not re-name the images and documents you place inside the folders, and do not re-name the folders, nor move items from a folder to another folder after you have created the webpages. Doing so is likely to break the elements you have on your webpages.
Related Instructional Design Resources
Creating HTML Templates
To use and edit HTML templates, you first need to create a file in the course module you wish to add the template.
WARNING: Brightspace loads all videos to an HTML page even if they are “hidden” in accordions or tabs. We recommend only uploading 4-5 videos per webpage to minimize page loading time.
- Log into Brightspace with your MyCarletonOne credentials.
- On the Brightspace homepage, locate your course in one of the following ways:
-
- Select the course tile under the My Courses widget.
- Select the Course Selector Grid
 and select the course from the drop-down menu. If you are enrolled in more than 20 courses, you can search for the course name using the search bar.
-
- In the navbar, select Content.

- Under Table of Contents in the left sidebar, select the module or submodule where you would like the HTML Template to be located.
TIP: When beginning to build your course, it is considered best practice to create a hidden module that houses every content template, so you can use this as a reference. For instructions on how to add or edit a course module, see Adding Modules or Sub-Modules.
- Select Upload/Create.
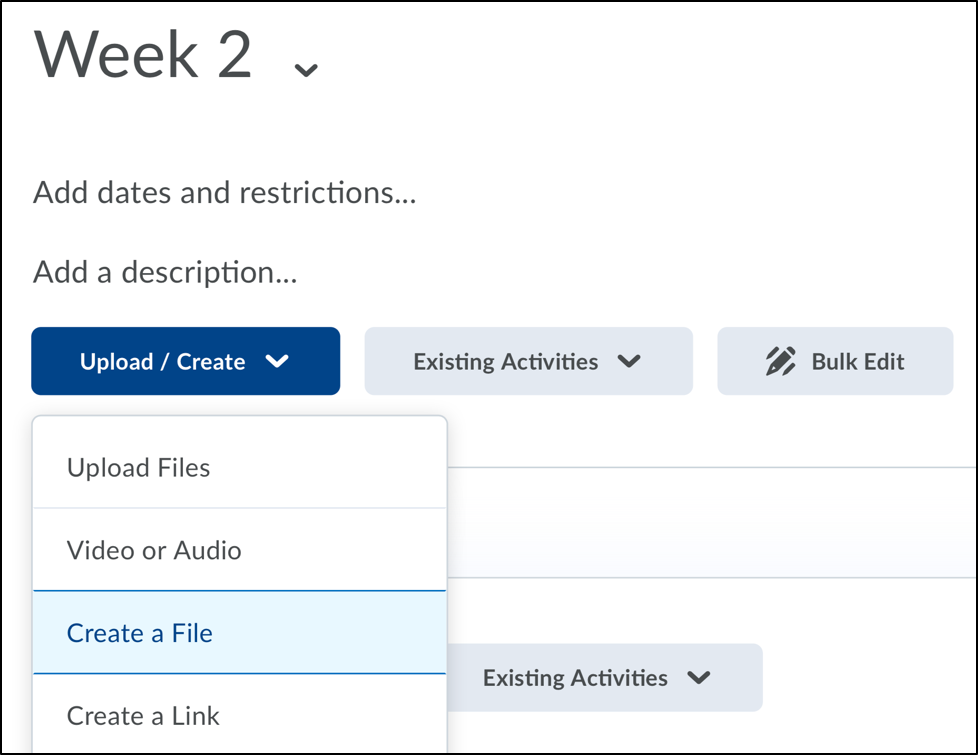
- In the drop-down menu, select Create a File.
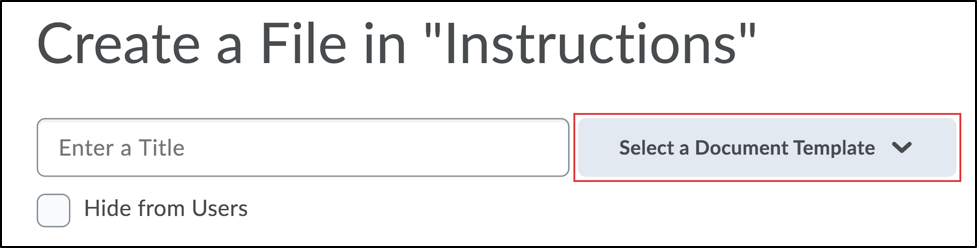
- Enter a Title.
- Select the Select a Document Template button to view the available template options.
NOTE: Each template offers instructions on how to customize its contents to fit your content.
TIP: Replace the default images in the templates to make the visuals more meaningful to your learners and course content.
- In the drop-down menu, select a template you want to apply to the file. Template options include:
- intro: This template features a full-screen image for visual impact and a clean area for a course description.
NOTE: the images on a template can be replaced by any images of your preference.
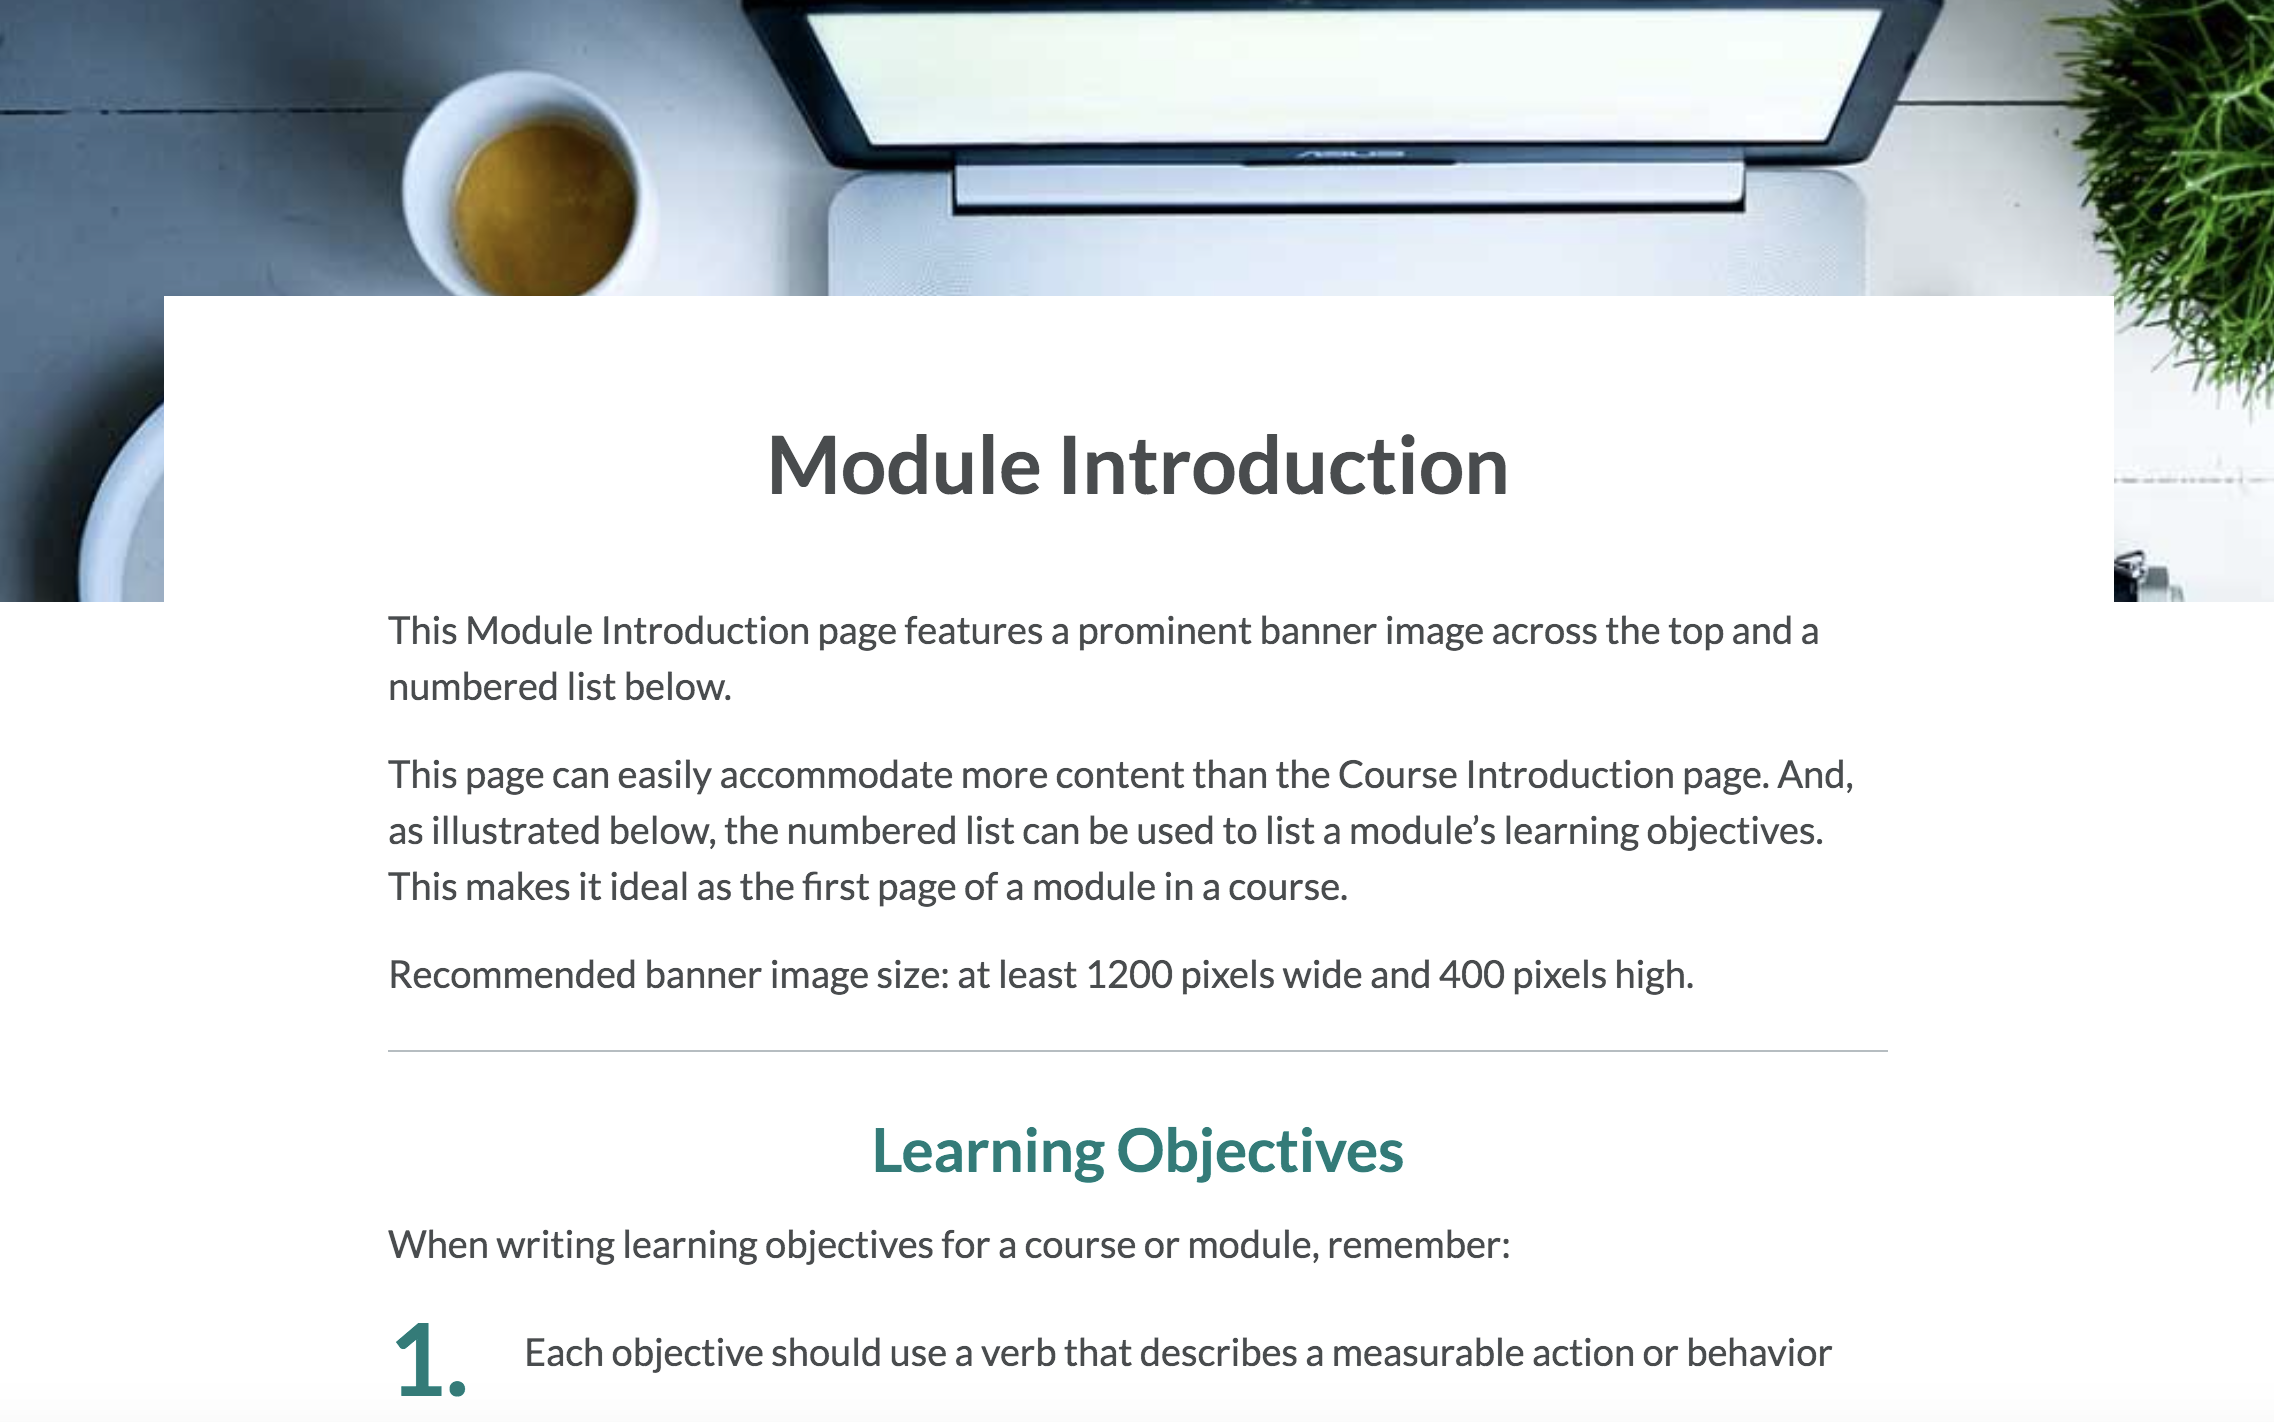
- module_intro: This template features a prominent banner image across the top and a numbered list could be used to list a module’s learning objectives. This makes it ideal as the first page of a module in a course.
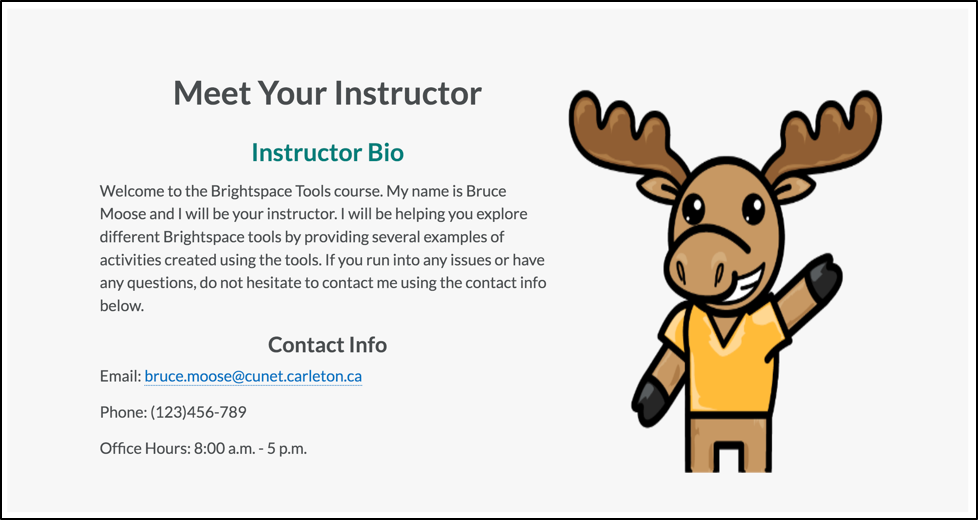
- meet_your_facilitator: This template can serve as a dedicated space to present facilitator’s expertise, experience and personality.
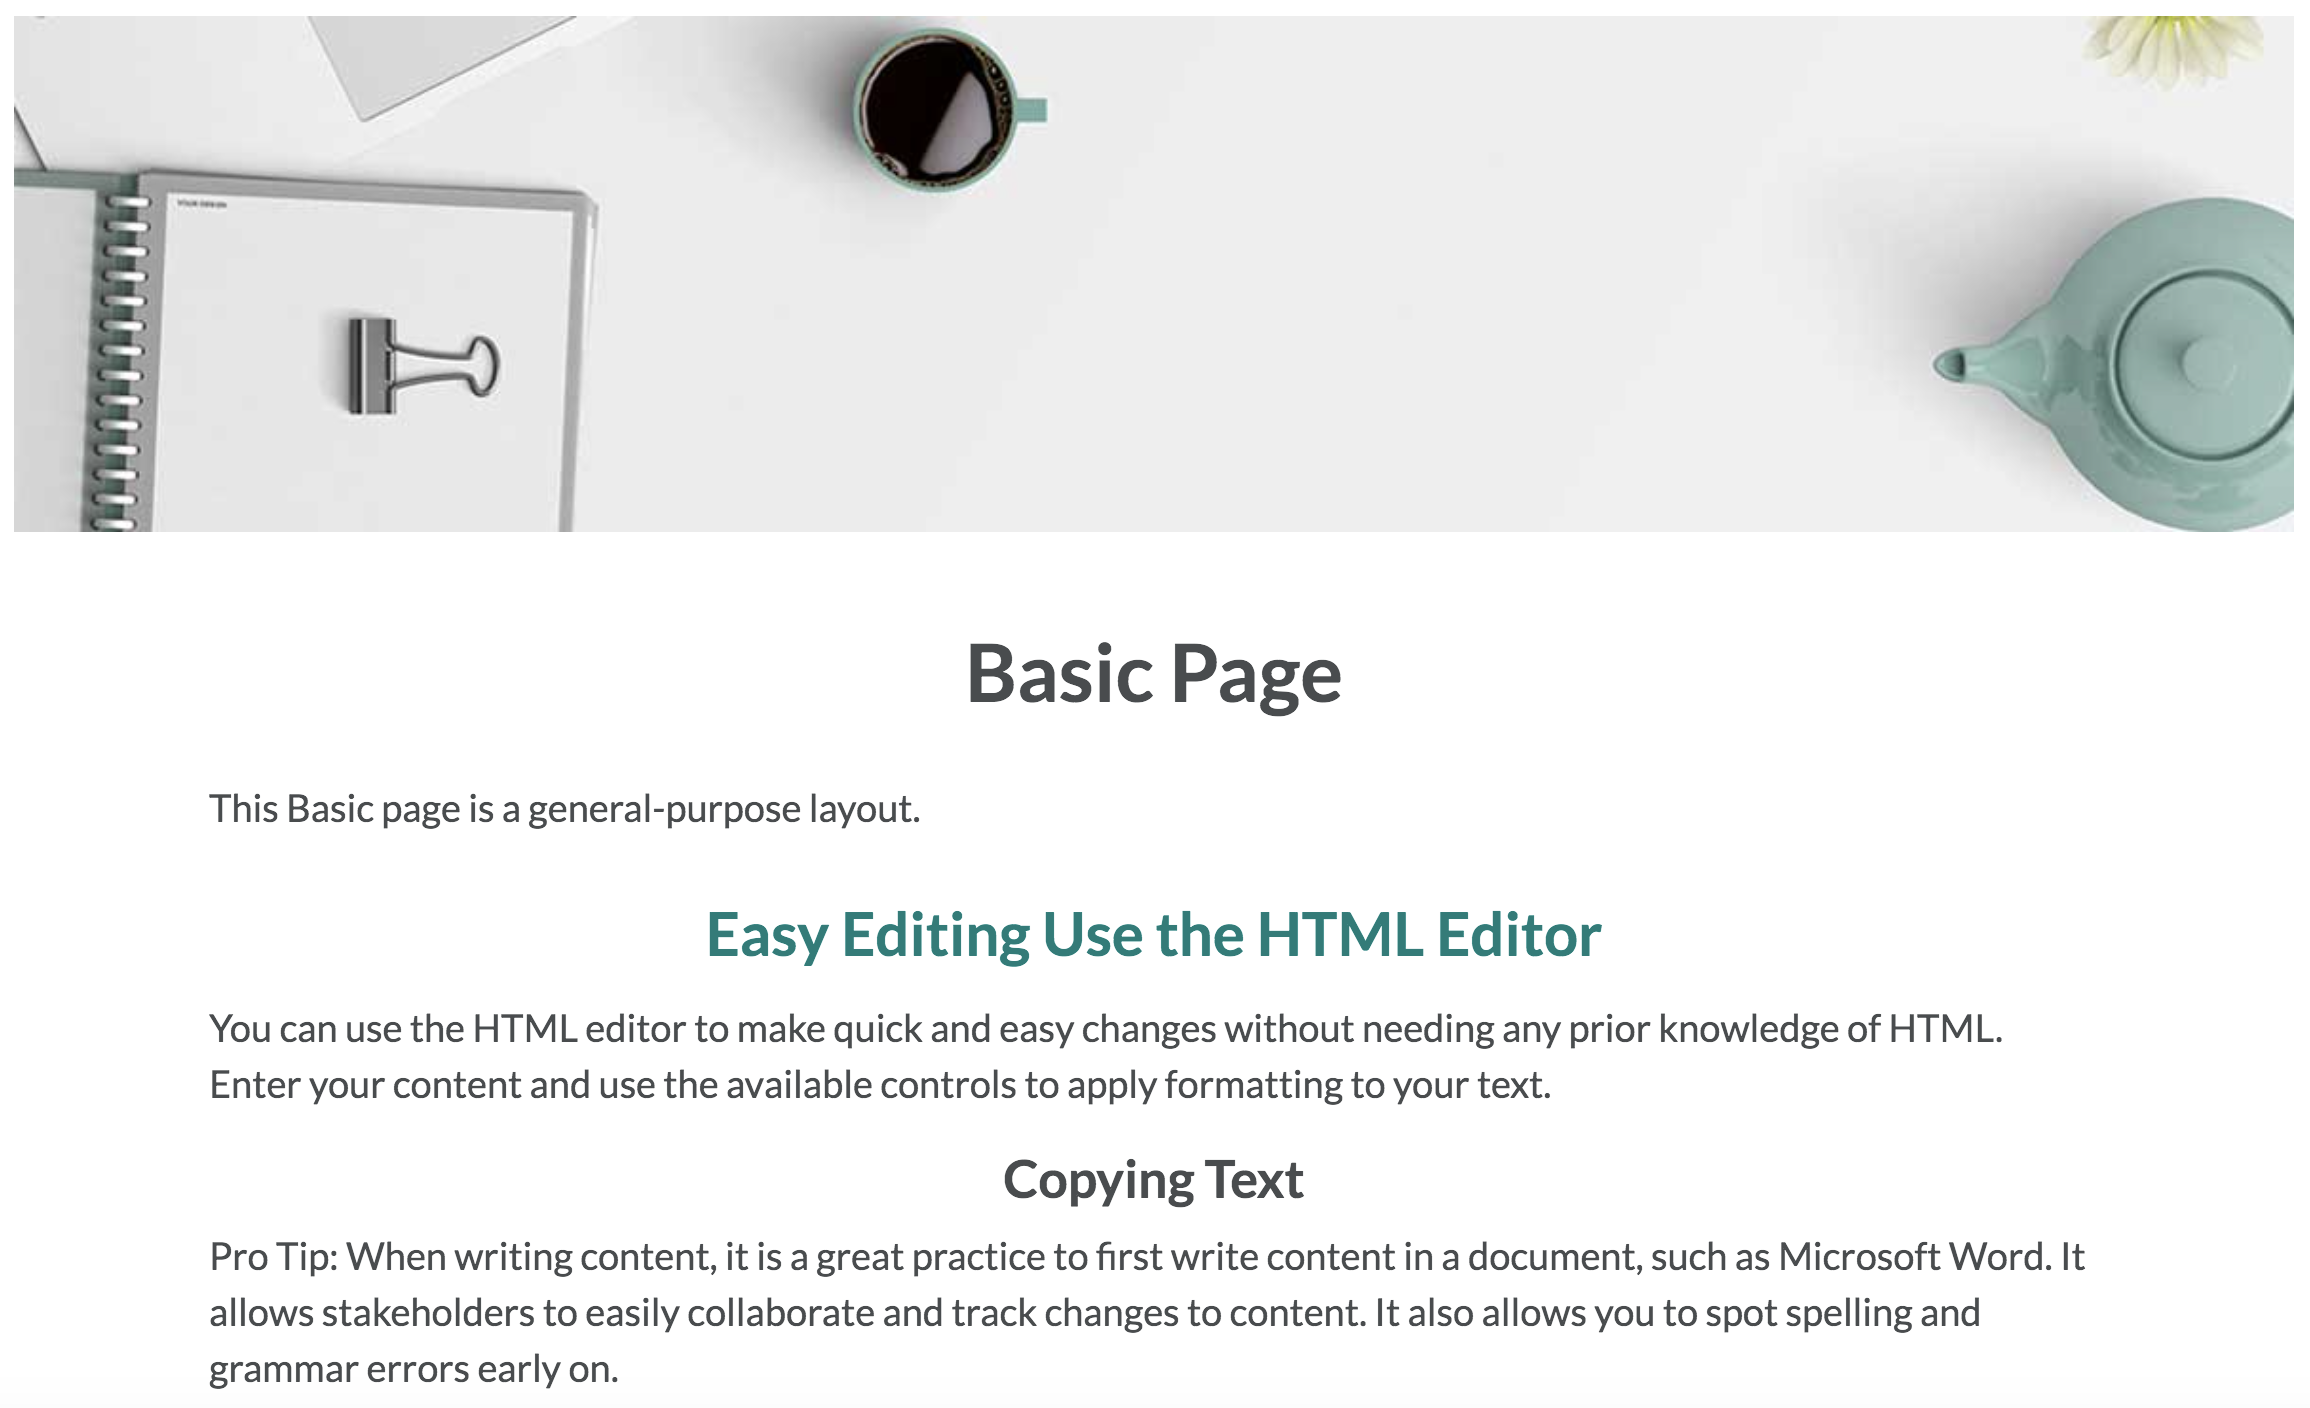
- basicpage: This template offers a general-purpose layout.
- elements: This template includes samples of some commonly used page elements which you can copy to other pages.
- images: This template illustrates the different ways images can be used. If you wish to have images on your page, select this template and customize it using your own images.
- video_lecture: This template is a great way to present video content, while accompanying it with supporting context, explanations and activities.
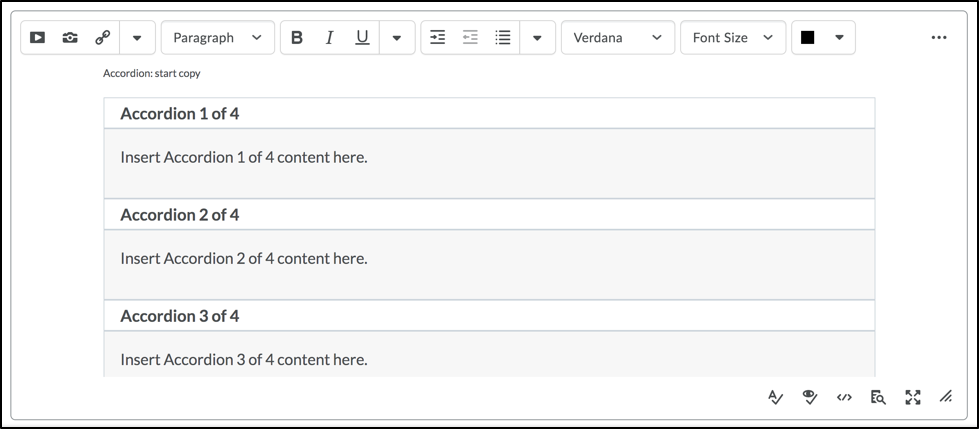
- accordions: This template allows you insert information within collapsible topics, which are very useful when you need to add a lot of information.
- conclusion: This template makes an excellent page to conclude each module and prepare students to what comes next.
- tabs: This template allows you to display your content in a tab format, which is useful for elaborating on an idea that has set structures or categories of sub-information.
- intro: This template features a full-screen image for visual impact and a clean area for a course description.
- Once you select the template, start editing and customizing it in the HTML Editor (see example below). For instructions on how to upload or format content in the HTML editor, see Using the HTML Editor.
TIP: To view how the template will appear to students, select the Preview icon

- When you finish editing. Select Save and Close.
Watch the video tutorial below for an overview of using HTML Templates in Brightspace:
Was this page helpful?
10 people found this useful
Still need help? Contact us